
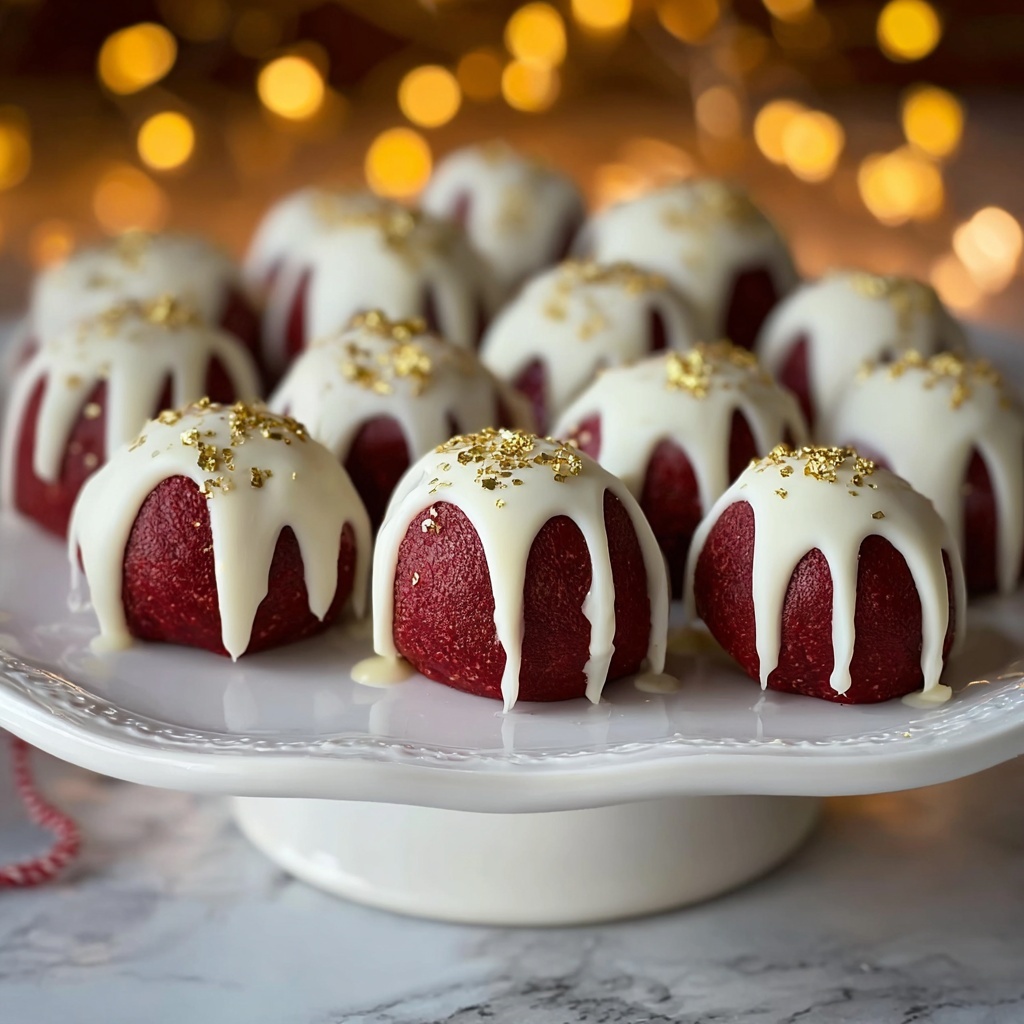
If you’re on the hunt for a delightful treat that’s both charming and utterly delicious, this Red Velvet Cake Balls Recipe is bound to become your new obsession. Imagine all the moist, tender goodness of classic red velvet cake captured in bite-sized, perfectly coated spheres of sweet bliss. They’re easy to make, wonderfully rich with a hint of cream cheese tang, and covered in decadent white chocolate for that irresistible finishing touch. Whether for a festive gathering, a cozy night in, or just because you deserve a little indulgence, these cake balls are pure joy in every bite.
Ingredients You’ll Need
The magic of this recipe lies in its simple, straightforward ingredients. Each one plays a crucial role—from the moist cake base to the creamy filling and the crisp chocolate shell—creating a perfect balance of flavors and textures that make these Red Velvet Cake Balls Recipe so special.
- Red velvet cake mix: The foundation of your cake balls, bringing that iconic red color and subtle cocoa flavor.
- Buttermilk: Adds moisture and a slight tang that enhances the cake’s tenderness.
- Vegetable oil: Keeps the cake moist and tender without overpowering the flavor.
- Eggs: Bind everything together and give structure to the cake.
- Vanilla extract: Brings warmth and depth to both the cake and cream cheese mixture.
- Cream cheese (softened): Adds rich creaminess and tang that defines the luscious filling.
- Powdered sugar: Sweetens and smooths the cream cheese filling for perfect balance.
- White chocolate (melted): The sweet, smooth coating that gives these cake balls a polished, tempting finish.
How to Make Red Velvet Cake Balls Recipe
Step 1: Bake the Red Velvet Cake
Start by preheating your oven to 350°F (175°C). Prepare the red velvet cake batter according to the package instructions, but here’s a tip—adding buttermilk, oil, eggs, and vanilla extract makes your cake extra moist and flavorful. Once mixed, bake the cake as directed, then let it cool completely. Cooling is key because warm cake can get messy when you’re forming your balls.
Step 2: Crumble the Cake
Once your cake is completely cooled, crumble it into a large bowl using your hands or a fork. It should break into fine crumbs that will mix well with the creamy filling, setting the perfect foundation for the cake balls.
Step 3: Prepare the Cream Cheese Filling
In a separate bowl, combine the softened cream cheese with vanilla extract and powdered sugar. Beat until you get a smooth, luscious mixture that will bind the crumbs together with a sweet and tangy punch—this is the heart of your Red Velvet Cake Balls Recipe.
Step 4: Mix Cake and Filling
Add the cream cheese mixture to the crumbled cake and stir everything together gently but thoroughly. Your goal is a uniform, sticky dough that you can easily roll into balls without crumbling apart.
Step 5: Form and Chill the Cake Balls
Using your hands, roll the mixture into small, bite-sized balls and place them evenly spaced on a baking sheet or tray. Then pop them into the refrigerator for at least an hour. Chilling helps the balls firm up so they hold their shape when dipped in chocolate.
Step 6: Coat with White Chocolate
After chilling, melt the white chocolate until smooth and glossy. Dip each cake ball carefully into the melted chocolate, fully coating each one. Place them on parchment paper to set. Once the chocolate hardens, these beauties are ready to enjoy!
How to Serve Red Velvet Cake Balls Recipe
Garnishes
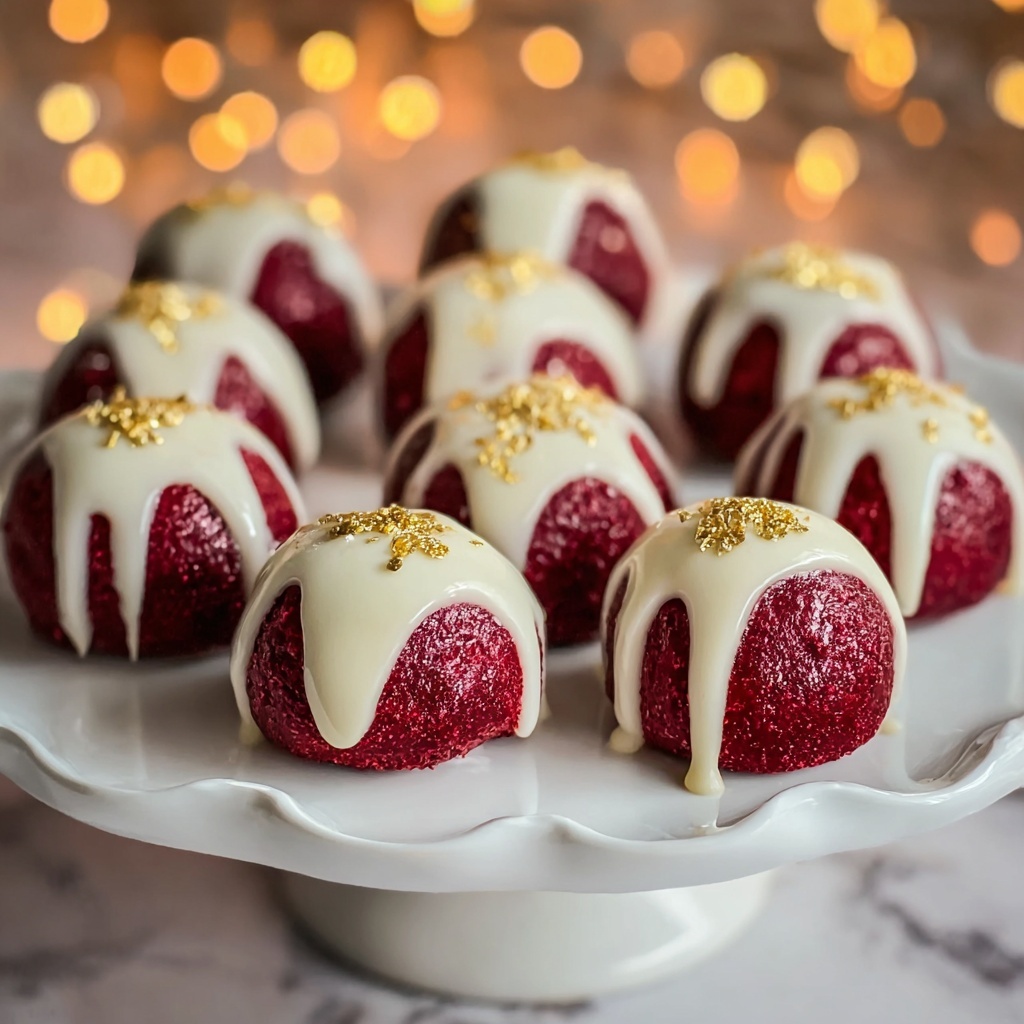
Add an extra flourish by sprinkling some crushed red velvet cake crumbs, edible glitter, or freeze-dried raspberries over the chocolate coating before it sets. These little touches not only amp up the visual appeal but also add a delightful textural contrast that guests will love.
Side Dishes
While Red Velvet Cake Balls are delightful on their own, pairing them with a cup of rich coffee, creamy hot chocolate, or a light fruit sorbet can elevate their indulgence. Consider accompanying these bite-sized treats with fresh berries for a refreshing twist.
Creative Ways to Present
Present your cake balls on a whimsical cake pop stand or arrange them in decorative cupcake liners for easy serving. You can also thread them delicately on skewers as edible kebabs for a fun party presentation that’s sure to impress both kids and adults alike.
Make Ahead and Storage
Storing Leftovers
If you end up with leftovers (which might be hard!), store your Red Velvet Cake Balls in an airtight container in the refrigerator. They’ll stay fresh and delicious for up to 5 days, so you can enjoy their decadent charm a little longer without worrying about spoilage.
Freezing
Want to make these in advance? Freeze the cake balls in a single layer on a baking sheet until solid, then transfer to a freezer-safe container. They can be stored frozen for up to 2 months. When ready to enjoy, just thaw them overnight in the fridge.
Reheating
Since these are best enjoyed cool or at room temperature, reheating is generally not recommended. However, if you prefer them softer, let them sit for 10-15 minutes at room temperature after removing from the fridge before serving.
FAQs
Can I use homemade red velvet cake instead of the box mix?
Absolutely! Using homemade red velvet cake will add a personal touch and unique flavor, but the box mix works perfectly for a hassle-free experience. Just ensure your cake is fully cooled before proceeding.
What can I substitute for white chocolate if I don’t have any?
You can use milk or dark chocolate as a coating instead, depending on your taste preference. Just melt it gently and coat the cake balls just as you would with white chocolate.
How do I prevent the cake balls from falling apart?
Make sure your cake is completely cooled before crumbling and that your cream cheese mixture is well combined and sticky. Also, chilling the cake balls before dipping helps maintain their shape.
Can I make these cake balls nut-free?
Yes! This recipe is naturally nut-free as long as you choose a red velvet cake mix and chocolate that do not contain nuts or have not been processed in facilities with nuts. Always check packaging to be sure.
How long do Red Velvet Cake Balls last at room temperature?
Because of the cream cheese filling, it’s best to keep these cake balls refrigerated and enjoy them within a few hours when left out to avoid spoilage.
Final Thoughts
This Red Velvet Cake Balls Recipe is more than just a dessert; it’s a delightful little moment of joy that you can easily make at home. It’s perfect for sharing with family, impressing friends, or even just treating yourself. Once you try these, you’ll understand why they’re so often requested again and again. So why wait? Gather your ingredients and start creating your own batch of these scrumptious Red Velvet Cake Balls today!
Print
Red Velvet Cake Balls Recipe
- Prep Time: 20 minutes
- Cook Time: 30 minutes
- Total Time: 1 hour 20 minutes
- Yield: 24 servings
- Category: Dessert
- Method: Baking
- Cuisine: American
Description
Deliciously moist and creamy Red Velvet Cake Balls coated in smooth white chocolate, these bite-sized treats combine classic red velvet cake flavors with a luscious cream cheese filling, perfect for parties or dessert tables.
Ingredients
Cake
- 1 box red velvet cake mix
- 1 cup buttermilk
- 1/2 cup vegetable oil
- 3 large eggs
- 1 teaspoon vanilla extract
Cream Cheese Filling
- 8 oz cream cheese, softened
- 1 teaspoon vanilla extract
- 1 cup powdered sugar
Coating
- 12 oz white chocolate, melted
Instructions
- Preheat Oven: Preheat your oven to 350°F (175°C) to prepare for baking the cake.
- Prepare Cake Batter: Mix the red velvet cake mix with buttermilk, vegetable oil, eggs, and vanilla extract according to the package directions to create a smooth batter.
- Bake the Cake: Pour the batter into a baking pan and bake as directed on the cake mix box. Once baked, remove from oven and allow the cake to cool completely to room temperature.
- Crumble Cooled Cake: Break the cooled cake into small crumbs by hand into a large mixing bowl, preparing for blending with the filling.
- Make Cream Cheese Mixture: In a separate bowl, beat together softened cream cheese, vanilla extract, and powdered sugar until the mixture is smooth and creamy.
- Combine Cake and Filling: Add the cream cheese mixture to the crumbled cake and stir until thoroughly combined, forming a uniform dough-like consistency.
- Form Cake Balls: Shape the mixture into small, bite-sized balls and arrange them on a baking sheet lined with parchment paper.
- Chill the Cake Balls: Place the cake balls in the refrigerator for at least 1 hour to firm up, ensuring they hold their shape during coating.
- Dip in White Chocolate: Using a fork or dipping tool, coat each chilled cake ball thoroughly in melted white chocolate, then return them to the parchment paper-lined baking sheet.
- Set the Coating: Allow the chocolate coating to harden at room temperature or in the refrigerator before serving.
Notes
- Ensure the cake is completely cooled before crumbling to avoid a soggy mixture.
- Use room temperature cream cheese for easier mixing and smoother filling.
- Chilling the cake balls helps them maintain their shape when dipping in chocolate.
- Store cake balls in an airtight container in the refrigerator for up to 5 days.
- You can use candy melts instead of white chocolate for easier coating and different color options.
