
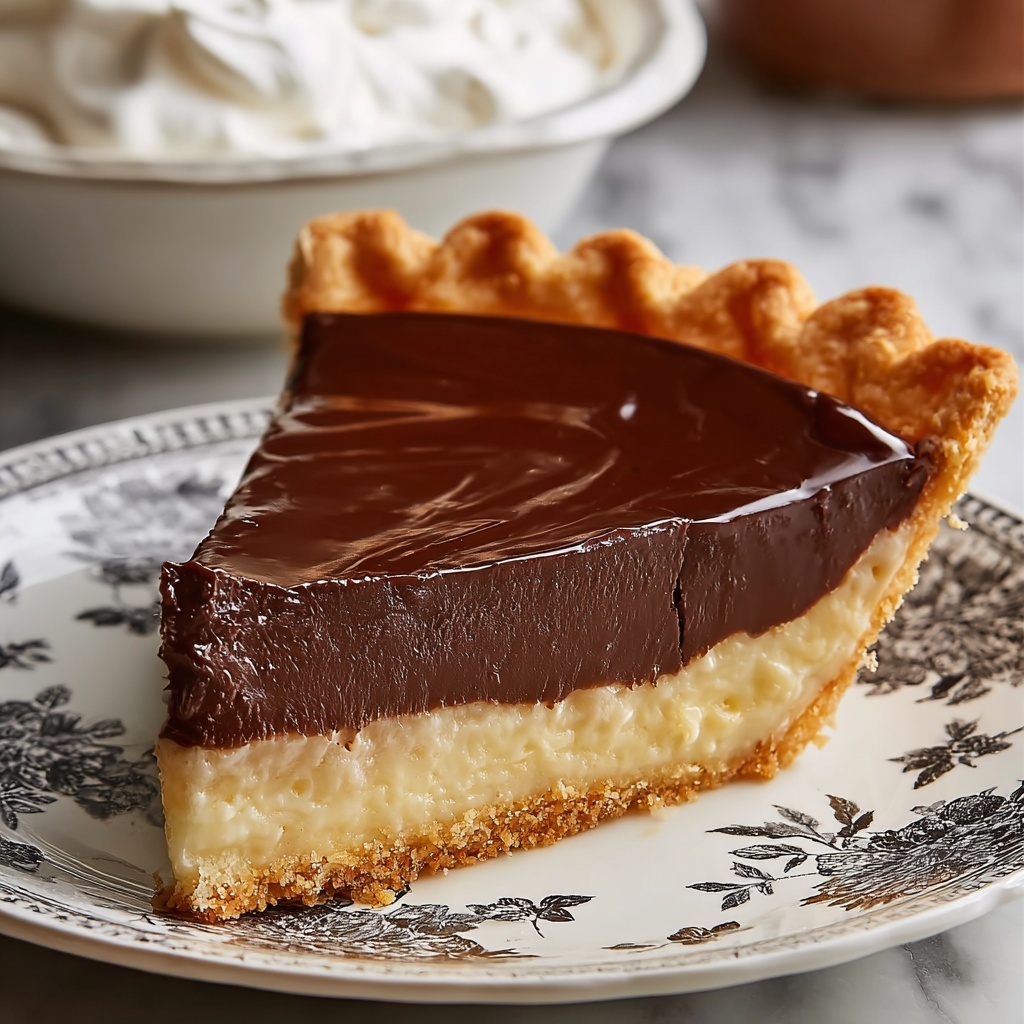
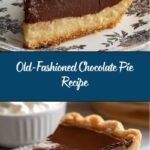
If you’ve ever found yourself dreaming of a dessert that’s classic, comforting, and rich with nostalgia, then this Old-Fashioned Chocolate Pie Recipe is about to become your new favorite indulgence. With its silky smooth chocolate filling nestled in a buttery crust, this pie brings together simple ingredients in a way that feels like a warm hug from Grandma’s kitchen. Every bite offers that perfect balance of creamy decadence and just the right hint of cocoa, proving that some recipes never go out of style.
Ingredients You’ll Need
Crafting this Old-Fashioned Chocolate Pie Recipe is a joy thanks to its straightforward ingredients, each playing a crucial role in creating that luscious texture and deep chocolate flavor. From the richness of whole milk to the subtle thickening power of cornstarch, these pantry staples come together beautifully to define this pie’s classic character.
- Prepared pie crust: Whether store-bought or homemade, a flaky crust is the foundation for a perfect pie.
- Granulated sugar (1 1/4 cups): Adds the ideal sweetness to balance the cocoa’s natural bitterness.
- Unsweetened cocoa powder (1/4 cup): The heart of the chocolate flavor, bringing depth without overpowering.
- Salt (1/4 teaspoon): Enhances every other ingredient’s flavor and tames any bitterness.
- Whole milk (2 1/2 cups): Makes the filling rich and creamy with a luscious mouthfeel.
- Egg yolks (3 large): Adds richness and helps thicken the filling for that custardy texture.
- Cornstarch (2 tablespoons): The secret thickener that turns the filling silky and stable.
- Unsalted butter (2 tablespoons): Adds a velvety finish and glossy shine to the pie’s surface.
- Vanilla extract (1 teaspoon): Brings warmth and complexity to the chocolate filling.
- Whipped cream (optional): A light, airy topping that crowns the pie with a cloud-like contrast.
How to Make Old-Fashioned Chocolate Pie Recipe
Step 1: Prepare the Pie Crust
Start by preheating your oven to 350°F (175°C). If you’re using a homemade crust, bake it until it’s golden brown and set it aside to cool fully. This ensures a crisp base that won’t get soggy once the filling is added.
Step 2: Mix Dry Ingredients
In a medium saucepan, whisk together the granulated sugar, unsweetened cocoa powder, and salt. This combination ensures every bite has a consistent chocolate flavor with just the right sweetness and balance.
Step 3: Add the Milk
Gradually pour the whole milk into your dry ingredients, whisking constantly to avoid lumps. This step creates a smooth base that will turn into the velvety filling we all crave.
Step 4: Prepare the Egg Mixture
In a separate bowl, whisk the egg yolks with cornstarch until smooth. This mixture is crucial since it thickens the pie filling perfectly without curdling or becoming too stiff.
Step 5: Combine and Cook
Slowly pour the egg yolk mixture into the milk and cocoa pan, stirring constantly over medium heat. Keep stirring until the filling thickens and comes to a boil, which usually takes about 8 to 10 minutes. Patience here pays off with that luscious silky custard texture.
Step 6: Finish the Filling
Remove the saucepan from heat and stir in the unsalted butter and vanilla extract until everything is beautifully smooth and glossy. This final touch enriches the pie filling, giving it a decadent finish.
Step 7: Assemble the Pie
Pour the chocolate filling into the cooled pie crust, smoothing out the top with a spatula. Then, let the pie come to room temperature before refrigerating it for at least 3 hours or better yet, overnight, to fully set the filling.
How to Serve Old-Fashioned Chocolate Pie Recipe

Garnishes
While this pie is stunning on its own, topping it with a generous swirl of freshly whipped cream adds a delightful lightness that contrasts beautifully with the rich filling. You could also sprinkle a little grated chocolate or a dash of cocoa powder on top for an elegant presentation.
Side Dishes
Serve the pie alongside fresh berries like raspberries or strawberries to add a refreshing tartness that cuts through the richness. A scoop of vanilla ice cream also pairs wonderfully, making each bite feel even more indulgent.
Creative Ways to Present
For gatherings, slice the pie into generous wedges and place each on a pretty dessert plate with a drizzle of raspberry or caramel sauce. You might even sprinkle chopped toasted nuts over the whipped cream for added texture and a nutty flavor twist.
Make Ahead and Storage
Storing Leftovers
This Old-Fashioned Chocolate Pie Recipe keeps beautifully covered in the refrigerator for up to 3 days. Just make sure it’s tightly wrapped or stored in an airtight container to preserve its creamy texture and prevent it from absorbing other fridge odors.
Freezing
While freezing the pie is possible, it’s best to freeze only the baked crust separately if you plan ahead. The chocolate filling’s custard texture might change after thawing, becoming slightly grainy. If you must freeze the whole pie, wrap it tightly and thaw overnight in the fridge for best results.
Reheating
Since this pie is served chilled, reheating is typically not recommended. However, if you prefer a slightly softer filling, let it sit at room temperature for a short while before serving to bring out the flavors without losing that classic custard texture.
FAQs
Can I use a store-bought pie crust for this Old-Fashioned Chocolate Pie Recipe?
Absolutely! A high-quality store-bought crust works wonderfully, especially if you’re short on time. Just bake it according to the package instructions before adding the filling.
What can I substitute for cornstarch in this recipe?
If you don’t have cornstarch, you can use an equal amount of all-purpose flour, though the texture may be slightly less silky. Tapioca starch is another good alternative if available.
Can I make this pie dairy-free?
You can substitute whole milk with your favorite plant-based milk, like oat or almond milk. Keep in mind it might slightly alter the creaminess, and using a non-dairy butter will help maintain the richness.
How long should I refrigerate the pie before serving?
For the best texture and flavor, chilling the pie for at least 3 hours is essential, but overnight chilling is ideal for allowing the filling to fully set and intensify in flavor.
Is the whipped cream topping necessary?
Not at all! The filling itself is decadent enough to stand alone, but whipped cream adds a lovely lightness and a pretty presentation if you want that extra touch.
Final Thoughts
There’s something magical about an Old-Fashioned Chocolate Pie Recipe that transports you to simpler times and memories warmed by homemade sweets. It’s a dessert that’s easy to make, deeply satisfying, and perfect for any occasion. Give it a try—you might just find yourself making it again and again, sharing a slice of happiness with everyone at your table.
Print
Old-Fashioned Chocolate Pie Recipe
- Prep Time: 20 minutes
- Cook Time: 15 minutes
- Total Time: 3 hours 35 minutes
- Yield: 8 servings
- Category: Dessert
- Method: Stovetop
- Cuisine: American
Description
This Old-Fashioned Chocolate Pie is a classic dessert featuring a rich, creamy chocolate filling nestled in a flaky pie crust. The silky custard-like chocolate filling is cooked on the stovetop and thickened with egg yolks and cornstarch, delivering a nostalgic and satisfying treat perfect for any occasion.
Ingredients
Pie Crust
- 1 prepared pie crust (store-bought or homemade)
Filling
- 1 1/4 cups granulated sugar
- 1/4 cup unsweetened cocoa powder
- 1/4 teaspoon salt
- 2 1/2 cups whole milk
- 3 large egg yolks
- 2 tablespoons cornstarch
- 2 tablespoons unsalted butter
- 1 teaspoon vanilla extract
Topping (Optional)
- Whipped cream for topping
Instructions
- Preheat Oven and Prepare Crust: Preheat your oven to 350°F (175°C). If you are using a homemade pie crust, bake it until it turns golden brown and set it aside to cool completely before adding the filling.
- Mix Dry Ingredients: In a medium saucepan, whisk together the granulated sugar, unsweetened cocoa powder, and salt to create an even mixture.
- Add Milk: Gradually whisk the whole milk into the dry ingredients in the saucepan, making sure to stir constantly to prevent lumps from forming and ensure a smooth base.
- Prepare Egg Mixture: In a separate bowl, whisk the egg yolks and cornstarch together until smooth and fully combined, which will help thicken the filling.
- Combine Mixtures: Slowly pour the egg yolk mixture into the milk and cocoa mixture in the saucepan while stirring constantly over medium heat. This step prevents the eggs from scrambling and helps the filling thicken evenly.
- Cook Filling: Continue cooking and stirring the mixture on medium heat until it thickens and comes to a boil, which should take about 8 to 10 minutes. This ensures the filling is fully cooked and has the right custard-like consistency.
- Finish Filling: Remove the saucepan from the heat and stir in the unsalted butter and vanilla extract until the filling is smooth and glossy.
- Fill Pie Crust: Pour the hot chocolate filling into the cooled pie crust and smooth out the top evenly with a spatula or spoon.
- Chill the Pie: Allow the pie to cool completely at room temperature, then place it in the refrigerator to chill for at least 3 hours, or preferably overnight, so the filling sets properly.
- Serve: Before serving, optionally top the pie with whipped cream for added richness and decoration.
Notes
- Ensure the pie crust is completely cooled before adding the filling to prevent it from becoming soggy.
- Stir constantly while cooking to avoid lumps and prevent the custard from sticking or burning.
- You can make this pie a day ahead to allow ample chilling time for best texture and flavor.
- For a richer flavor, use high-quality unsweetened cocoa powder and real vanilla extract.
- Leftover pie should be refrigerated and consumed within 3 days.

