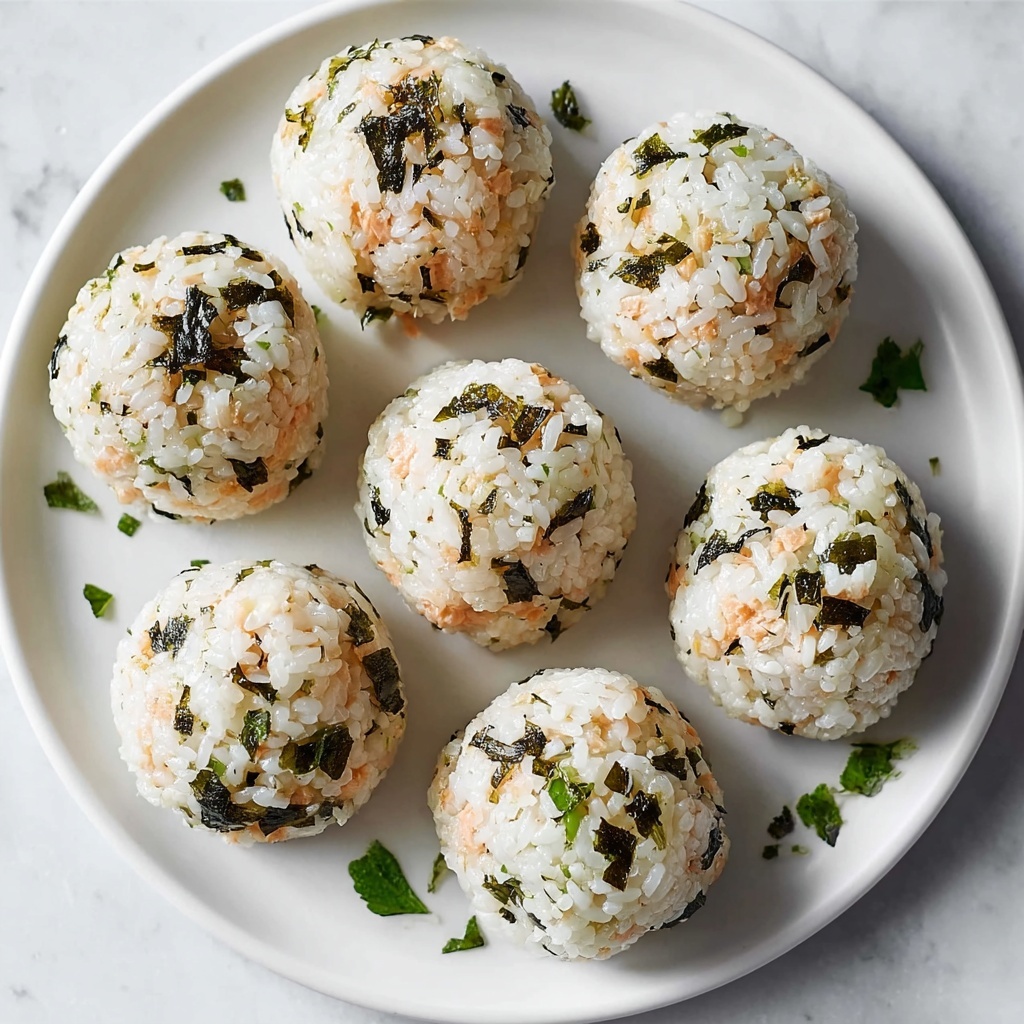
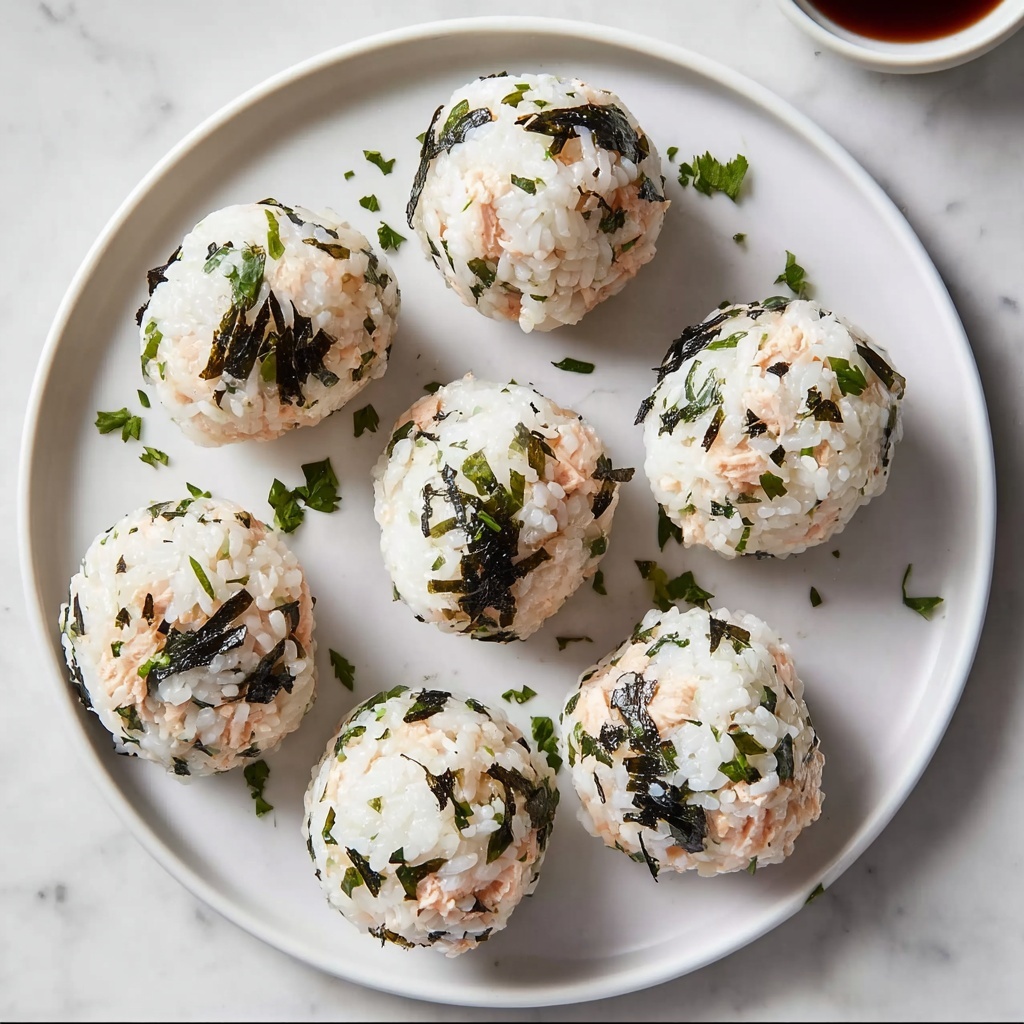
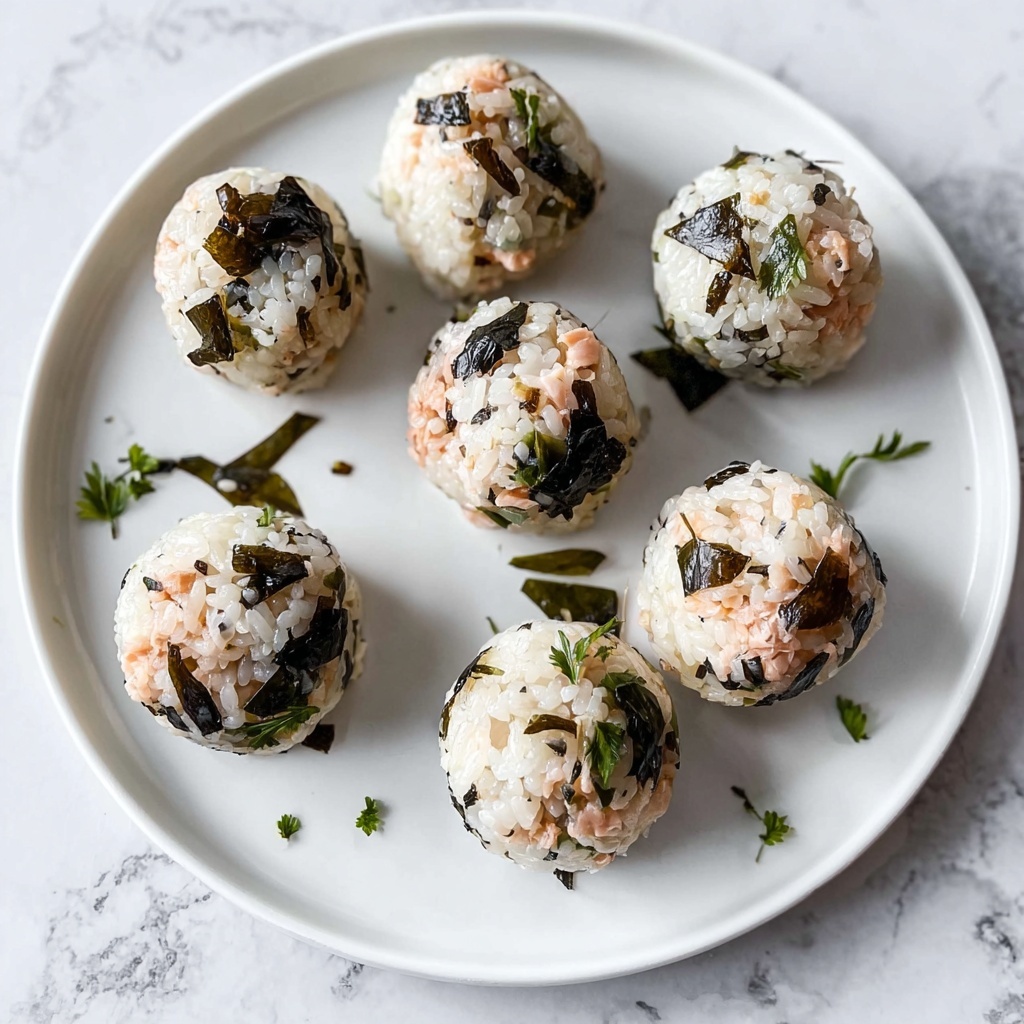
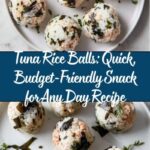
Nothing beats a snack that is both satisfying and simple to whip up, and that’s exactly what the Tuna Rice Balls: Quick, Budget-Friendly Snack for Any Day Recipe delivers. This delightful dish combines fluffy rice with savory tuna, a touch of creamy mayo, and a hint of seaweed, creating a perfect harmony of flavors and textures. Whether you’re rushing out the door or craving a light bite, these rice balls are a comforting treat that fits any occasion with ease and flair.
Ingredients You’ll Need
Each ingredient in this recipe plays a crucial role, bringing together taste, texture, and color to make these tuna rice balls truly memorable. From the tender rice forming the base to the nutty sesame oil adding depth, every element is simple yet essential.
- Prepared rice: Use about 2 cups, and feel free to swap in brown rice or quinoa for extra nutrition and texture contrast.
- Canned tuna: A convenient and flavorful protein, canned tuna keeps this recipe quick and budget-friendly.
- Sesame oil: Just a tablespoon provides a rich, nutty aroma that elevates the overall flavor.
- Mayonnaise: Three tablespoons add creaminess and binding power; Japanese mayo is ideal but plant-based alternatives also work.
- Nori sheets: Two sheets chopped finely bring a lovely ocean breeze taste and a touch of color.
- Rice vinegar: One tablespoon adds the perfect subtle tang to brighten the mix.
- Sugar: A teaspoon or just a pinch balances the acidity cleanly without overpowering.
How to Make Tuna Rice Balls: Quick, Budget-Friendly Snack for Any Day Recipe
Step 1: Combine Your Base Ingredients
Start by placing your prepared rice into a large mixing bowl—the foundation of your snack. Add the canned tuna, sesame oil, mayonnaise, and chopped nori right on top. This is where the magic begins, as these ingredients blend to form a creamy, savory mixture that holds the promise of a delicious bite ahead.
Step 2: Mix Until Well Combined
Using a sturdy spoon or spatula, gently combine all the components until every grain of rice is coated and the tuna is evenly distributed. It’s all about achieving that perfect balance of flavors and a texture that will hold together without falling apart.
Step 3: Adjust Creaminess If Needed
If your mixture feels too dry or crumbly, don’t hesitate to add an extra dollop of mayonnaise. This little addition brings a luscious creaminess that helps the rice balls hold tight while also making each bite melt in your mouth.
Step 4: Form the Shape
Press the mixture into a flat, even layer in the bowl. Then, carefully cut the flattened mixture into eight triangular portions using a spatula. This makes shaping manageable and gives your snack a fun, classic onigiri-inspired look.
Step 5: Roll Into Perfect Balls
Using clean hands or food-safe gloves, scoop up each triangular portion and gently but firmly roll it into a tight ball. The goal is a compact shape that holds together perfectly for easy grabbing and eating on the go.
Step 6: Time to Enjoy or Pack Away
Your Tuna Rice Balls: Quick, Budget-Friendly Snack for Any Day Recipe is ready to be enjoyed right away! If you’re prepping for later, simply pack them into containers for a mess-free, delicious snack anytime.
How to Serve Tuna Rice Balls: Quick, Budget-Friendly Snack for Any Day Recipe
Garnishes
Sprinkle some toasted sesame seeds or finely chopped green onions over each rice ball for an extra pop of flavor and a little crunch. A small dab of spicy mayo or a drizzle of soy sauce adds some exciting dimension as well.
Side Dishes
Pair your rice balls with simple sides like pickled vegetables, edamame pods, or a crisp cucumber salad. These fresh accompaniments provide great contrast to the rich, creamy tuna-packed balls.
Creative Ways to Present
For a fun twist, try wrapping the rice balls with a small strip of nori for a neat, sushi-like appearance. You can also thread a few rice balls on colorful cocktail picks for party platters or bite-sized snacks that everyone will love.
Make Ahead and Storage
Storing Leftovers
If you have any leftovers, store them in an airtight container in the refrigerator. They will keep well for up to two days, maintaining their texture and flavor, perfect for a quick snack or lunch on busy days.
Freezing
You can freeze these rice balls, but note that the texture of the rice might change slightly upon thawing. Wrap each ball tightly in plastic wrap and place them in a freezer-safe container or bag for up to one month.
Reheating
To enjoy thawed rice balls, microwave them gently in short bursts until warm or steam them lightly. This method helps retain moisture and brings back the soft, comforting texture you want in every bite.
FAQs
Can I use different types of rice?
Absolutely! While white rice is classic, brown rice or quinoa are excellent alternatives that add nutrients and unique flavors, making the recipe even more wholesome.
Is there a vegetarian option for the tuna?
Yes, you can swap canned tuna for mashed chickpeas or crumbled firm tofu. Both work wonderfully with the other ingredients, making the rice balls suitable for vegetarian diets.
Can I make these rice balls gluten-free?
Definitely! The basic recipe is naturally gluten-free if you use gluten-free mayonnaise and ensure that any additional soy sauce or seasonings are also gluten-free.
How do I prevent the rice balls from falling apart?
Using the right amount of mayonnaise and rolling the balls tightly with your hands helps the mixture stick together. Slightly warm rice also binds better than cold rice.
Can I add other flavors or ingredients?
Feel free! Adding finely chopped scallions, grated carrots, or a dash of chili flakes can personalize your rice balls with exciting new flavors and textures.
Final Thoughts
Making Tuna Rice Balls: Quick, Budget-Friendly Snack for Any Day Recipe is a joy that you can savor anytime. They’re wonderfully adaptable, easy to prepare, and bring a comforting blend of tastes that never disappoint. I hope you give this recipe a try and find yourself reaching for these tasty little balls whenever hunger strikes. Happy snacking!
Print
Tuna Rice Balls: Quick, Budget-Friendly Snack for Any Day Recipe
- Prep Time: 10 minutes
- Cook Time: 5 minutes (if cooking rice fresh; otherwise 0 if using pre-cooked rice)
- Total Time: 15 minutes
- Yield: 8 servings (8 rice balls)
- Category: Snack
- Method: No-Cook
- Cuisine: Japanese-inspired
Description
These Tuna Rice Balls are a quick and budget-friendly snack perfect for any day. Combining prepared rice with canned tuna, sesame oil, mayonnaise, and nori, they offer a deliciously creamy, nutty, and savory flavor profile. Easy to make in just 15 minutes, these bite-sized balls can be enjoyed immediately or packed for on-the-go snacking, making them ideal for lunchboxes or a light meal.
Ingredients
Base Ingredients
- 2 cups Prepared rice (Brown rice or quinoa can be used for added nutrition)
- 1 can Canned tuna
Flavorings and Add-ins
- 1 tablespoon Sesame oil (infuses a rich, nutty flavor)
- 3 tablespoons Mayonnaise (Japanese mayo preferred; plant-based mayo for vegan option)
- 2 sheets Nori (seaweed), chopped into small pieces
- 1 tablespoon Rice vinegar (adjust to taste)
- 1 teaspoon Sugar (to balance acidity)
Instructions
- Combine Ingredients: In a large bowl, mix together the prepared rice, sesame oil, mayonnaise, canned tuna, and chopped nori. Stir until all ingredients are evenly incorporated, ensuring a well-combined mixture.
- Adjust Creaminess: If the mixture feels too dry or crumbly, add an extra dollop of mayonnaise to achieve the desired creamy texture.
- Shape Mixture: Gently press the rice mixture down flat in the bowl to compact it slightly.
- Portion: Using a spatula, carefully cut the pressed mixture into 8 equal triangular portions.
- Form Rice Balls: Scoop each portion and roll tightly using clean hands or gloves to form compact, firm rice balls.
- Serve or Store: Enjoy the rice balls immediately for best texture or pack them away for a convenient snack later.
Notes
- For a vegetarian alternative, substitute canned tuna with mashed chickpeas or crumbled firm tofu.
- Japanese mayonnaise adds authentic flavor, but plant-based mayo can be used for vegan diets.
- Brown rice or quinoa can be used instead of white rice for added nutrition and fiber.
- Adjust rice vinegar and sugar amounts to balance the flavor according to personal taste.
- Rice balls are perfect for quick snacks, lunchboxes, or picnic finger food.