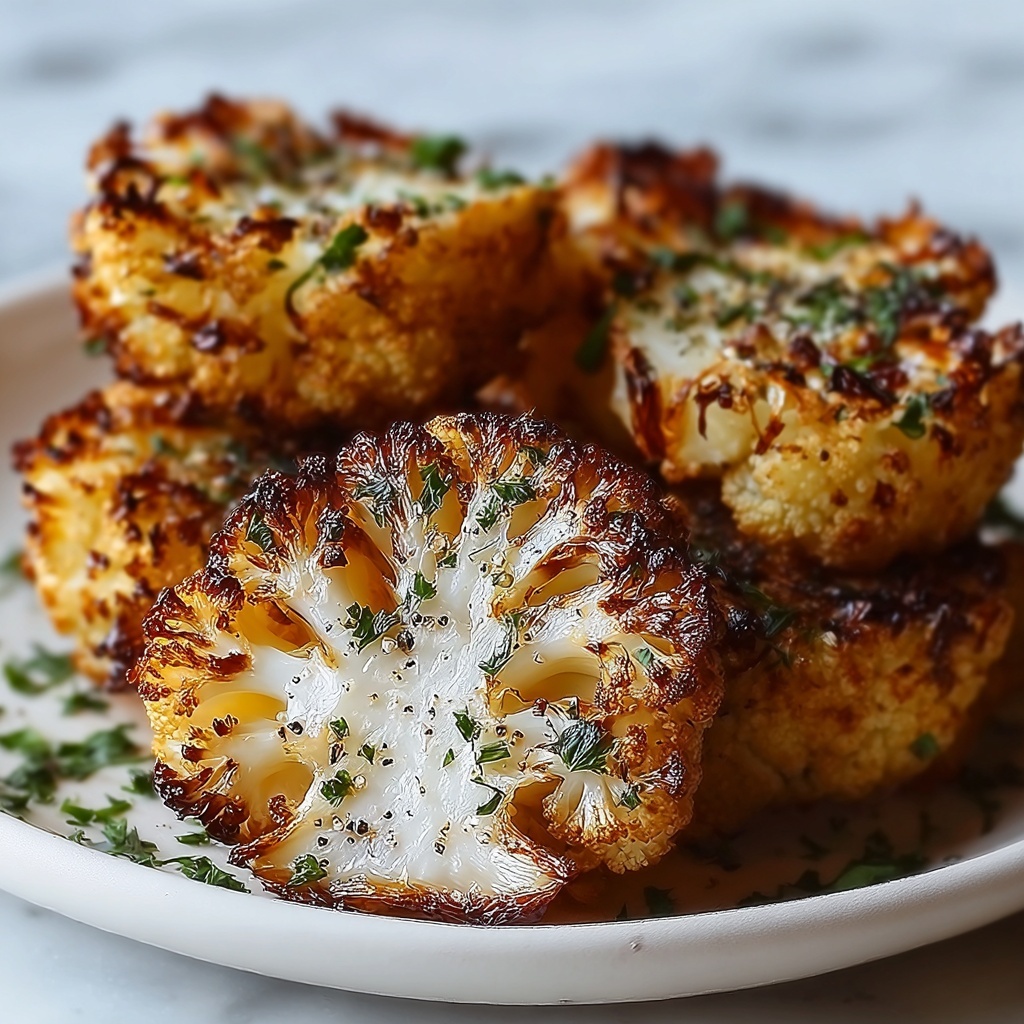
If you’re craving a healthier twist on a beloved classic, this Roasted Garlic Cauliflower Tots Recipe is going to become your new go-to snack or side dish. Imagine crunchy, cheesy tots packed with roasted garlic’s mellow sweetness and cauliflower’s subtle earthiness, all baked to golden perfection. These tots are not only incredibly tasty but sneak in a good dose of veggies, making them a fantastic way to please both kids and adults alike without any guilt. Trust me, once you try this recipe, you’ll be hooked on the unbeatable combination of textures and flavors it delivers.
Ingredients You’ll Need
Gathering simple, wholesome ingredients is the first step to creating the perfect Roasted Garlic Cauliflower Tots Recipe. Each component adds a special touch, from flavor and texture to color, making this dish truly shine.
- Cauliflower florets: The star veggie that forms the healthy base, offering a gentle earthy flavor and great texture.
- Garlic cloves: Roasted to mellow out their sharpness and infuse the tots with rich, aromatic depth.
- Shredded cheddar cheese: Adds melty gooeyness and sharpness to balance the cauliflower’s mild tone.
- Grated Parmesan cheese: Brings a nutty, salty kick that enhances overall flavor complexity.
- Panko breadcrumbs: For that perfect crispy crunch on the outside; you can swap for gluten-free if preferred.
- Large egg: Helps bind everything together so your tots hold their shape during baking.
- Salt and black pepper: Basic seasoning that boosts all the flavors without overpowering.
- Smoked paprika (optional): Adds a subtle smoky warmth for an extra flavor layer.
- Olive oil spray or cooking spray: Used to give your tots a crispy, golden crust while baking.
How to Make Roasted Garlic Cauliflower Tots Recipe
Step 1: Roast the Cauliflower and Garlic
Start by preheating your oven to 400°F (200°C) and lining a baking sheet with parchment paper, then lightly spray it with olive oil. Scatter your cauliflower florets and whole garlic cloves across the sheet. Roasting for about 20 to 25 minutes will soften the cauliflower and caramelize the garlic, bringing out those sweet, mellow flavors that make this recipe so special. Don’t rush this step because it sets the taste foundation.
Step 2: Pulse the Roasted Veggies
Once the cauliflower and garlic have cooled just enough to handle, transfer them to a food processor. Pulse the mixture until it’s finely chopped but still has some texture; you don’t want it completely pureed because those little chunks add character and bite to your tots. This balance keeps them tender inside while still holding together well.
Step 3: Combine Ingredients
Now for the fun part! In a large mixing bowl, blend the chopped cauliflower and garlic with shredded cheddar, Parmesan, panko breadcrumbs, egg, salt, pepper, and smoked paprika if using. Mix thoroughly until all the ingredients are well incorporated. You should have a sturdy yet slightly sticky mixture that’s ready to transform into tots.
Step 4: Shape and Bake
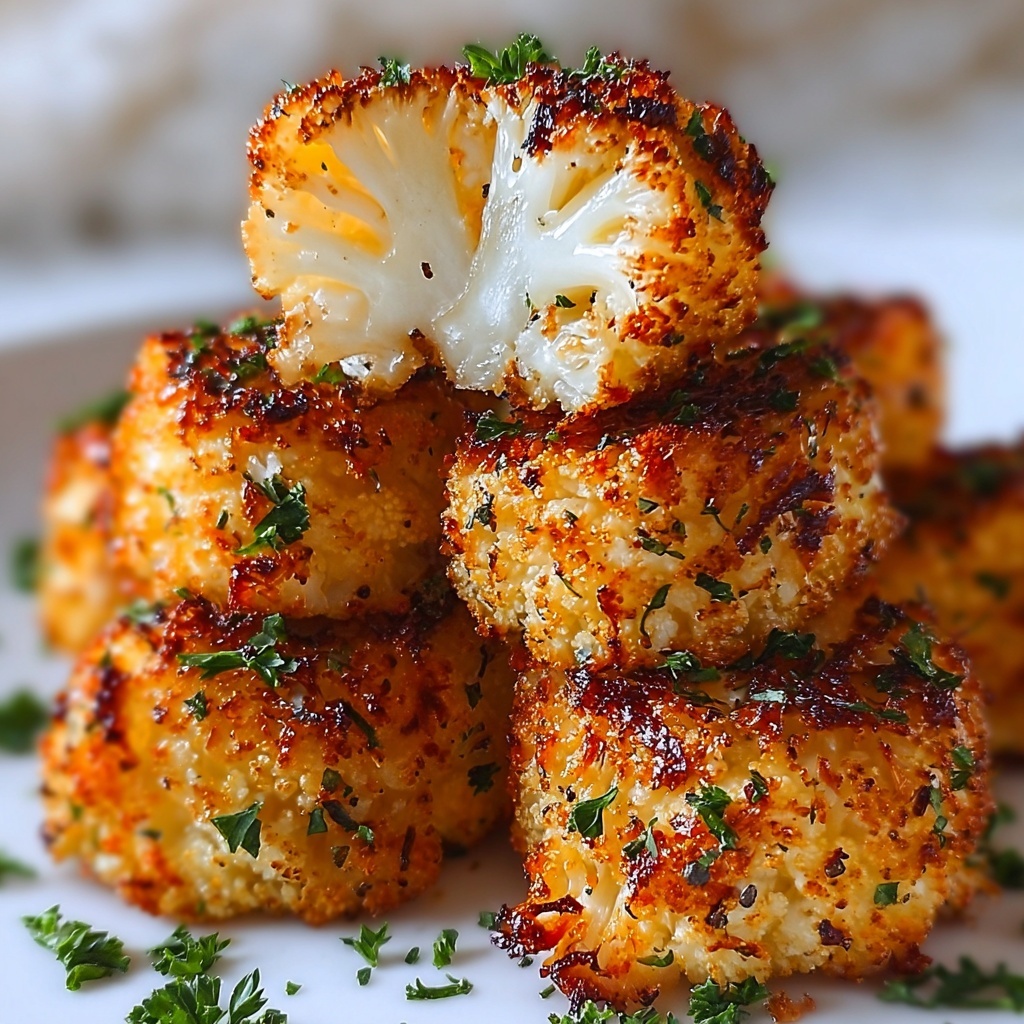
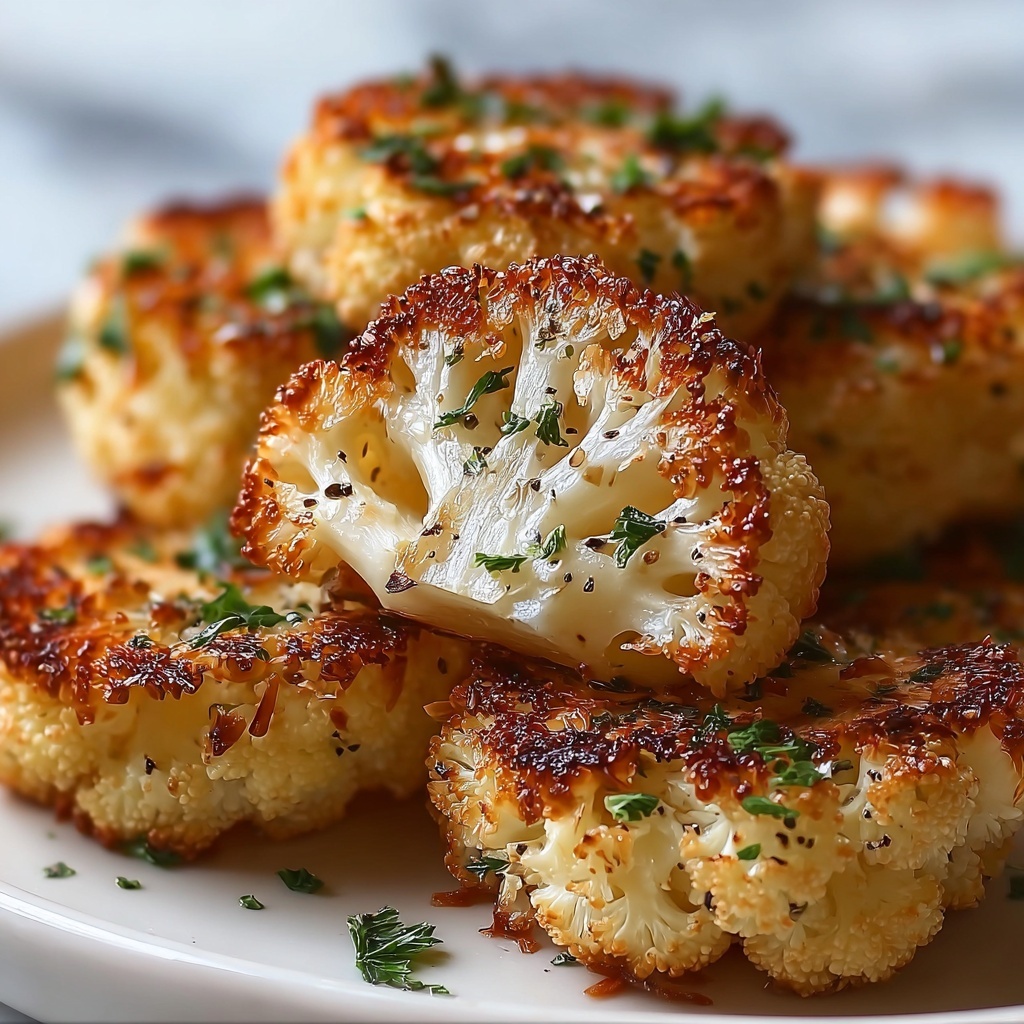
Shape the mixture into small tot shapes roughly 2 inches long and place them evenly spaced on your prepared baking sheet. Give each tot a light spray of olive oil to ensure a crispy exterior. Bake for 20 to 25 minutes, flipping them halfway through to guarantee an even golden crust. The result is irresistibly crispy on the outside and tender on the inside.
How to Serve Roasted Garlic Cauliflower Tots Recipe
Garnishes
Simple garnishes can elevate your Roasted Garlic Cauliflower Tots Recipe to something truly special. Freshly chopped parsley or chives add a pop of color and a subtle herbaceous note. A sprinkle of extra Parmesan right out of the oven also complements the cheesy undertones beautifully.
Side Dishes
These tots pair wonderfully with vibrant sides like a crisp green salad tossed in lemon vinaigrette or a creamy dipping sauce such as garlic aioli or tangy yogurt dip. They’re sturdy enough to be served alongside grilled chicken or fish, balancing your meal with their veggie goodness and satisfying crunch.
Creative Ways to Present
Looking to impress? Serve your roasted garlic cauliflower tots in mini mason jars layered with a little marinara sauce or as part of a colorful appetizer platter alongside roasted veggies and assorted dips. You can even garnish with edible flowers or microgreens for a restaurant-style look at home.
Make Ahead and Storage
Storing Leftovers
Leftover tots store beautifully in an airtight container in the refrigerator for up to 3 days. Make sure they’ve fully cooled before sealing, to keep their texture at its best. When ready to enjoy, simply reheat them until crispy again.
Freezing
If you want to prep ahead or save extras, freeze the uncooked tots on a baking sheet until solid, then transfer them to a freezer-safe bag or container. They’ll keep well for up to 1 month. Bake directly from frozen, adding a few extra minutes to the cooking time.
Reheating
To reheat leftovers, place the tots on a baking sheet and warm them in a 375°F (190°C) oven for about 10 minutes. This will refresh their crispy exterior without drying them out, better than using a microwave which can make them soggy.
FAQs
Can I make this recipe gluten-free?
Absolutely! Just swap the regular panko breadcrumbs with gluten-free breadcrumbs, and you’re good to go. The texture remains just as wonderful, and the flavor won’t be compromised.
Are these tots suitable for a vegetarian diet?
Yes, this Roasted Garlic Cauliflower Tots Recipe is perfect for vegetarians as it contains no meat, just veggies, cheese, and eggs.
Can I use fresh garlic instead of roasting it?
While fresh garlic can be very pungent, roasting garlic mellows it out significantly and adds a subtle sweetness. Fresh garlic can overpower the dish, so roasting is highly recommended to maintain the perfect flavor balance.
What dipping sauces pair best with these tots?
They’re delicious with classic ketchup, ranch dressing, garlic aioli, or even a spicy sriracha mayo. Feel free to experiment to find your favorite match!
Can I bake the tots instead of frying them?
This recipe is designed for baking, which keeps them healthier and just as crispy when done right. No frying necessary, which makes them easier to prepare and a lighter snack overall.
Final Thoughts
Now that you know how to make this delicious and nutritious Roasted Garlic Cauliflower Tots Recipe, it’s time to get in the kitchen and whip up a batch. They’re fun to make, satisfying to eat, and perfect for sharing. Whether you’re serving them as a snack, a side, or a party treat, these tots are guaranteed to impress and delight every palate. Happy cooking!
Print
Roasted Garlic Cauliflower Tots Recipe
- Prep Time: 15 minutes
- Cook Time: 45 minutes
- Total Time: 1 hour
- Yield: 4 servings
- Category: Appetizer
- Method: Baking
- Cuisine: American
- Diet: Vegetarian
Description
These Roasted Garlic Cauliflower Tots are a delicious and healthier alternative to traditional potato tots. Roasting the cauliflower and garlic brings out a rich, nutty flavor while the blend of cheddar and Parmesan cheeses adds a savory depth. Crispy on the outside and tender on the inside, these tots make a perfect snack, appetizer, or side dish that’s easy to prepare and sure to please both kids and adults alike.
Ingredients
Vegetables
- 1 medium head cauliflower, cut into florets
- 4 cloves garlic, peeled
Cheeses
- 1 cup shredded cheddar cheese
- 1/2 cup grated Parmesan cheese
Other Ingredients
- 1/2 cup panko breadcrumbs (or gluten-free breadcrumbs)
- 1 large egg
- 1/4 teaspoon salt
- 1/4 teaspoon black pepper
- 1/2 teaspoon smoked paprika (optional)
- Olive oil spray or cooking spray
Instructions
- Preheat and Prepare: Preheat your oven to 400°F (200°C). Line a baking sheet with parchment paper and lightly spray it with olive oil to prevent sticking and ensure even roasting.
- Roast Cauliflower and Garlic: Spread the cauliflower florets and garlic cloves evenly on the prepared baking sheet. Roast them in the oven for 20-25 minutes until they become tender and slightly browned, which enhances their natural sweetness and flavor. Let them cool slightly before handling.
- Process the Vegetables: Transfer the roasted cauliflower and garlic to a food processor. Pulse a few times until the mixture is finely chopped but still retains some texture; avoid pureeing into a paste.
- Mix Ingredients: In a large bowl, combine the chopped cauliflower and garlic with shredded cheddar, grated Parmesan, panko breadcrumbs, egg, salt, black pepper, and smoked paprika if using. Mix thoroughly until the ingredients are well incorporated and form a cohesive mixture.
- Shape the Tots: Take small portions of the mixture and shape them into tot-like forms approximately 2 inches long. Place the shaped tots evenly spaced on the prepared baking sheet.
- Apply Oil Spray: Lightly spray the shaped tots with olive oil spray or cooking spray. This helps them achieve a crispy exterior during baking.
- Bake: Bake the tots in the preheated oven for 20-25 minutes. About halfway through baking, flip the tots to ensure they brown evenly on all sides. Bake until they are golden and crisp on the outside.
- Serve: Remove the tots from the oven and serve them warm. They are perfect with your favorite dipping sauce such as ketchup, ranch, or spicy mayo.
Notes
- You can substitute panko breadcrumbs with gluten-free breadcrumbs to make this recipe gluten-free.
- For a dairy-free version, omit the cheeses and add extra seasonings or a dairy-free cheese alternative.
- Make sure not to over-process the cauliflower; some texture is important for the tots to hold together.
- These tots reheat well in an oven or air fryer to retain crispiness.
- Smoked paprika is optional but adds a nice smoky depth to the flavor.


