If you’re craving a dessert that perfectly balances tart and sweet with a burst of fresh fruit, you are absolutely going to love this Raspberry Lemon Bars Recipe. This delightful treat features a buttery, crumbly crust topped with a luscious lemon filling swirled with juicy raspberries, creating a combination that feels both refreshing and indulgent. It’s a dessert that brings sunshine to any occasion and will quickly become your go-to for summer gatherings, afternoon tea, or any time you want to brighten your dessert table.
Ingredients You’ll Need
These ingredients are wonderfully simple but every single one plays a crucial role in achieving that classic balance of flavors and textures in your Raspberry Lemon Bars Recipe. From the rich, buttery crust to the tangy, fruit-studded filling, each component is essential.
- Unsalted butter, softened: Provides a tender, rich base for the crust that melts in your mouth.
- Granulated sugar: Sweetens both the crust and filling perfectly without overpowering the tartness of the lemon and raspberries.
- All-purpose flour: Creates structure in the crust and filling, giving you bars that hold together beautifully.
- Salt: Enhances the flavors and balances the sweetness in the crust.
- Large eggs: Bind the filling ingredients together and add a smooth, custardy texture.
- Freshly squeezed lemon juice: Delivers that bright, zesty punch that defines this dessert.
- Lemon zest: Adds an extra layer of fragrant citrus aroma and flavor.
- Fresh or frozen raspberries: Give bursts of juicy sweetness and a lovely color contrast.
- Powdered sugar (optional): For a delicate finishing touch that makes each bar look extra special.
How to Make Raspberry Lemon Bars Recipe
Step 1: Prepare the Crust
Start by preheating your oven to 350°F (175°C) and greasing or lining a 9×13-inch baking pan with parchment paper. In a medium bowl, cream together the softened butter and granulated sugar until smooth and slightly fluffy. Stir in the all-purpose flour and salt until the mixture forms a crumbly dough. Press this evenly into the bottom of the pan, creating a sturdy base that will hold all the lemony goodness on top. Bake it for about 18 to 20 minutes until it turns a lovely light golden color — this toasty crust will add a buttery crunch with every bite.
Step 2: Mix the Filling
While the crust bakes, whisk together the granulated sugar and flour in a large bowl to create a smooth mixture. Beat in the eggs one at a time for perfect consistency, then stir in the freshly squeezed lemon juice and lemon zest. These citrus elements pack the filling with bright, tangy flavor. Now, gently fold in the fresh or frozen raspberries. If you prefer a smoother texture without the little seeds, you can strain the raspberries first, but either way, they add bursts of flavor and gorgeous red flecks throughout your filling.
Step 3: Bake the Bars
Pour the luscious lemon-raspberry filling over the hot crust straight from the oven. This step helps the filling start setting right away. Return the pan to the oven and bake for another 25 to 30 minutes, or until the center is set and no longer jiggles when you gently shake the pan. This baking time ensures your bars will have the perfect texture—firm enough to hold their shape but still delightfully smooth and creamy inside.
Step 4: Cool and Chill
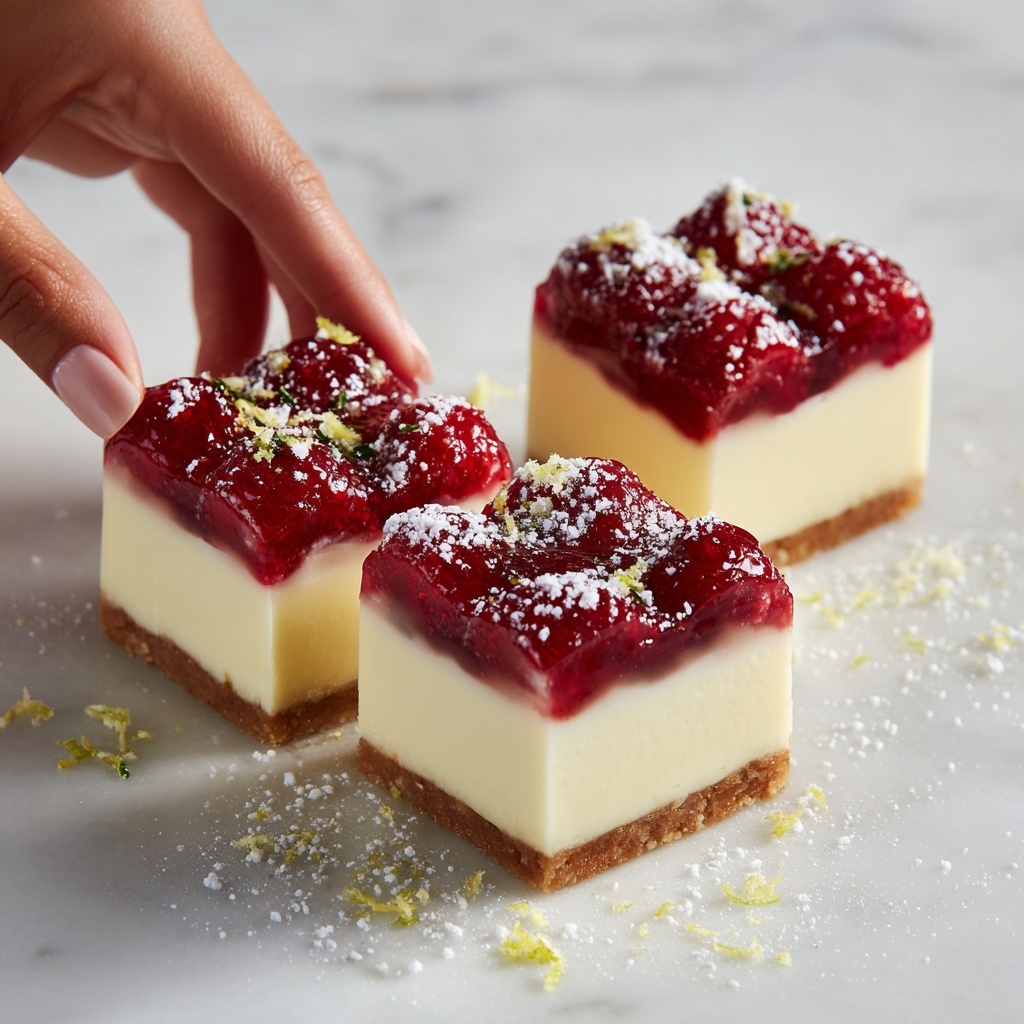
Allow your bars to cool completely at room temperature. This patience pays off, as it lets the flavors settle and intensify. After cooling, pop the pan into the refrigerator for at least 2 hours to chill thoroughly. This chilling step makes the bars easier to slice and lets that buttery crust stay crisp under the velvety filling. Just before serving, dust the top with powdered sugar for an elegant, sweet finish.
How to Serve Raspberry Lemon Bars Recipe
Garnishes
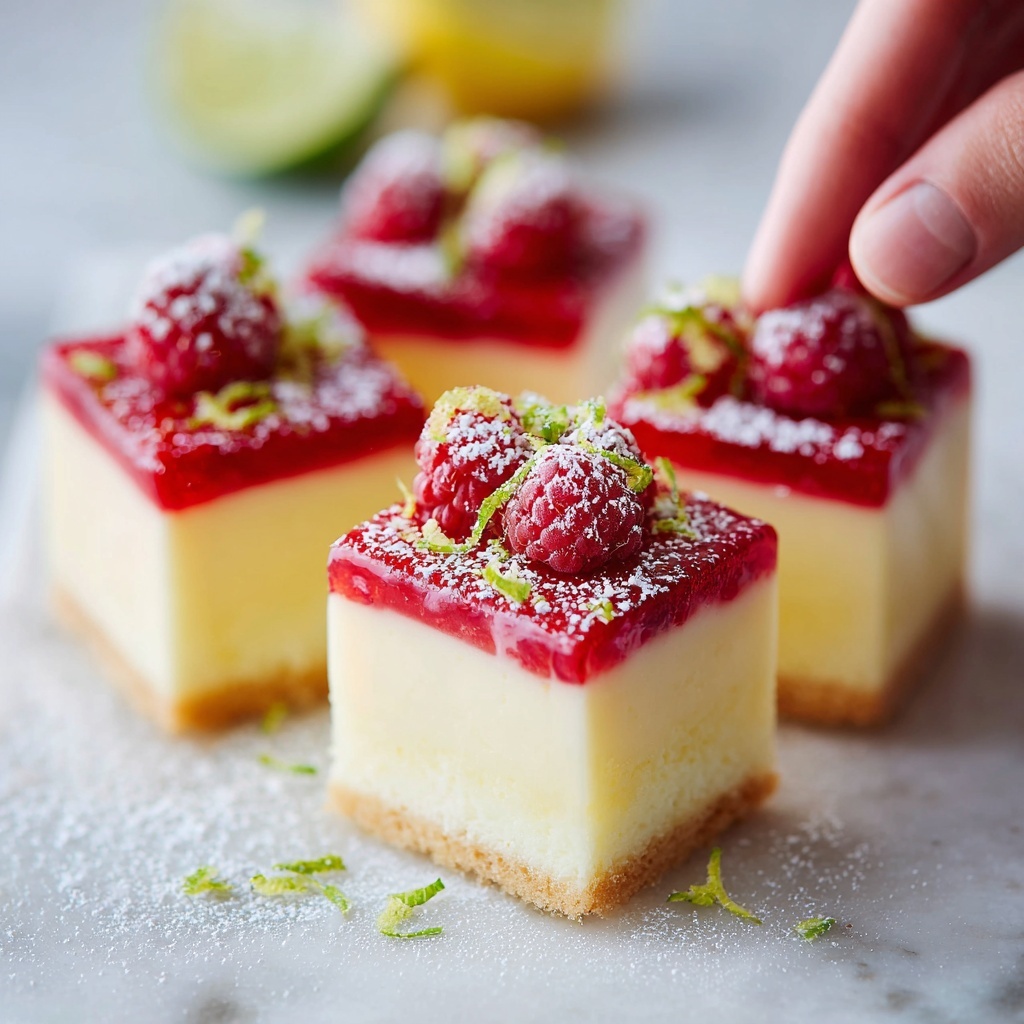
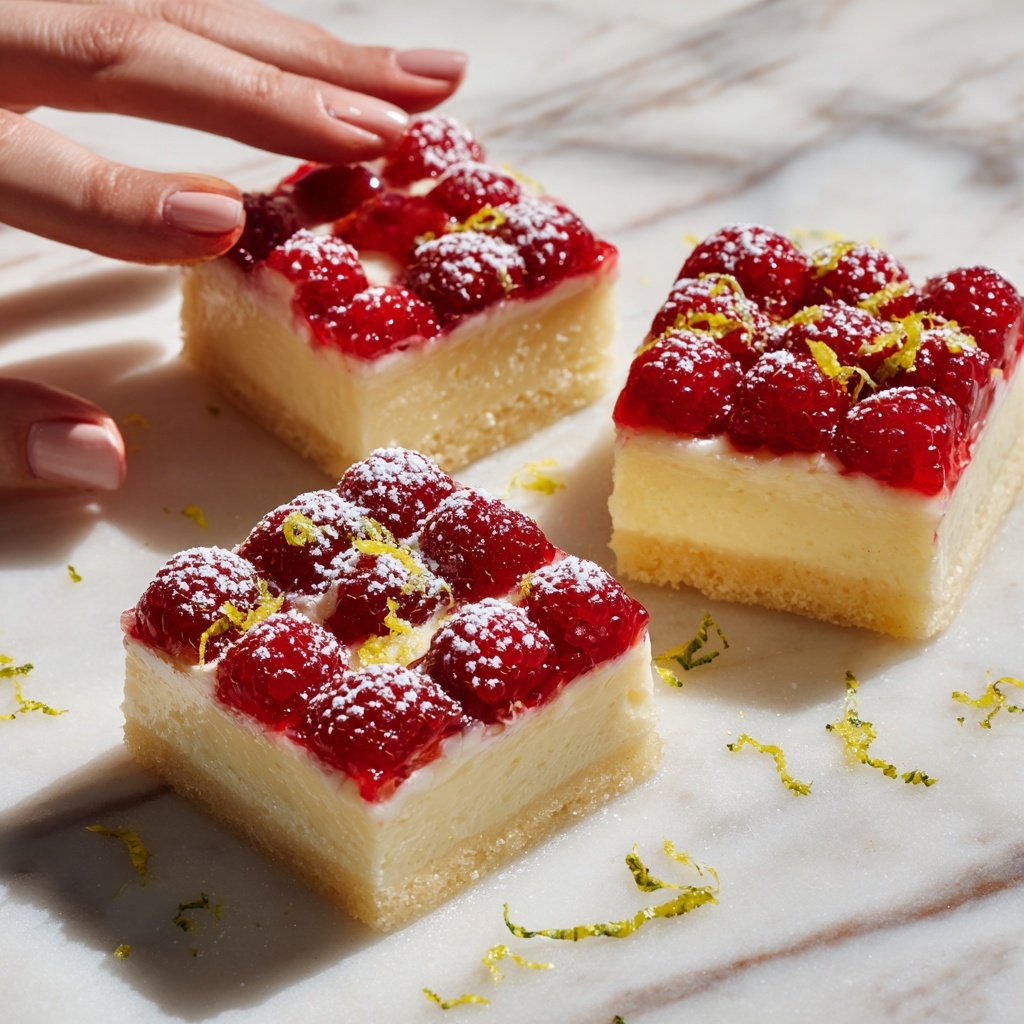
Adding fresh garnishes can elevate the presentation and flavor of your Raspberry Lemon Bars Recipe. Consider topping each slice with a few fresh raspberries and a small sprig of mint for a pop of color and freshness. A light dusting of powdered sugar right before serving adds a delicate sweetness and a pretty, snow-like effect that makes them look irresistible.
Side Dishes
These lemon bars are wonderfully versatile and pair beautifully with a cup of hot tea or a refreshing glass of lemonade. For a more decadent experience, serve alongside a dollop of whipped cream or a scoop of vanilla ice cream to complement the bars’ tangy brightness with creamy richness.
Creative Ways to Present
For special occasions or dessert tables, cut the bars into petite squares or even into fun shapes using cookie cutters. Layer them on a beautiful platter, alternating with fresh raspberries for a festive look. You can also drizzle a little raspberry coulis or a thin lemon glaze on top for stunning visual appeal and an extra burst of flavor.
Make Ahead and Storage
Storing Leftovers
If you find yourself lucky enough to have leftovers, you can store these bars in an airtight container in the refrigerator for up to 4 days. They actually taste freshly delicious even after a day or two as the flavors continue to meld.
Freezing
These bars freeze beautifully if you want to prep ahead or save some for later indulgence. Wrap them tightly in plastic wrap or foil and place in a freezer-safe container for up to 2 months. When ready to enjoy, thaw in the refrigerator overnight.
Reheating
For best results, let the bars come to room temperature before serving after refrigeration or freezing. You can warm them slightly in a microwave for about 10 seconds if you prefer a warm dessert, but they are perfectly delicious served chilled or at room temperature.
FAQs
Can I use frozen raspberries for the Raspberry Lemon Bars Recipe?
Absolutely! Frozen raspberries work just as well as fresh ones and are a great option if fresh berries aren’t in season. Just be sure to thaw and drain them to avoid extra liquid in your filling.
Is it necessary to use fresh lemon juice?
Fresh lemon juice is highly recommended because it provides the bright and vibrant flavor that bottled lemon juice often lacks. The zest also adds essential oils that enhance the overall citrus aroma.
How do I prevent the crust from getting soggy?
Baking the crust first until it’s lightly golden creates a firm base that resists sogginess. Pouring the filling over a hot crust also helps set the layers properly and keeps the crust crisp.
Can I make this recipe gluten-free?
Yes, you can substitute the all-purpose flour with a gluten-free blend that measures cup-for-cup. Make sure to choose a blend suitable for baking to maintain the right texture.
Why is chilling the bars important?
Chilling helps the filling firm up and makes the bars easier to cut without crumbling. It also enhances the flavors by giving them time to meld and develop a deeper taste.
Final Thoughts
If you want a dessert that feels both homey and special, the Raspberry Lemon Bars Recipe is a total winner. The harmony of buttery crust, tart lemon, and juicy raspberries is a gift your taste buds will thank you for. Whip up a batch soon and watch these bars disappear—you may just find yourself making them again and again!
Print
Raspberry Lemon Bars Recipe
- Prep Time: 15 minutes
- Cook Time: 45 minutes
- Total Time: 1 hour (plus chilling time of at least 2 hours)
- Yield: 16 bars
- Category: Dessert
- Method: Baking
- Cuisine: American
- Diet: Vegetarian
Description
Raspberry Lemon Bars offer a perfect balance of tart lemon filling and sweet raspberry notes on a buttery, crumbly crust. These bars are easy to prepare and chilled to set, making them a refreshing dessert ideal for summer or any occasion where a fruity, tangy treat is desired.
Ingredients
For the crust:
- 1 cup unsalted butter, softened
- 1/2 cup granulated sugar
- 2 cups all-purpose flour
- 1/4 teaspoon salt
For the filling:
- 1 1/2 cups granulated sugar
- 1/4 cup all-purpose flour
- 4 large eggs
- 1/2 cup freshly squeezed lemon juice (about 2–3 lemons)
- 1 tablespoon lemon zest
- 1 1/2 cups fresh or frozen raspberries
For topping:
- Powdered sugar, for dusting (optional)
Instructions
- Preheat and prepare pan: Preheat your oven to 350°F (175°C). Grease a 9×13-inch baking pan or line it with parchment paper for easy removal of the bars.
- Make the crust: In a medium bowl, cream together the softened butter and 1/2 cup sugar until light and fluffy. Add 2 cups flour and 1/4 teaspoon salt, mixing until a crumbly dough forms. Press this dough evenly into the bottom of the prepared pan.
- Bake the crust: Bake the crust in the preheated oven for 18–20 minutes or until it turns lightly golden. This step ensures a firm base for the filling.
- Prepare the filling: While the crust bakes, whisk together 1 1/2 cups sugar and 1/4 cup flour in a large bowl. Add the 4 eggs, freshly squeezed lemon juice, and lemon zest, whisking until the mixture is smooth and well combined.
- Add raspberries: Gently fold the fresh or frozen raspberries into the lemon filling. For a smoother texture, you can strain out raspberry seeds before adding.
- Bake the bars: Pour the lemon and raspberry filling over the hot baked crust. Return the pan to the oven and bake for an additional 25–30 minutes, or until the center is set and no longer jiggles when gently shaken.
- Cool and chill: Allow the bars to cool completely at room temperature. Then chill them in the refrigerator for at least 2 hours to set fully and enhance flavors.
- Serve: Dust the cooled bars with powdered sugar if desired, then slice into 16 bars and serve chilled for best taste.
Notes
- For a smoother texture, strain out raspberry seeds before adding to the filling (optional).
- These bars can be stored in the refrigerator for up to 4 days, making them a convenient make-ahead dessert.

