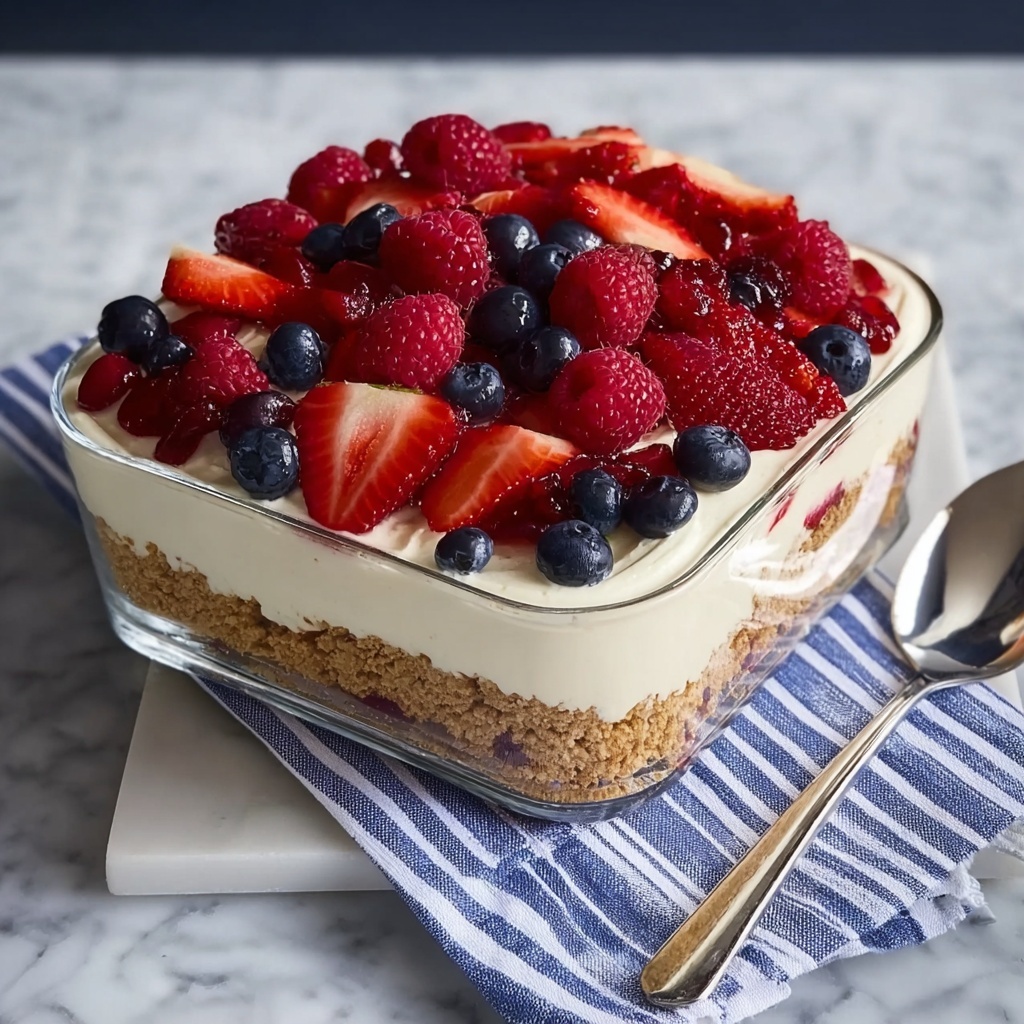
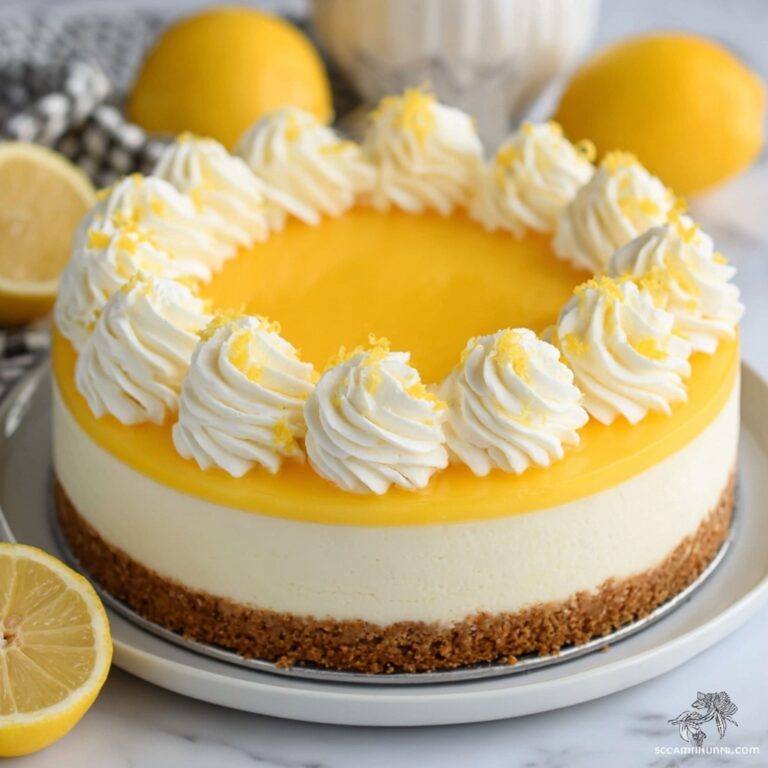
If you’re looking for a dessert that dazzles both the eyes and the taste buds, this No-Bake Cheesecake Flag Cake Recipe is a total winner. It combines the creamy, dreamy texture of a classic cheesecake with the bright, fresh flavors of summer berries arranged like a patriotic flag. Perfect for celebrations, and surprisingly simple to make, this dessert has a crisp graham cracker crust and a luscious, fluffy filling that’s light yet rich. Whether you’re hosting a get-together or just craving something special, this No-Bake Cheesecake Flag Cake Recipe is sure to become a fast favorite in your dessert rotation.
Ingredients You’ll Need
The magic of this No-Bake Cheesecake Flag Cake Recipe lies in its simple, thoughtfully chosen ingredients. Each one brings something special — from the buttery crust to the tangy lemon zing in the filling, and those radiant fresh berries that top it all off with color and freshness.
- Graham cracker crumbs (1 ½ cups): The crunchy base that provides perfect texture contrasts with the smooth filling.
- White sugar (¼ cup + ⅓ cup): Adds just the right amount of sweetness without overpowering the other flavors.
- Unsweetened cocoa powder (2 tablespoons): Gives the crust a subtle, rich chocolate undertone.
- Butter, melted (6 tablespoons): Binds the crust ingredients together for a firm yet tender foundation.
- Cream cheese (1 cup, room temperature): Provides the classic cheesecake tang and creamy texture.
- Mascarpone cheese (1 cup, room temperature): Adds a decadently smooth and silky richness.
- Lemon zest (2 teaspoons): Gives a fresh, vibrant lift to balance the richness.
- Lemon juice (2 teaspoons): Enhances the tanginess and brightens the flavor profile.
- Vanilla extract (1 teaspoon): Adds warmth and depth of flavor to the filling.
- Cold heavy whipping cream (1 ¼ cups): Whipped to soft peaks to create a light and fluffy texture.
- Fresh strawberries (20 large, hulled and halved lengthwise): Bring juicy sweetness and bright red color for the flag’s stripes.
- Fresh blueberries (24 large): Their sweet-tart burst adds perfect contrast and the starry blue field effect.
How to Make No-Bake Cheesecake Flag Cake Recipe
Step 1: Prepare the crust
Start by combining the graham cracker crumbs, sugar, cocoa powder, and melted butter in a bowl until the mixture is crumbly and evenly moistened. Press this mixture firmly into the bottom of a 9×11-inch baking dish, smoothing out the surface so it’s even. Pop it into the fridge and let it chill for at least 30 minutes — this sets the crust so it holds its shape beautifully later on.
Step 2: Make the creamy filling
In a clean bowl, mix the cream cheese and mascarpone cheese until completely smooth and well blended. Stir in the lemon zest, lemon juice, and vanilla extract until the mixture is fragrant and bright. Meanwhile, whip the heavy cream with ⅓ cup sugar until soft peaks form — light and airy is what you want here. Gently fold the whipped cream into your cheese mixture, creating a fluffy filling that feels indulgent yet light.
Step 3: Assemble and chill
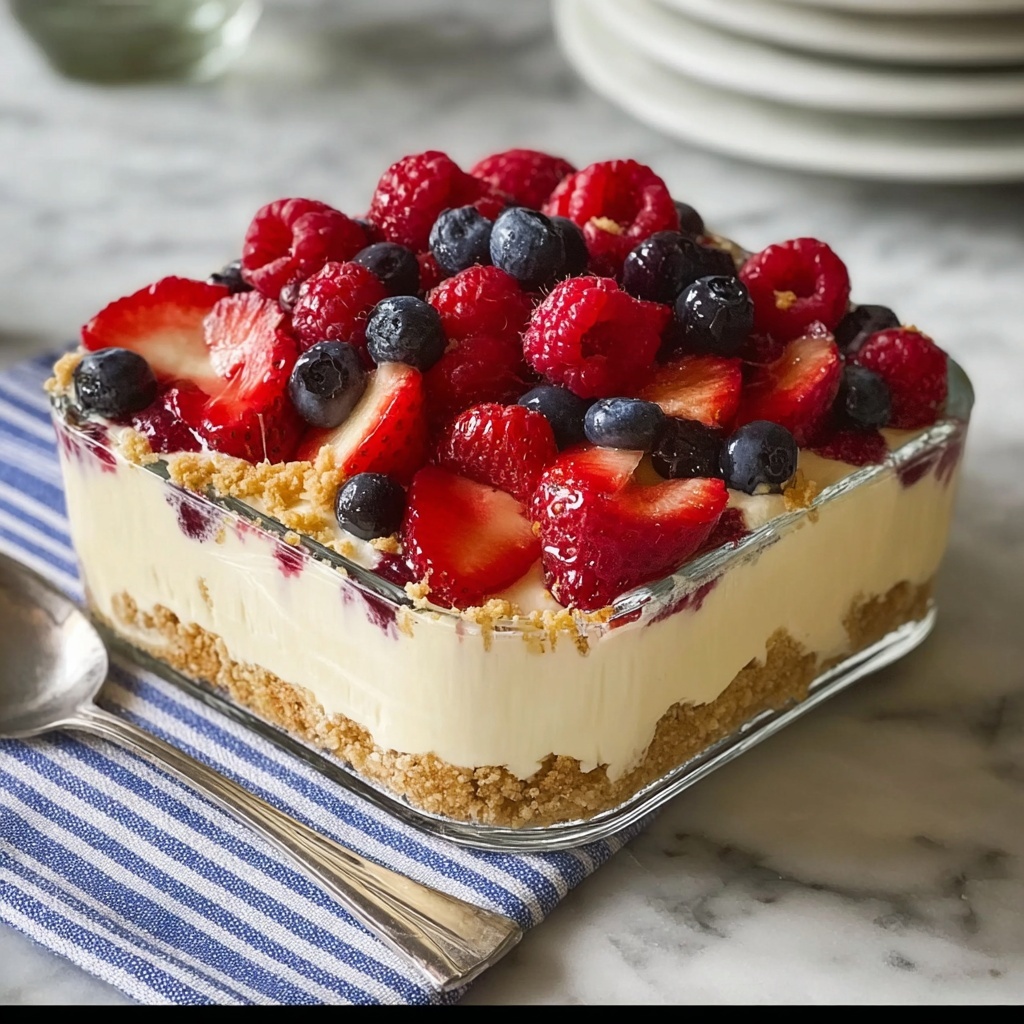
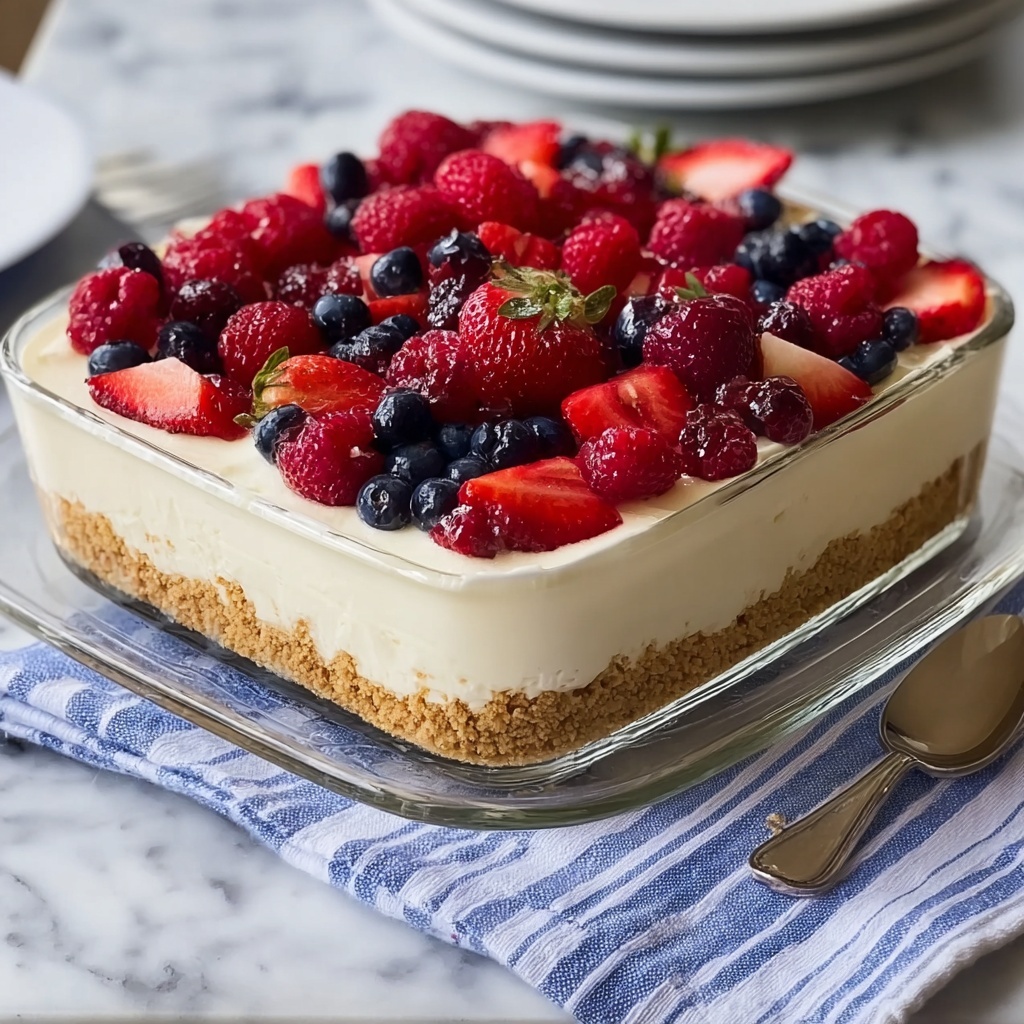
Spread the cheesecake filling over the chilled crust, smoothing the top with a spatula. Give the pan a few gentle taps on the countertop to level everything and settle the layers. Cover with plastic wrap and refrigerate for at least three hours, allowing the cheesecake to fully set into a creamy, sliceable masterpiece.
Step 4: Decorate with the berries
Here’s where the fun really kicks in! Starting at the bottom edge, lay the strawberry halves in a neat horizontal stripe, pointed ends facing right. Create a series of these rows, spacing them carefully to form the iconic stripes of the flag. Leave a square space on the cake’s upper left for the blueberries. Fill this “star” area with rows of blueberries, placing them closely side by side with their blossom ends facing up to mimic the flag’s stars pattern.
Step 5: Serve in style
Slice your flag cake into squares, making sure to showcase a bit of the berry flag pattern in each piece. The vibrant colors and creamy layers will have everyone eager for more.
How to Serve No-Bake Cheesecake Flag Cake Recipe
Garnishes
Adding a little extra to your No-Bake Cheesecake Flag Cake Recipe presentation makes it feel even more special. Consider a light dusting of powdered sugar around the edges or a few edible flowers for a burst of color. Fresh mint leaves are also a lovely complement to the fruity freshness and add a pleasant aromatic note.
Side Dishes
This No-Bake Cheesecake Flag Cake Recipe shines bright enough on its own, but pairing it with simple accompaniments like freshly brewed coffee or iced tea can elevate the experience. For a more indulgent menu, a dollop of whipped cream or a scoop of vanilla bean ice cream makes the perfect sidekick.
Creative Ways to Present
Want to impress your guests even further? Try arranging mini versions of the No-Bake Cheesecake Flag Cake Recipe into individual jars or clear cups. Layer crushed crust, cheesecake filling, and a mini berry flag on top for a fun, portable, and visually stunning twist. It’s perfect for picnics, potlucks, or those hot summer days when you want to impress without fuss.
Make Ahead and Storage
Storing Leftovers
After the celebration, cover any leftover cake tightly with plastic wrap or place it in an airtight container. Store in the refrigerator, where it will stay fresh and delicious for up to 3 days. The flavors actually deepen nicely when given a little extra time to meld.
Freezing
If you want to save your No-Bake Cheesecake Flag Cake Recipe for later, freezing is an option. Wrap each slice individually in plastic wrap and then place them in an airtight freezer bag. This way, you can enjoy your cheesecake anytime within 1 month. When thawing, leave it in the fridge overnight for the best texture.
Reheating
Because this is a no-bake cheesecake, reheating isn’t necessary and can actually affect the texture negatively. It’s best enjoyed cold and creamy straight from the fridge, maintaining that fresh and luscious mouthfeel.
FAQs
Can I use frozen berries for the decoration?
While fresh berries are ideal to maintain the integrity of the flag design and freshness, you can use thawed frozen berries in a pinch. Just be sure to drain any excess moisture to avoid the topping becoming soggy.
What can I substitute for mascarpone cheese?
If mascarpone is hard to find, you can use additional cream cheese or even ricotta cheese for a slightly different but still delicious flavor and texture.
How long does it take for this cheesecake to set?
You’ll want to chill the assembled cheesecake for at least 3 hours, but overnight refrigeration will yield the best firmness and flavor melding.
Can I make this recipe dairy-free?
This particular recipe depends on cream cheese and mascarpone for its creamy texture, so making it completely dairy-free would require substantial substitutions. However, there are dairy-free cream cheese alternatives available that could be experimented with for a similar effect.
Is this recipe suitable for kids’ parties?
Absolutely! The bright colors and fun flag design make it a hit with kids, and the fluffy texture is gentle and creamy enough for little ones to enjoy safely.
Final Thoughts
Trust me, once you make this No-Bake Cheesecake Flag Cake Recipe, you’ll be amazed at how effortlessly it steals the show at any event. It’s a true crowd-pleaser that brings together texture, flavor, and festive charm in every bite. So go ahead and try this stunning, no-bake delight — your taste buds and your guests will thank you!
Print
No-Bake Cheesecake Flag Cake Recipe
- Prep Time: 15 minutes
- Cook Time: 0 minutes
- Total Time: 3 hours 15 minutes
- Yield: 12 servings
- Category: Dessert
- Method: No-Cook
- Cuisine: American
- Diet: Vegetarian
Description
This No-Bake Cheesecake Flag Cake is a delicious and visually stunning dessert perfect for patriotic celebrations. Featuring a chocolate graham cracker crust, a creamy mascarpone and cream cheese filling lightly flavored with lemon and vanilla, and topped with fresh strawberries and blueberries arranged like the American flag, this cake is sure to impress without ever turning on the oven.
Ingredients
Crust
- 1 ½ cups finely crushed graham cracker crumbs
- ¼ cup white sugar
- 2 tablespoons unsweetened cocoa powder
- 6 tablespoons butter, melted
Filling
- 1 cup cream cheese at room temperature
- 1 cup mascarpone cheese at room temperature
- 2 teaspoons grated lemon zest
- 2 teaspoons lemon juice
- 1 teaspoon vanilla extract
- ⅓ cup white sugar
- 1 ¼ cups cold heavy whipping cream
Topping
- 20 large fresh strawberries, hulled and halved lengthwise
- 24 large fresh blueberries
Instructions
- Prepare the Crust: Combine graham cracker crumbs, ¼ cup sugar, cocoa powder, and melted butter in a bowl until the mixture is crumbly and well mixed.
- Form the Crust: Press the crust mixture evenly into the bottom of a 9×11-inch baking dish. Cover with plastic wrap and refrigerate for about 30 minutes to set.
- Make the Cheese Filling: In a separate bowl, mix the cream cheese and mascarpone until smooth. Stir in the lemon zest, lemon juice, and vanilla extract to flavor the cheese mixture.
- Whip the Cream: Whisk the ⅓ cup sugar into the cold heavy whipping cream until soft peaks form. Gently fold the whipped cream into the cheese mixture until fluffy and fully combined.
- Assemble and Chill: Spread the filling evenly over the chilled crust. Tap the pan gently to even out the filling and crust layers. Cover tightly with plastic wrap and refrigerate for at least 3 hours until set.
- Arrange Strawberries: Starting at the bottom long edge, place strawberry halves in horizontal stripes with pointed ends facing right. Make additional strawberry lines upward, leaving a square in the upper left corner.
- Create the Blueberry Field: Fill the reserved upper left square with blueberries arranged in lines touching each other, blossom ends facing up, to mimic the stars on the flag.
- Serve: Cut the finished flag cheesecake into squares and serve chilled.
Notes
- Ensure cream cheese and mascarpone are at room temperature for easier mixing.
- Use fresh, firm strawberries and blueberries for best decoration results.
- Chill the crust well before adding filling to prevent sogginess.
- This cake is best served within 1-2 days of preparation for optimal freshness.
- For a firmer crust, press mixture firmly and chill longer.

