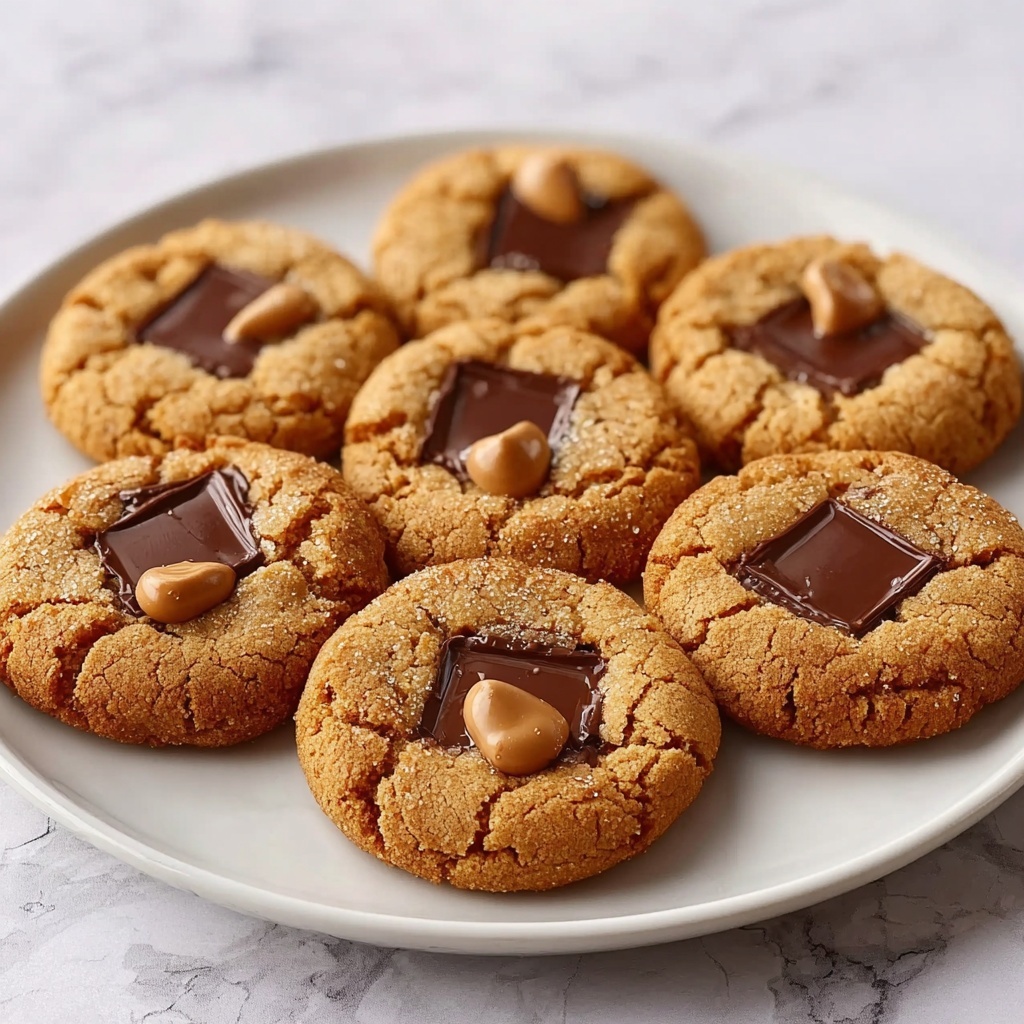
If you’re craving a sweet treat that perfectly balances rich peanut butter with melty chocolate, this Mouthwatering Peanut Butter Cup Cookies for Sweet Cravings Recipe is exactly what you need. These cookies bring together the creamy texture of peanut butter, the subtle crunch of chocolate-covered peanut butter cups, and a tender, chewy crumb that will keep you reaching for more. Whether you’re baking for a gathering or just indulging your own sweet tooth, these cookies never fail to delight and satisfy.
Ingredients You’ll Need
These ingredients are wonderfully simple but each plays a crucial role in crafting the perfect cookie – from the smooth peanut butter to the pockets of chocolate goodness that make every bite unforgettable.
- 2 cups all-purpose flour: The foundation that gives your cookies structure and softness.
- 1 teaspoon salt: A small pinch to enhance and balance the sweetness.
- 1 teaspoon baking soda: Helps your cookies rise to a lovely, soft texture.
- 1 cup butter (softened): Adds richness and moistness; margarine can be swapped in if needed.
- 1 cup creamy peanut butter: Use creamy for that silky smooth mix and ultimate peanut flavor.
- 1 cup granulated sugar: Sweetens without overpowering, keeping the cookie just right.
- 1 cup brown sugar (packed): Brings moisture and a hint of caramel flavor with its light brown variety.
- 1 large egg (beaten): Binds all ingredients together; for a vegan option, try a flax egg.
- 1 teaspoon pure vanilla extract: Adds a warm, aromatic note that elevates the cookie.
- 2 tablespoons milk: Helps achieve the perfect dough consistency; almond milk works well for dairy-free baking.
- 1 cup miniature chocolate-covered peanut butter cups (unwrapped): This is the showstopper ingredient that makes these cookies so irresistibly special.
How to Make Mouthwatering Peanut Butter Cup Cookies for Sweet Cravings Recipe
Step 1: Preheat and Prepare
Begin by heating your oven to 350°F (175°C). Line your baking sheet with parchment paper to ensure your cookies come off effortlessly and keep their perfect shape during baking.
Step 2: Combine Dry Ingredients
In a medium bowl, whisk together the flour, salt, and baking soda. This ensures even distribution, so every cookie bakes evenly and rises nicely.
Step 3: Cream the Butters and Sugars
In a large mixing bowl, beat softened butter and creamy peanut butter with both sugars until the mixture is smooth and creamy. This step is crucial because it incorporates air, lending your cookies a light texture despite their richness.
Step 4: Add Egg and Vanilla
Beat in the egg and vanilla extract until the mixture is fully combined. These ingredients add moisture and depth of flavor that turns simple dough into a taste sensation.
Step 5: Incorporate Dry Ingredients Gradually
Slowly add your flour mixture to the wet ingredients, stirring just until you no longer see flour streaks. Overmixing can make cookies tough, so take it easy here.
Step 6: Stir in Milk for Perfect Consistency
Add the milk and mix until well blended. This keeps your dough moist and workable, ensuring your cookies bake up tender, not dry.
Step 7: Fold in the Star Ingredient
Gently fold in the miniature chocolate-covered peanut butter cups. These little nuggets of goodness melt slightly in the oven, providing ooey-gooey surprises in every bite.
Step 8: Scoop and Bake
Spoon dollops of dough onto your prepared baking sheet, spacing them evenly to allow room for spreading. Bake for 10 to 12 minutes, just until the edges turn a light golden hue.
Step 9: Cool and Enjoy
After baking, let the cookies cool on the baking sheet for a few minutes to set up, then transfer them to a wire rack to cool completely. This step ensures the perfect chewy but tender texture.
How to Serve Mouthwatering Peanut Butter Cup Cookies for Sweet Cravings Recipe
Garnishes
A simple dusting of powdered sugar on these cookies adds a charming touch and a hint of extra sweetness. For an indulgent twist, drizzle melted chocolate or peanut butter over the top to create enticing visual appeal and a flavor boost.
Side Dishes
The rich and sweet nature of the cookies pairs beautifully with a cold glass of milk or a cup of black coffee. For a cozy snack, serve alongside fresh fruit or yogurt to balance the sweetness.
Creative Ways to Present
For parties, arrange these cookies on a rustic wooden board alongside small bowls of extra peanut butter cups and nuts. Alternatively, sandwich two cookies together with peanut butter or chocolate ganache for an irresistible treat that looks just as good as it tastes.
Make Ahead and Storage
Storing Leftovers
Store your leftover cookies in an airtight container at room temperature for up to a week. Keeping them sealed prevents them from drying out, preserving that incredible chewy texture.
Freezing
If you want to keep these cookies longer, freeze them in a single layer on a baking sheet first, then transfer to a freezer-safe bag or container. They’ll stay fresh for up to three months and thaw quickly at room temperature.
Reheating
To refresh your cookies, warm them gently in the microwave for 10 to 15 seconds. This brings back that freshly-baked softness and slightly melted peanut butter cup goodness, making each bite feel brand new.
FAQs
Can I use crunchy peanut butter instead of creamy?
While creamy peanut butter is recommended for a smooth dough, crunchy can be used if you like a bit of texture in your cookies. Just expect a slightly different mouthfeel with small peanut bits.
What if I don’t have miniature peanut butter cups?
If miniature peanut butter cups aren’t handy, chop up regular-sized ones. You’ll still get delicious pockets of melty chocolate and peanut butter, though the distribution might be less uniform.
Are these cookies suitable for vegans?
This recipe can easily be adapted for vegans by swapping the egg with a flax egg and using dairy-free butter and milk alternatives. The cookies will still be just as tasty and satisfying.
How do I prevent cookies from spreading too much?
Chill the dough for about 30 minutes before baking. This firms up the butter and peanut butter, helping the cookies hold their shape better during baking.
Can I make these cookies gluten-free?
You can substitute the all-purpose flour with a gluten-free baking flour blend. Just check to ensure it has baking powder or soda included, or add them separately. Texture might vary slightly but flavor remains wonderful.
Final Thoughts
You truly can’t go wrong with this Mouthwatering Peanut Butter Cup Cookies for Sweet Cravings Recipe. It’s a delightful mix of familiar favorites that come together to create a cookie that’s tender, rich, and bursting with flavor. Next time you want to surprise yourself or loved ones with a sweet treat, dive into this recipe — your taste buds will thank you!
Print
Mouthwatering Peanut Butter Cup Cookies for Sweet Cravings Recipe
- Prep Time: 15 minutes
- Cook Time: 12 minutes
- Total Time: 27 minutes
- Yield: 12 servings
- Category: Dessert
- Method: Baking
- Cuisine: American
Description
These Mouthwatering Peanut Butter Cup Cookies combine the rich creaminess of peanut butter with chunks of chocolate-covered peanut butter cups for a decadent treat. Soft yet slightly chewy, these cookies are perfect for satisfying sweet cravings with a delightful blend of flavors and textures.
Ingredients
Dry Ingredients
- 2 cups all-purpose flour
- 1 teaspoon salt
- 1 teaspoon baking soda
Wet Ingredients
- 1 cup butter, softened (can be replaced with margarine)
- 1 cup creamy peanut butter
- 1 cup granulated sugar
- 1 cup brown sugar, packed (light brown preferred)
- 1 large egg, beaten (or flax egg for vegan option)
- 1 teaspoon pure vanilla extract
- 2 tablespoons milk (or almond milk for dairy-free)
Add-ins
- 1 cup miniature chocolate-covered peanut butter cups, unwrapped
Instructions
- Preheat the Oven: Set your oven temperature to 350°F (175°C) to get it ready for baking the cookies.
- Mix Dry Ingredients: In a medium bowl, combine the flour, salt, and baking soda thoroughly to ensure even distribution.
- Cream Butter and Sugars: In a large bowl, beat together the softened butter, creamy peanut butter, granulated sugar, and brown sugar until the mixture is smooth and creamy.
- Add Egg and Vanilla: Beat in the beaten egg and pure vanilla extract into the butter and sugar mixture until fully blended and smooth.
- Combine Flour Mixture: Gradually incorporate the dry flour mixture into the wet ingredients, mixing gently until just combined, avoiding overmixing.
- Mix in Milk: Stir the milk (or almond milk) into the dough until it is fully incorporated and the dough is smooth.
- Fold in Peanut Butter Cups: Carefully fold in the miniature chocolate-covered peanut butter cups to distribute them evenly throughout the dough.
- Form Cookies: Drop spoonfuls of the cookie dough onto a baking sheet lined with parchment paper, spacing them adequately to allow for spreading.
- Bake: Bake the cookies in the preheated oven for 10-12 minutes, or until the edges turn a light golden brown.
- Cool: Let the cookies cool on the baking sheet for a few minutes before transferring them to a wire cooling rack to cool completely.
Notes
- Do not substitute all-purpose flour with whole wheat as it will result in denser cookies.
- Use creamy peanut butter to ensure smooth dough consistency.
- For a vegan alternative, replace the egg with a flax egg and use almond milk instead of regular milk.
- Make sure to unwrap the miniature peanut butter cups before folding them into the dough.
- Use pure vanilla extract for the best flavor.
- Let cookies cool on the baking sheet initially to prevent breaking before transferring to a rack.

