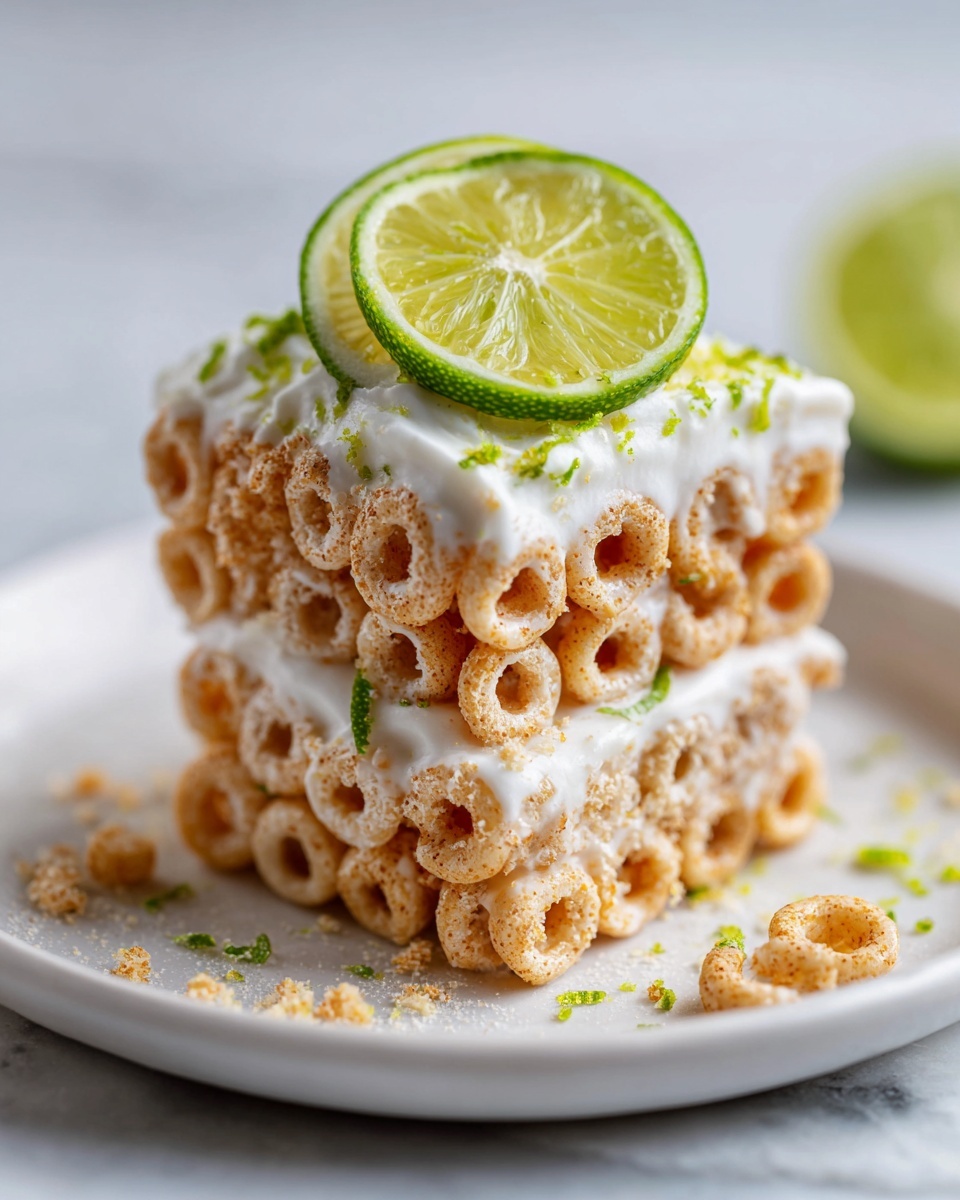
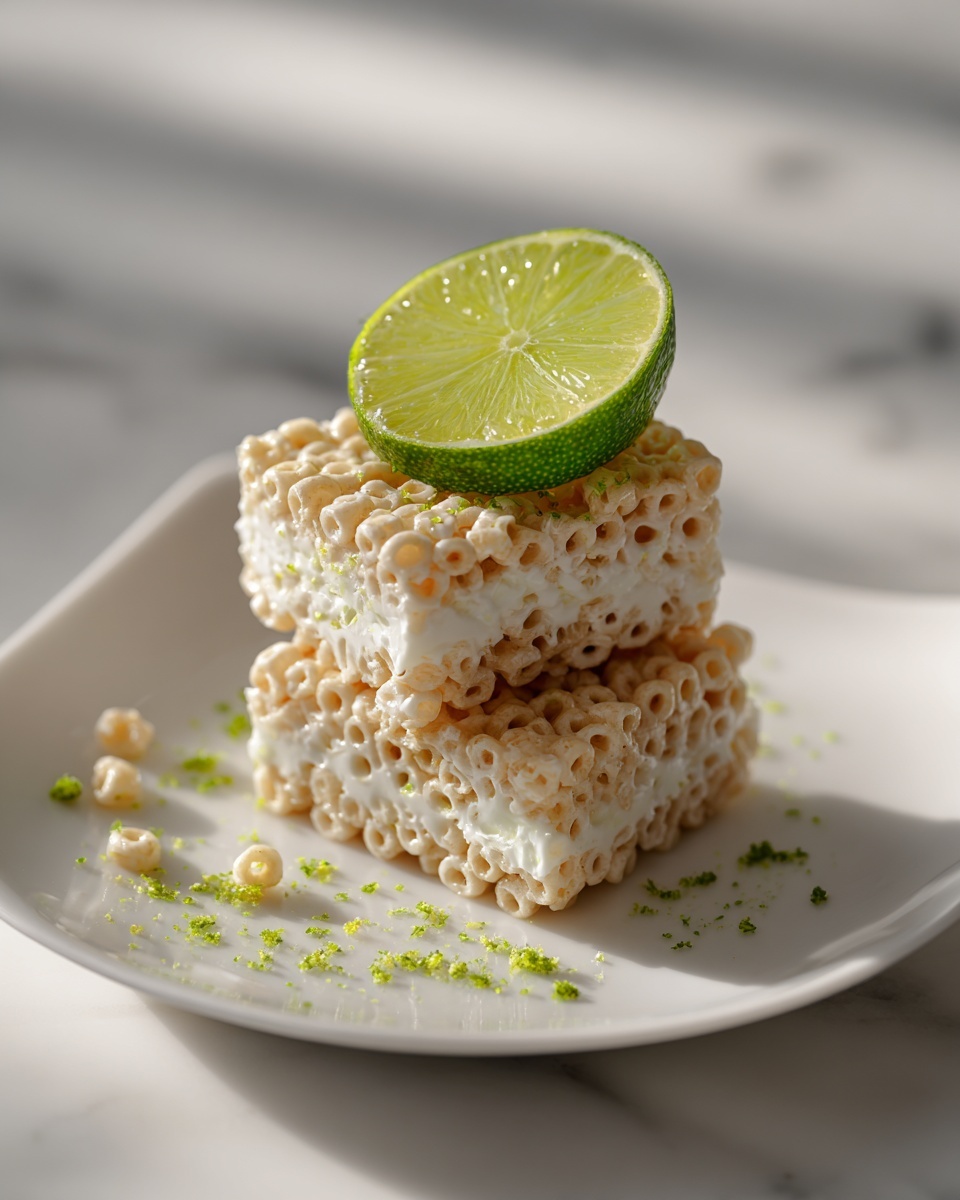
If you love a twist on a classic treat with a burst of refreshing citrus, the Key Lime Pie Rice Krispie Treats Recipe is going to become your new obsession. These lively bars combine the nostalgic, crispy, gooey goodness of traditional Rice Krispie treats with the bright tang of fresh lime juice and zest. The result is a delightful balance of sweet, tart, and creamy flavors that dance on your tongue and bring a sunny smile with every bite. Whether you’re looking for a fun dessert to share or a playful snack to brighten your day, this recipe brings the best of both worlds in one irresistibly chewy square.
Ingredients You’ll Need
With just a handful of simple ingredients, this recipe proves that you don’t need complexity to create something special. Each element plays a key role in flavor and texture, giving you a treat that’s crisp, tangy, and satisfyingly sweet.
- 3 tbsp butter: Adds richness and helps melt the marshmallows smoothly for that perfect gooey texture.
- 1 package mini marshmallows: The sticky superstar that holds everything together and creates that classic treat feel.
- 6 cups Rice Krispies cereal: Provides the signature crunch and lightness for every bite.
- 1/4 cup lime juice: Delivers a fresh and zesty note that brightens the entire recipe beautifully.
- 1/4 tsp lime zest: Packs concentrated citrus flavor, enhancing the key lime pie vibe powerfully.
- 1/2 cup white chocolate chips (optional): When drizzled, this adds a creamy sweetness that complements the tart lime wonderfully.
How to Make Key Lime Pie Rice Krispie Treats Recipe
Step 1: Melt the Butter and Marshmallows
Start by melting the butter in a large pot over medium heat. Once melted, toss in the mini marshmallows and stir constantly until everything is smooth and silky. This gooey base is essential for that classic chewy texture we all love.
Step 2: Add Lime Juice and Zest
Remove the pot from heat and quickly mix in the lime juice and lime zest. This step infuses the marshmallow mixture with the distinct and refreshing Key lime pie flavor that sets this recipe apart from any other Rice Krispie treat you’ve tried.
Step 3: Stir in Rice Krispies Cereal
Pour in the Rice Krispies cereal and gently fold it into the marshmallow mixture until every crispy bit is well coated. This ensures that each square has the perfect balance of crunch and chewy sweetness throughout.
Step 4: Press into Baking Pan
Transfer the mixture into a greased 9×13-inch baking pan. Use a spatula or your hands to press it down firmly and evenly. This will help the treats set nicely and makes them easier to cut later.
Step 5: Cool Completely
Allow the mixture to cool at room temperature until set. This step is crucial so the treats hold their shape and become easy to slice into perfect squares.
Step 6: Add White Chocolate Drizzle (Optional)
If you want to elevate your Key Lime Pie Rice Krispie Treats recipe, melt the white chocolate chips and drizzle over the cooled bars. The creamy sweetness from the white chocolate beautifully contrasts the tartness of the lime, making these even more irresistible.
How to Serve Key Lime Pie Rice Krispie Treats Recipe

Garnishes
Enhance your presentation by adding a sprinkle of extra lime zest on top or a few small dollops of whipped cream. You could also toss on some finely chopped toasted coconut for a tropical vibe. These simple touches make the treat feel fresh and special, impressing everyone who tries them.
Side Dishes
These treats shine best on their own as a grab-and-go snack or dessert. But if you want to create a fun spread, pair them with a scoop of vanilla ice cream or a light fruit salad made with berries and melon. The cool creaminess or juicy fruits will complement the zesty lime flavor beautifully.
Creative Ways to Present
Want to wow your guests? Cut the bars into bite-sized squares and serve them on a platter sprinkled with edible flowers or lime slices. You can also layer them with key lime mousse in clear jars for a layered dessert that looks as stunning as it tastes. Presentation makes this recipe a perfect fit for parties or special occasions.
Make Ahead and Storage
Storing Leftovers
You can store Key Lime Pie Rice Krispie Treats Recipe leftovers in an airtight container at room temperature for up to three days. Keeping them well sealed preserves that chewy texture and freshness, so you’ll enjoy every bite just like the day you made them.
Freezing
If you want to keep these treats longer, wrap them tightly in plastic wrap and place them in an airtight freezer bag or container. They freeze well for up to two months. When you want a treat, just thaw them at room temperature for a couple of hours and enjoy.
Reheating
Though these treats are best served cool or at room temperature, you can soften them by microwaving for a few seconds if desired—just be careful not to overheat, or they may become too sticky. A gentle warm-up helps bring back that soft, gooey texture momentarily.
FAQs
Can I use regular marshmallows instead of mini marshmallows?
Absolutely! Regular marshmallows work just fine in the Key Lime Pie Rice Krispie Treats Recipe. Just give them a bit more time to melt completely and stir until smooth.
Is there a substitute for lime juice if I can’t find fresh limes?
Fresh lime juice is best, but bottled lime juice can work in a pinch. Just be sure it’s 100% lime juice without added sugars for that authentic tangy flavor.
Can I make this recipe dairy-free?
Yes! Replace the butter with a plant-based margarine or coconut oil. The creamy texture might vary slightly, but the treats will still be delicious and flavorful.
What if I don’t have white chocolate chips for the drizzle?
No worries! You can skip the drizzle or substitute with a lime-flavored glaze, melted regular chocolate, or even a dusting of powdered sugar for a simple finish.
How do I get the treats to cut cleanly?
Make sure the bars are completely cool and set before cutting. Use a sharp knife and wipe it clean between cuts to get neat squares without too much crumbling.
Final Thoughts
If you’re craving a fun, nostalgic treat with a zesty twist, the Key Lime Pie Rice Krispie Treats Recipe is a must-try. It’s simple, bright, and delivers big flavor without fuss. I encourage you to make a batch today and experience the perfect marriage of tangy lime and crispy marshmallow magic firsthand. You won’t regret it!
Print
Key Lime Pie Rice Krispie Treats Recipe
- Prep Time: 10 minutes
- Cook Time: 10 minutes
- Total Time: 20 minutes
- Yield: 16 servings
- Category: Dessert
- Method: Stovetop
- Cuisine: American
Description
These Key Lime Pie Rice Krispie Treats are a zesty twist on the classic marshmallow cereal bars, combining the tangy flavors of lime juice and zest with the sweet, gooey texture of traditional Rice Krispies treats. Perfect as a vibrant, refreshing dessert or snack, they are easy to make in just 20 minutes and serve 16 people.
Ingredients
Main Ingredients
- 3 tbsp butter
- 1 package mini marshmallows (about 10 oz)
- 6 cups Rice Krispies cereal
- 1/4 cup lime juice
- 1/4 tsp lime zest
Optional Topping
- 1/2 cup white chocolate chips
Instructions
- Melt Butter and Marshmallows: In a large pot over medium heat, melt the butter and mini marshmallows together, stirring constantly until the mixture is smooth and fully melted.
- Add Lime Flavor: Remove the pot from the heat and stir in the lime juice and lime zest thoroughly to infuse the mixture with fresh, citrusy flavor.
- Combine with Cereal: Add the Rice Krispies cereal to the marshmallow mixture, stirring gently until all the cereal is evenly coated.
- Press into Pan: Transfer the mixture to a greased 9×13-inch baking pan and press it down firmly using a spatula or clean hands to create an even layer.
- Cool Completely: Let the mixture cool completely at room temperature to set before cutting into squares.
- Optional Chocolate Drizzle: If desired, melt the white chocolate chips and drizzle them over the cooled bars to add a sweet, decorative finish.
Notes
- Use fresh lime juice for the best citrus flavor.
- Press the mixture firmly into the pan to help the treats hold together.
- Allow the treats to cool completely before cutting to prevent crumbling.
- White chocolate drizzle is optional but adds sweetness and visual appeal.
- Store treats in an airtight container at room temperature for up to 3 days.


