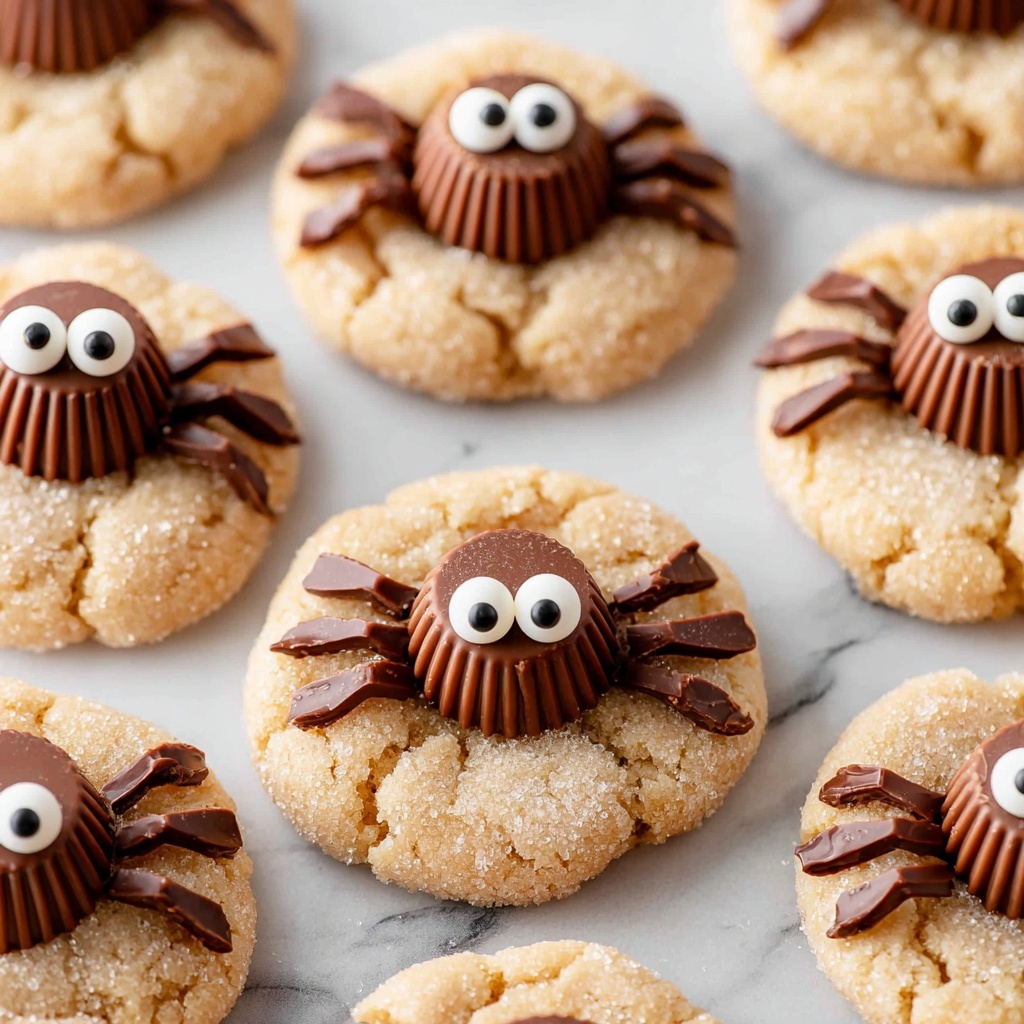
If you are looking for a fun, spooky, and utterly adorable treat to brighten up your Halloween celebrations, this Halloween Spider Cookies Recipe is an absolute must-try. These creepy-crawly cookies blend the rich flavors of chocolate or peanut butter cookies with mini peanut butter cups and candy eyes, creating a dessert that is both festive and delicious. Perfect for parties, kids’ activities, or just a sweet seasonal snack, this recipe is as simple as it is charming — each bite offers a perfect balance of texture and flavor that will have everyone coming back for more.
Ingredients You’ll Need
The beauty of this recipe lies in its simplicity and careful selection of ingredients, each bringing something special to the table. Whether you choose to bake your own cookies or use store-bought ones, every component plays a role in making these spider cookies spooky, tasty, and fun.
- Chocolate or peanut butter cookies: These serve as the sturdy, flavorful base for your spiders and can be homemade or store-bought for convenience.
- Mini peanut butter cups (unwrapped): These form the body of the spiders, adding a deliciously creamy peanut butter center.
- Semisweet chocolate chips (melted): Essential for piping the spider legs and attaching the candy eyes, melted chocolate adds rich flavor and helps hold everything together.
- Candy eyes: These create the cute and creepy spider faces, perfect for giving your cookies character.
- Optional black or brown decorating gel: Great for extra spider leg detail or adding spooky touches like fangs or drips.
How to Make Halloween Spider Cookies Recipe
Step 1: Bake or Prepare Your Cookies
Start by either baking about 24 of your favorite chocolate or peanut butter cookies or grabbing a batch of store-bought ones. The cookies need to be completely cooled before you move on to decorating; this prevents the melted chocolate from melting further or running everywhere. Crisp, sturdy cookies make the best canvas for your spooky spiders.
Step 2: Attach the Spider Bodies
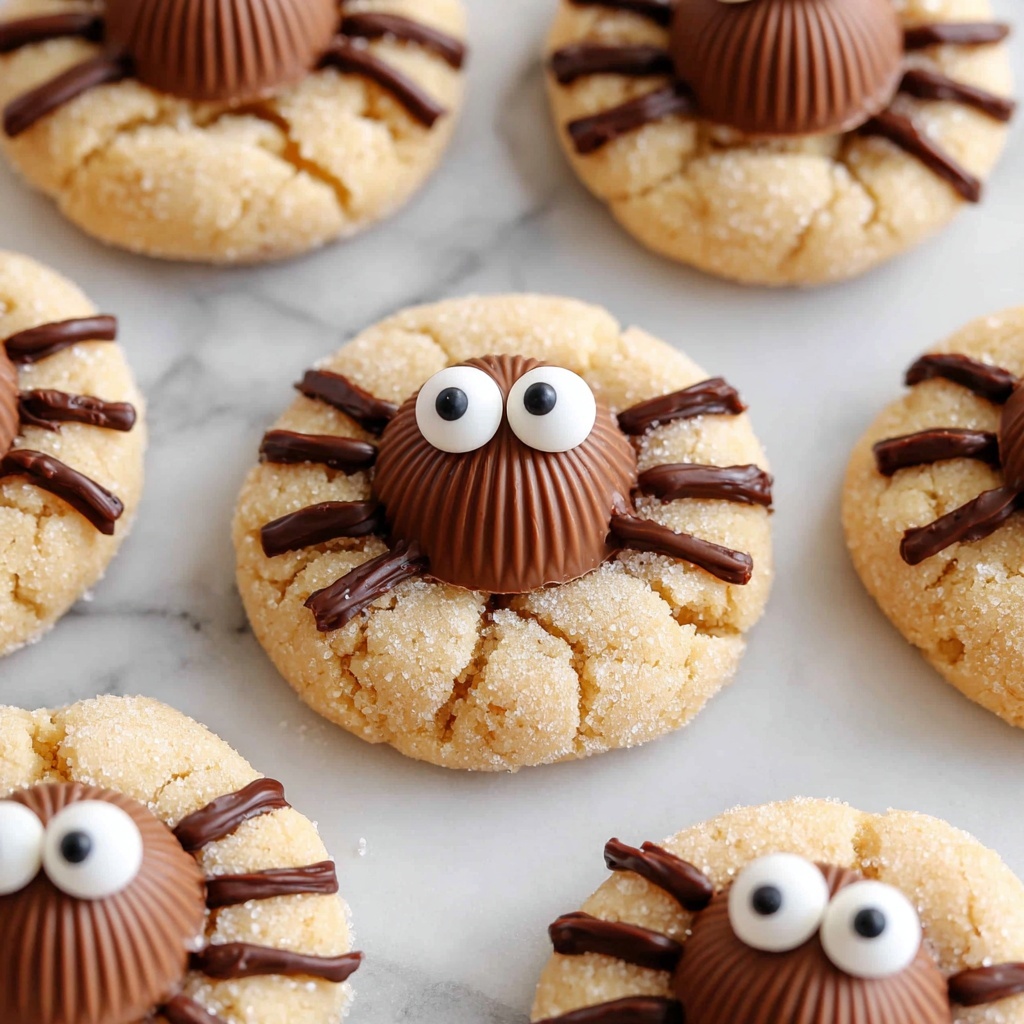
Press one mini peanut butter cup gently into the center of each cookie. This peanut butter cup becomes the spider’s body, giving a delightful, creamy surprise inside every cookie. Make sure the cups are unwrapped and not too soft to ensure they hold their shape perfectly.
Step 3: Pipe the Spider Legs
Melt the semisweet chocolate chips and transfer the smooth chocolate to a piping bag or a zip-top bag with a tiny corner snipped off. Carefully pipe eight spider legs extending outward from each peanut butter cup across the cookie base. Even if your piping isn’t perfect, the charm of these spider legs adds personality and fun to each treat.
Step 4: Add the Candy Eyes
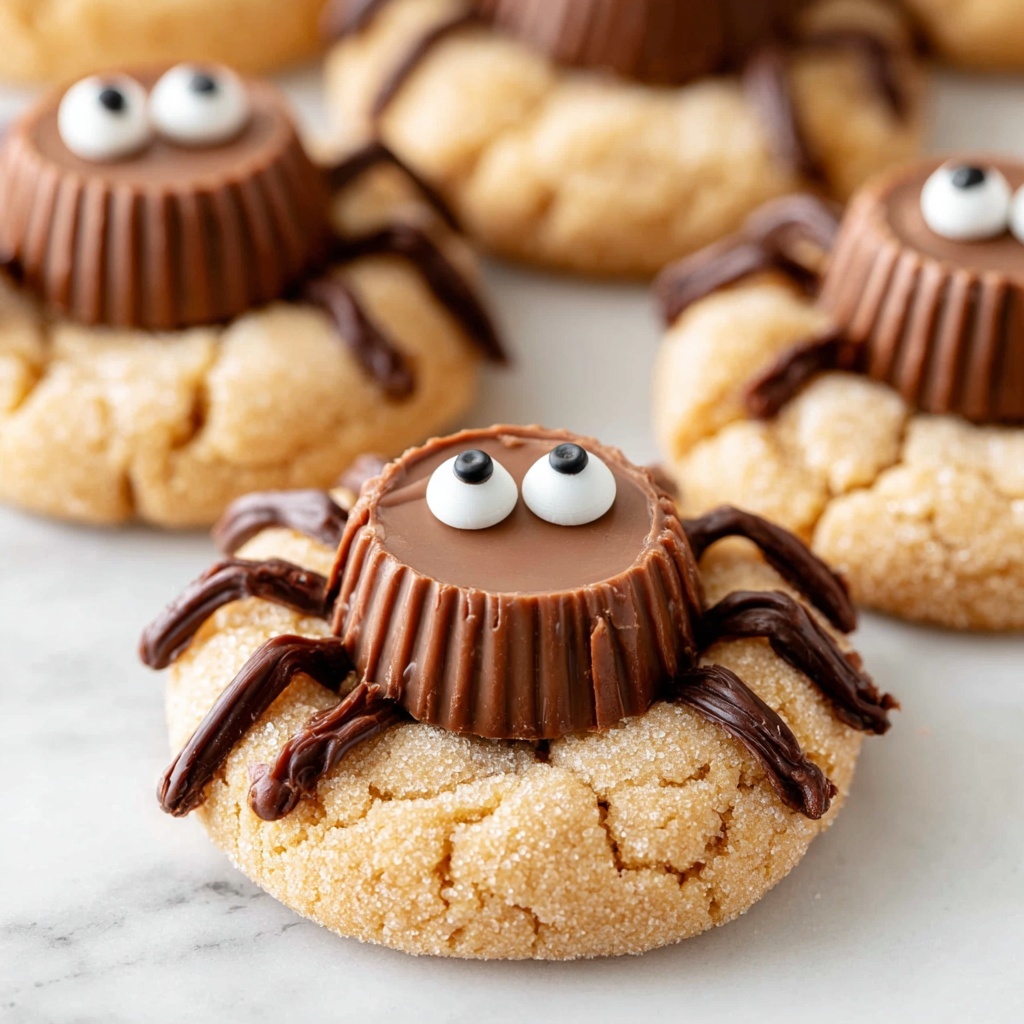
Use a small dab of melted chocolate as glue to attach two candy eyes to each peanut butter cup body. This step brings your creepy crawlers to life and turns everyday cookies into Halloween magic. The eyes don’t have to be perfectly symmetrical; their quirky placement can add to the spooky fun!
Step 5: Let the Chocolate Set
Allow the decorated cookies to rest at room temperature for 15 to 20 minutes, or pop them into the fridge for about 5 minutes to speed up the setting process. This step ensures the spider legs and eyes stay firmly in place so you can transport and serve them with ease.
How to Serve Halloween Spider Cookies Recipe
Garnishes
To make your Halloween Spider Cookies Recipe even more festive, consider using black or brown decorating gel to enhance the spider legs or add little fangs and dripping “blood” effects. A light drizzle of red gel can give your spiders a creepy yet cute look, perfect for a Halloween party table.
Side Dishes
These spider cookies pair wonderfully with a tall glass of cold milk or a warm cup of hot chocolate spiced with cinnamon. For a Halloween-themed party, serve alongside other themed treats like ghost-shaped marshmallows or pumpkin spice cupcakes to create a spooky dessert spread everyone will love.
Creative Ways to Present
Try arranging your spider cookies on a platter decorated with faux spider webs made from cotton candy or sugar spun threads for an eerie effect. You could also serve them in small treat bags decorated with Halloween stickers for party favors. Adding googly eyes to the serving tray or placing the cookies on a bed of crushed chocolate cookies to mimic dirt can really amp up the fun presentation.
Make Ahead and Storage
Storing Leftovers
Halloween Spider Cookies Recipe leftovers should be stored in an airtight container at room temperature to keep cookies crisp and chocolate decorations intact. They can typically stay fresh for 3 to 5 days, making them great for enjoying throughout the Halloween season.
Freezing
If you want to make these cookies ahead of time, you can freeze them after assembling. Place them in a single layer on a baking sheet to freeze initially to prevent sticking, then transfer to a freezer-safe container or bag. To enjoy, thaw at room temperature for about an hour or overnight in the fridge before serving.
Reheating
Reheating is not necessary since these are best served at room temperature. If desired, you can warm them slightly in a low-temperature oven for a few minutes to get them soft and melty, but be careful not to melt the candy eyes or distort the spider legs.
FAQs
Can I use other types of cookies for the base?
Absolutely! While chocolate or peanut butter cookies work best, you can also use sandwich cookies like Oreos for a quicker option or any sturdy cookie that can hold the spider decorations without breaking.
What if I’m allergic to peanuts?
Great question! You can substitute the mini peanut butter cups with mini chocolate candies or small round chocolates to avoid peanut allergens while still creating the spider body effect.
Can I make these cookies without candy eyes?
Yes, you can skip candy eyes if you prefer. Alternatively, use little dots of white and dark chocolate to create eyes or any small edible decoration you have on hand.
How far in advance can I decorate the cookies?
You can decorate the cookies up to a day ahead and keep them in an airtight container to preserve freshness and chocolate crispness. Decorating too early might cause the candy eyes or gel details to shift or dull.
Is this recipe kid-friendly?
Absolutely! Kids will have a blast helping with the decorating steps like pressing on peanut butter cups and adding candy eyes. Just supervise piping the melted chocolate to keep things safe and fun.
Final Thoughts
This Halloween Spider Cookies Recipe is such a delightful and easy way to bring some spooky spirit to your kitchen while indulging in a sweet treat. Whether you’re baking with kids, preparing for a party, or just craving an adorable themed dessert, these spider cookies offer fun, flavor, and fuss-free preparation. Give them a try and watch these little creepy-crawly delights disappear in no time!
Print
Halloween Spider Cookies Recipe
- Prep Time: 20 minutes
- Cook Time: 10 minutes (if baking cookies)
- Total Time: 30 minutes
- Yield: 24 cookies
- Category: Dessert
- Method: No-Cook
- Cuisine: American
- Diet: Vegetarian
Description
Halloween Spider Cookies are a spooky and fun treat perfect for Halloween parties and kids’ activities. These creative cookies combine chocolate or peanut butter cookies topped with mini peanut butter cups, decorated with melted chocolate spider legs and candy eyes to create adorable and creepy spider designs.
Ingredients
Cookies
- 1 batch (about 24) chocolate or peanut butter cookies (store-bought or homemade)
Spider Toppings
- 24 mini peanut butter cups (unwrapped)
- ½ cup semisweet chocolate chips (melted)
- 48 candy eyes
- Optional: black or brown decorating gel for legs
Instructions
- Bake Cookies: Bake your favorite chocolate or peanut butter cookies according to recipe or package instructions and let them cool completely before decorating.
- Add Peanut Butter Cups: Once cooled, press one mini peanut butter cup into the center of each cookie gently to avoid breaking the cookie.
- Pipe Spider Legs: Transfer the melted chocolate chips to a piping bag or zip-top bag with a small corner cut off. Carefully pipe 8 spider legs extending outward from each peanut butter cup over the cookie surface.
- Attach Candy Eyes: Use a small dab of melted chocolate to stick two candy eyes onto each peanut butter cup, creating the spider’s face.
- Set the Chocolate: Let the decorated cookies rest at room temperature for 15–20 minutes or chill in the fridge for about 5 minutes until the chocolate fully sets.
- Serve and Enjoy: Once the chocolate has hardened, your Halloween Spider Cookies are ready to serve for a festive and fun treat.
Notes
- For extra creepiness, drizzle red gel or add fangs using icing for a spooky effect.
- You can use sandwich cookies like Oreos for a quicker base instead of baking your own cookies.
- These cookies are perfect for Halloween parties, school events, and fun activities with kids.


