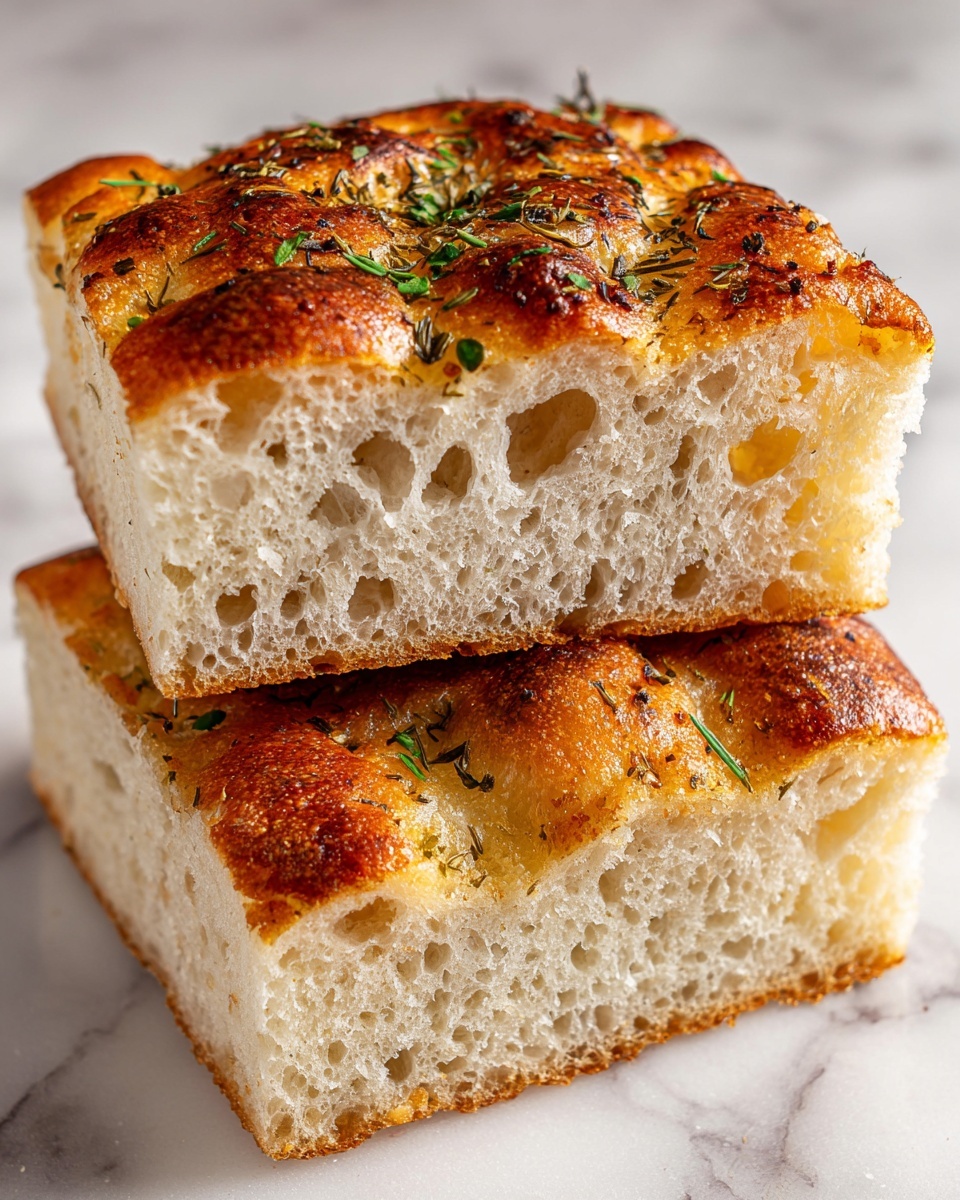
If you are searching for a delightful and authentic bread to bring a taste of the Balkan coast right into your kitchen, this Croatian Lepinja Bread Recipe is an absolute must-try. Soft on the inside with a lightly crisp crust, lepinja is a traditional flatbread that carries a beautiful simplicity and versatility. Whether you enjoy it fresh from the oven or use it to accompany your favorite grilled meats and spreads, this bread will instantly become a cherished homemade staple. Let me take you through every step to help you recreate this classic Croatian delight with ease and confidence.
Ingredients You’ll Need
The magic of this Croatian Lepinja Bread Recipe lies in its simplicity. Using just a handful of basic ingredients, each plays an essential role in creating the perfect texture and flavor. From the rich olive oil adding a subtle fruitiness to the yeast giving that beautiful rise, every element works harmoniously together.
- 3 1/2 cups all-purpose flour: The foundation of the bread, providing structure and chewiness.
- 1 tablespoon instant yeast: Ensures the dough rises beautifully, giving the bread its soft, airy crumb.
- 1 1/2 teaspoons salt: Enhances flavor and balances the sweetness.
- 1 tablespoon olive oil: Adds moisture and subtle richness to the dough.
- 1 1/2 cups warm water (around 110°F/43°C): Activates the yeast and hydrates the flour for a perfect dough.
- 1 teaspoon sugar: Feeds the yeast for better fermentation and a slight sweetness.
How to Make Croatian Lepinja Bread Recipe
Step 1: Activate the Yeast
Begin by dissolving the sugar and instant yeast in warm water. This rest period lets the yeast bloom and signals that it’s ready to work its magic in your dough. You’ll notice a frothy layer forming on top after about 5 minutes, which is a great sign your yeast is alive and eager to bake.
Step 2: Combine Dry Ingredients
While the yeast blooms, mix your all-purpose flour and salt in a large bowl. The salt not only seasons the bread but also strengthens the gluten, helping lepinja develop its lovely chewy texture.
Step 3: Mix Wet and Dry Ingredients
Add the frothy yeast mixture and olive oil into the flour and salt blend. Stir everything until a loose dough forms. This step is where the ingredients begin their delicious transformation.
Step 4: Knead the Dough
Transfer the dough to a floured surface and knead it for 5 to 7 minutes until smooth and elastic. If the dough feels sticky, gently sprinkle in more flour, a little at a time. Proper kneading helps develop gluten, which is key to the bread’s texture.
Step 5: First Rise
Cover your dough with a clean cloth or plastic wrap, then let it rest in a warm spot for about 1 hour. During this time, the dough will double in size as the yeast ferments, creating those characteristic air pockets inside your lepinja.
Step 6: Prepare for Shaping
Once risen, punch down the dough to release excess air. Divide it into 8 even portions. Shape each into a smooth ball, then gently flatten into discs about half an inch thick. This shape will bake into the signature flat, puffed bread classic to lepinja.
Step 7: Second Rise
Place the discs on a parchment-lined or floured baking sheet and cover them again. Allow them to rise for another 15 to 20 minutes. This final proofing ensures your lepinja will be soft and light when baked.
Step 8: Make Shallow Cuts
Before baking, use a sharp knife or dough scraper to make shallow cuts on the tops of each disc. These designs are more than decorative; they allow the bread to expand evenly without cracking unpredictably in the oven.
Step 9: Bake to Perfection
Preheat your oven to a hot 475°F (245°C). For a delightfully crisp crust, place your bread directly on a preheated baking stone or sheet. Bake the lepinja for 12 to 15 minutes until golden brown and puffed up, filling your kitchen with the most irresistible aroma.
Step 10: Final Touches
Remove the warm bread from the oven and let it cool just enough to handle. For an extra shine and a touch of depth in flavor, brush the tops with a little olive oil while still warm. Your Croatian Lepinja Bread is now ready to be devoured!
How to Serve Croatian Lepinja Bread Recipe
Garnishes
Lepinja is delicious on its own, but you can elevate it by adding some simple garnishes. A sprinkle of sesame seeds or some flaky sea salt on top before baking adds a beautiful crunch and visual appeal. Fresh herbs like rosemary or thyme incorporated into the dough or sprinkled on top after baking also bring wonderful aromatic notes.
Side Dishes
This bread pairs perfectly with hearty soups, stews, or grilled meats typical of Croatian cuisine. Think along the lines of ćevapi (grilled minced meat), fresh ajvar spread, or creamy cheese dips. Lepinja’s soft yet slightly chewy texture makes it ideal for mopping up rich sauces or wrapping around your favorite fillings.
Creative Ways to Present
Turn your Croatian Lepinja Bread into charming mini sandwiches by stuffing each with grilled vegetables, tender meats, or vibrant spreads. You can also slice them horizontally, toast lightly, and serve as a side for breakfast or a snack platter full of olives, cheeses, and cured meats for a Mediterranean-inspired spread.
Make Ahead and Storage
Storing Leftovers
If you have leftover lepinja, keep it fresh by storing it in an airtight container or resealable bag at room temperature. It’s best enjoyed within two days to maintain its softness and flavor.
Freezing
For longer storage, freeze the bread in a sealed freezer bag. Wrap each piece individually or stack them with parchment paper in between. Frozen lepinja stays good for up to one month and can be thawed quickly before use.
Reheating
To revive your Croatian Lepinja Bread, warm it in a preheated oven at 350°F (175°C) for about 5 to 7 minutes. This restores its light crust and soft interior, just like fresh from the oven.
FAQs
What makes lepinja different from other flatbreads?
Lepinja’s unique fluffiness combined with a thin, slightly crisp crust distinguishes it from other flatbreads that are either very thin and crispy or dense. Its characteristic rise comes from the yeast and resting periods, creating a soft interior perfect for sandwiches or dipping.
Can I use bread flour instead of all-purpose flour?
Yes, you can substitute bread flour, which has a higher protein content. This will result in a slightly chewier texture. However, all-purpose flour produces a tender crumb that is traditional for lepinja.
Is it necessary to use instant yeast?
Instant yeast works best because it doesn’t require proofing and blends easily into the flour. If you only have active dry yeast, it will still work, but you should dissolve it in warm water and sugar first before mixing it into the dough.
How do I get a crispier crust on my lepinja?
Using a preheated baking stone or placing the bread directly on the oven rack can help achieve a crisper bottom crust. Brushing with olive oil right after baking adds a nice sheen and a bit of crunch as well.
Can I make this dough without olive oil?
While olive oil adds a lovely flavor and softness, you can omit it if necessary. The bread will be slightly less tender and less rich, but the recipe will still produce a tasty lepinja bread.
Final Thoughts
This Croatian Lepinja Bread Recipe is a beautiful way to bring a little slice of Croatian tradition into your home. From the warm, yeasty fragrance that fills your kitchen to the tender, pillowy bites that follow, it is a bread that invites sharing and enjoyment at any table. I truly hope you fall in love with making lepinja and discover how wonderfully versatile and comforting this humble bread can be.
Print
Croatian Lepinja Bread Recipe
- Prep Time: 25 minutes
- Cook Time: 15 minutes
- Total Time: 1 hour 45 minutes
- Yield: 8 servings
- Category: Bread
- Method: Baking
- Cuisine: Croatian
Description
Traditional Croatian Lepinja Bread is a soft, fluffy flatbread perfect for sandwiches or as a side. This simple recipe uses basic ingredients like flour, yeast, olive oil, and warm water to create a golden, slightly crispy crust with a tender interior. Ideal for serving with grilled meats, cheeses, or traditional Balkan fillings.
Ingredients
For the Dough
- 3 1/2 cups all-purpose flour
- 1 tablespoon instant yeast
- 1 1/2 teaspoons salt
- 1 tablespoon olive oil
- 1 1/2 cups warm water (around 110°F/43°C)
- 1 teaspoon sugar
Instructions
- Activate Yeast: In a small bowl, combine warm water, sugar, and instant yeast. Stir until the yeast dissolves and let it sit for about 5 minutes until it becomes frothy, indicating the yeast is active.
- Mix Dry Ingredients: In a large mixing bowl, combine the all-purpose flour and salt. This forms the base of your dough.
- Combine Wet and Dry Ingredients: Add the frothy yeast mixture and olive oil to the dry ingredients. Stir together until the dough starts forming.
- Knead Dough: Knead the dough for 5-7 minutes on a floured surface until it becomes smooth and elastic. If the dough is too sticky, add flour one tablespoon at a time.
- First Rise: Cover the dough with a clean cloth or plastic wrap and let it rise in a warm place for about 1 hour, or until it has doubled in size.
- Prepare Oven: Preheat your oven to 475°F (245°C). If available, place a baking stone or baking sheet inside to preheat for better crust.
- Shape Dough: Punch down the risen dough to release air. Divide into 8 equal portions, shape each into a ball, then flatten into thick discs about 1/2 inch thick.
- Second Rise: Arrange the discs on a parchment-lined or floured baking sheet. Cover them with a cloth and let rise an additional 15-20 minutes.
- Score Dough: Using a sharp knife or dough scraper, make a few shallow cuts on top of each disc to allow expansion while baking.
- Bake: Place the bread in the preheated oven and bake for 12-15 minutes until golden brown and puffed. For crispier crust, place directly on the baking stone.
- Cool and Serve: Remove from oven and let cool slightly. Optionally, brush tops with olive oil for extra flavor and shine before serving.
Notes
- Use warm water around 110°F (43°C) to properly activate the yeast without killing it.
- Adding olive oil enriches the bread and helps keep it soft.
- If you don’t have a baking stone, a heavy baking sheet preheated in the oven works well.
- Allowing the dough to rise twice helps develop texture and flavor.
- Shallow scoring prevents the bread from cracking unpredictably while expanding.


