
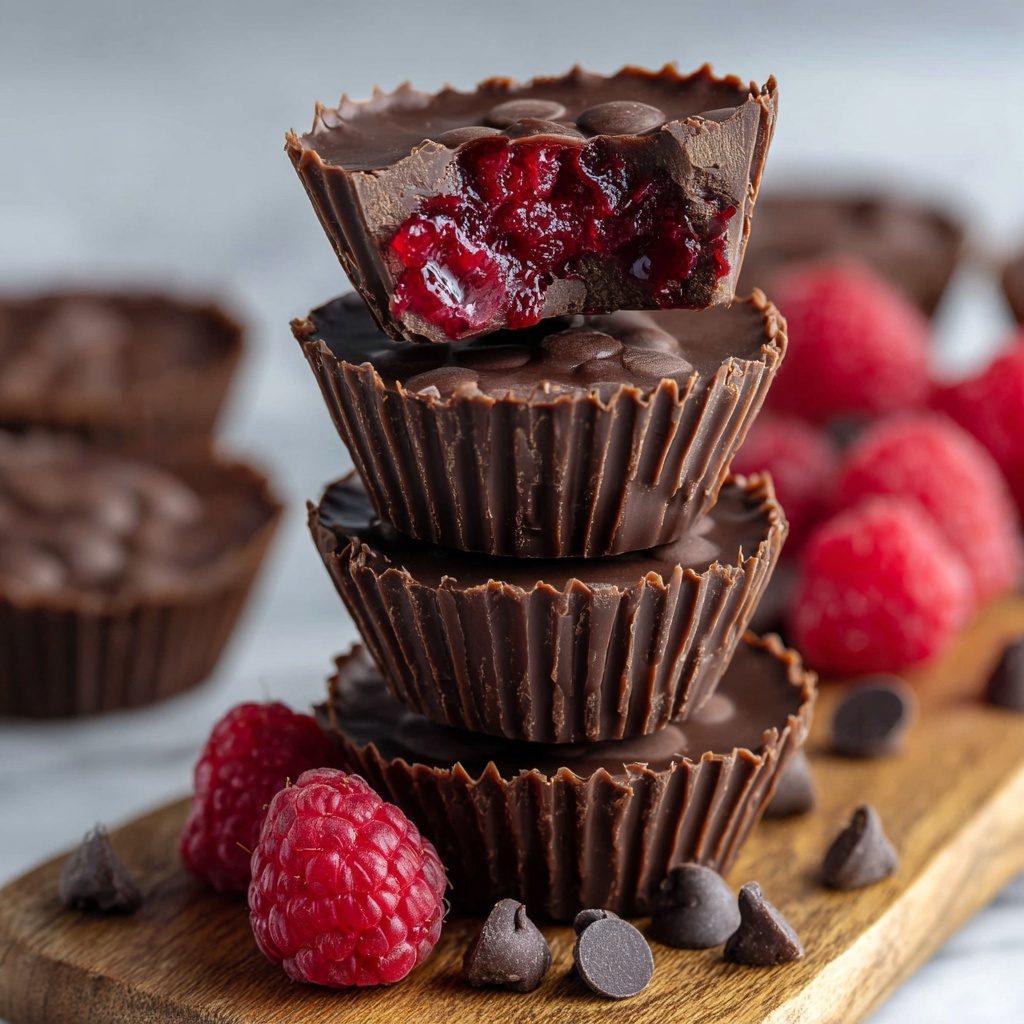
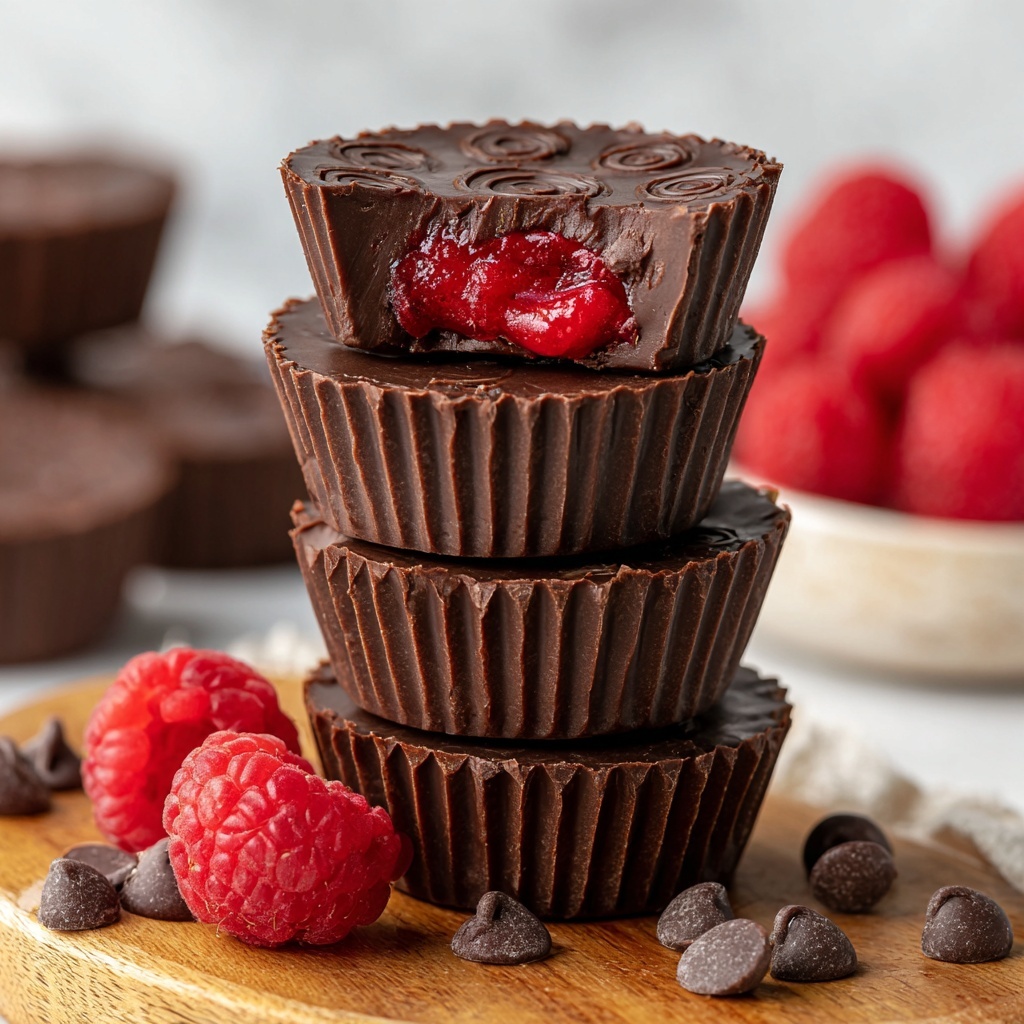
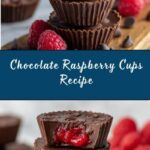
If you adore decadent treats that blend the rich allure of chocolate with the bright, tangy charm of fresh fruit, this Chocolate Raspberry Cups Recipe is destined to become your new favorite indulgence. Offering a luscious balance between creamy chocolate shells and a vibrant raspberry chia seed filling, these delightful little cups are not only a feast for your taste buds but also an impressive yet surprisingly simple dessert to whip up anytime you crave something sweet, refreshing, and elegant all at once.
Ingredients You’ll Need
Gathering the right ingredients is the key to nailing this recipe. Each element plays an essential role, whether it’s the fresh pop and natural sweetness of raspberries or the decadent smoothness of melted chocolate. Together, they create a perfect harmony of textures and flavors that make these cups utterly irresistible.
- 6 oz raspberries (fresh or frozen): The star fruit adding brightness and natural tartness to the filling.
- 1 tbsp chia seeds: These thicken the raspberry mixture beautifully and provide a subtle crunch and added nutrition.
- 2 tsp sweetener of choice: Customize the sweetness to your liking with honey, maple syrup, or any sweetener you prefer.
- 6 oz chocolate chips or chopped chocolate bars (about 1 cup): High-quality chocolate ensures smooth, rich cups that snap perfectly when bitten.
- Optional: 1 tsp vegetable oil or melted coconut oil: Helps achieve a glossy, silky texture in the melted chocolate.
How to Make Chocolate Raspberry Cups Recipe
Step 1: Prepare the Raspberry Filling
Start by mashing your raspberries thoroughly to break down the fruit for a smoother texture. Then, in a small saucepan over low heat, combine the mashed raspberries, chia seeds, and your chosen sweetener. Stir this mixture occasionally as it warms until it becomes hot and just begins to bubble. This gentle heating helps the chia seeds activate, thickening the filling while the raspberries release all their vibrant flavor. Remove from heat and allow the mixture to cool slightly before proceeding.
Step 2: Melt the Chocolate
While the filling is cooling, it’s time to melt your chocolate. Use a microwave-safe bowl or a double boiler for even melting. Heat the chocolate gently, stirring occasionally to avoid overheating and clumping. If you’ve opted to use vegetable or coconut oil, stir it in once the chocolate is almost melted to give that beautiful glossy finish and extra smoothness. This step is what transforms your chocolate into a luscious shell for your raspberry centers.
Step 3: Form the Chocolate Cups
Line a mini muffin tin with paper liners or prepare candy molds for shaping your cups. Carefully spoon about a teaspoon of the melted chocolate into each liner, using the back of your spoon or the edge to spread the chocolate up the sides, creating a thin shell. Pop the tray into the refrigerator or freezer for a few minutes until the chocolate fully firms up. This chilling step ensures sturdy cups that will hold the filling perfectly.
Step 4: Add the Raspberry Filling
Once your chocolate shells are set, gently spoon about two teaspoons of the raspberry filling into the center of each cup. The contrasting textures and flavors begin to come together at this stage, getting ready for their final chocolate layer. Be sure not to overfill to maintain a perfect balance and allow space for sealing.
Step 5: Seal the Cups
Top each raspberry-filled cup with the remaining melted chocolate, smoothing the surface to create an even seal. This final layer locks in the delicious filling and completes your elegant little desserts. Place the filled cups back in the refrigerator to chill until the chocolate is fully firm—this may take 10 to 15 minutes. Once set, your Chocolate Raspberry Cups Recipe is ready to dazzle!
How to Serve Chocolate Raspberry Cups Recipe
Garnishes
To give your Chocolate Raspberry Cups an extra touch of fabulous, consider garnishing with a few fresh raspberries, a light dusting of powdered sugar, or tiny mint leaves. These simple additions brighten the plate and echo the flavors inside, making each bite look as wonderful as it tastes.
Side Dishes
These cups shine on their own but also pair beautifully with a scoop of vanilla or raspberry sorbet, fresh fruit salad, or a creamy dollop of whipped cream. Serving alongside a cup of rich coffee or an herbal tea rounds out the experience wonderfully, balancing sweetness with a hint of warmth or freshness.
Creative Ways to Present
Try presenting the Chocolate Raspberry Cups in a decorative box for gifting, or arrange them on a beautiful serving platter with edible flowers or drizzles of raspberry coulis for parties. Alternatively, serve them in individual mini dessert jars layered with whipped cream or mousse for a playful twist.
Make Ahead and Storage
Storing Leftovers
Once prepared, simply store your Chocolate Raspberry Cups in an airtight container in the refrigerator. They’ll keep beautifully fresh for up to 4 days, making them a perfect make-ahead treat for gatherings or a sweet snack whenever the mood strikes.
Freezing
If you want to enjoy these cups later, freezing is a great option. Place them in an airtight container with parchment paper between layers and freeze for up to a month. Thaw in the refrigerator before serving to retain their delicate texture and fresh flavor.
Reheating
These cups are best enjoyed chilled or at room temperature. If you prefer, you can let them sit out for about 15 minutes to soften slightly; avoid microwaving as it can melt the chocolate unevenly and soften the filling too much.
FAQs
Can I use frozen raspberries for this recipe?
Absolutely! Frozen raspberries work perfectly and are often more convenient. Just be sure to thaw and drain any excess liquid before mashing to avoid a runny filling.
What type of chocolate is best for these cups?
High-quality dark or semi-sweet chocolate works best for a rich flavor balance. You can also use milk chocolate for a sweeter, creamier version, depending on your preference.
Are there any vegan or dairy-free options?
Yes! Use dairy-free chocolate chips and opt for coconut oil instead of vegetable oil. The filling ingredients are naturally vegan, making it easy to adapt.
Can I substitute chia seeds if I don’t have any?
Chia seeds help thicken and add texture, but if you don’t have them, you can try using ground flaxseeds or a small amount of cornstarch mixed with water as a thickener.
How long does it take to prepare these cups?
This Chocolate Raspberry Cups Recipe takes about 45 minutes from start to finish, including chilling time. It’s a manageable and rewarding project for a weekend treat or special occasion.
Final Thoughts
There’s something truly magical about the combination of chocolate and raspberries, and this Chocolate Raspberry Cups Recipe captures that magic in every bite. Whether you’re surprising friends, celebrating a special moment, or simply treating yourself, these cups offer a perfect balance of indulgence and freshness that’s hard to resist. I can’t wait for you to try them and see how easily they become one of your cherished go-to desserts!
Print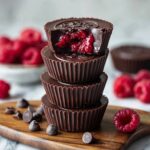
Chocolate Raspberry Cups Recipe
- Prep Time: 15 minutes
- Cook Time: 10 minutes
- Total Time: 45 minutes
- Yield: 12 servings
- Category: Dessert
- Method: Stovetop
- Cuisine: American
- Diet: Vegetarian
Description
Delight in these homemade Chocolate Raspberry Cups, a perfect blend of rich chocolate and tangy raspberry filling. These bite-sized treats combine creamy melted chocolate shells with a luscious chia seed-infused raspberry filling, making them a healthy and delicious dessert or snack option that’s easy to prepare in under an hour.
Ingredients
Raspberry Filling
- 6 oz raspberries (fresh or frozen)
- 1 tbsp chia seeds
- 2 tsp sweetener of choice (such as honey, maple syrup, or sugar)
Chocolate Cups
- 6 oz chocolate chips or chopped chocolate bars (about 1 cup)
- Optional: 1 tsp vegetable oil or melted coconut oil
Instructions
- Prepare the raspberry filling: Thoroughly mash the raspberries. In a small saucepan over low heat, combine the mashed raspberries, chia seeds, and sweetener. Stir occasionally until the mixture is heated through and begins to bubble. Remove from heat and let it cool slightly to allow the chia seeds to thicken the mixture.
- Melt the chocolate: Melt the chocolate chips or chopped chocolate using either a microwave-safe bowl in short bursts, stirring between intervals, or a double boiler on the stovetop. If desired, stir in the vegetable or melted coconut oil until smooth and glossy.
- Form the chocolate cups: Line a mini muffin tin with paper liners or prepare candy molds. Spoon about a teaspoon of the melted chocolate into each liner, then spread the chocolate up the sides to form a cup-shaped shell. Place the tin or molds in the refrigerator or freezer for a few minutes until the chocolate hardens.
- Add the raspberry filling: Once the chocolate shells have set, spoon approximately two teaspoons of the raspberry chia filling into each cup, filling them evenly.
- Seal the cups: Cover the raspberry filling with the remaining melted chocolate, smoothing the tops to seal the filling inside. Return to the refrigerator or freezer and chill until the chocolate is fully set and firm.
Notes
- Use fresh or frozen raspberries depending on availability; thaw frozen raspberries before mashing.
- Adjust the sweetness to taste by varying the amount or type of sweetener.
- The optional oil helps make the melted chocolate smoother and easier to work with but can be omitted.
- Store the finished cups in an airtight container in the refrigerator for up to 5 days.
- For a dairy-free version, use vegan chocolate chips and coconut oil.