
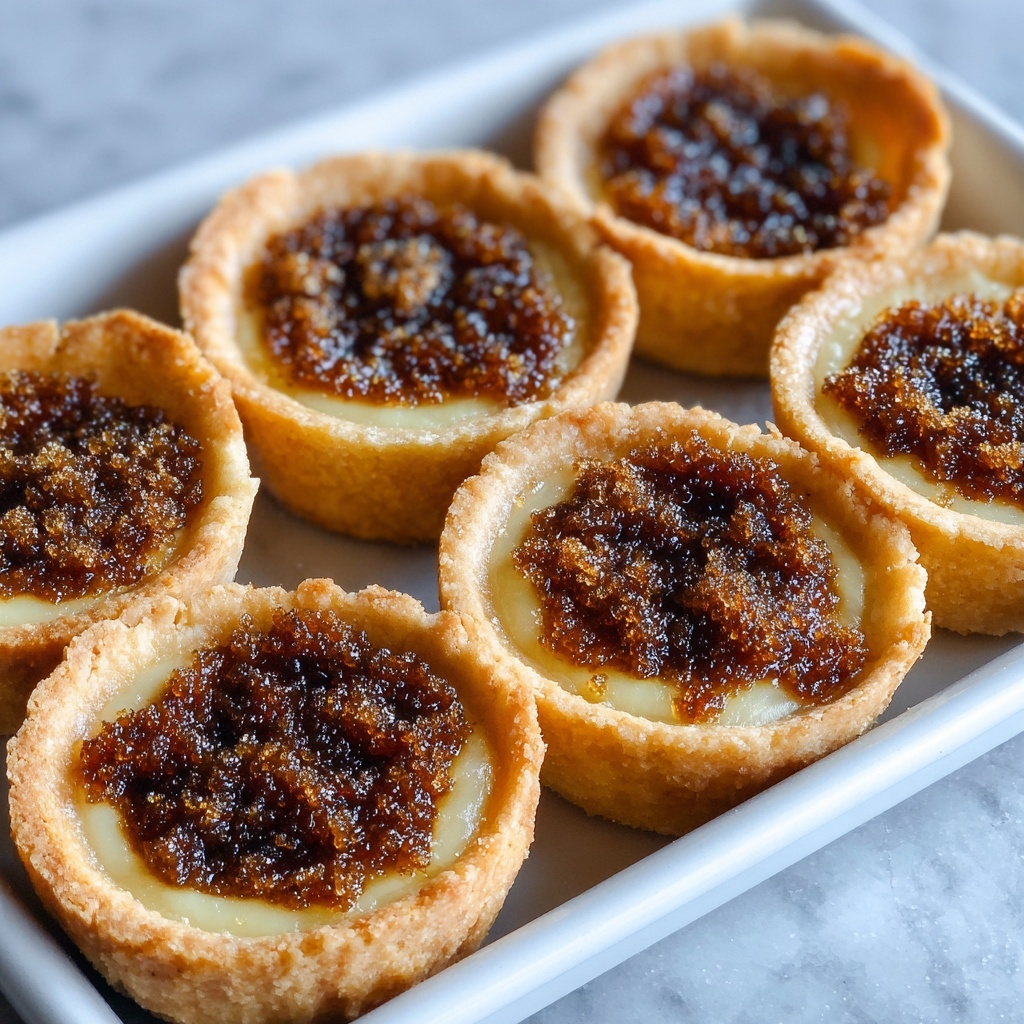
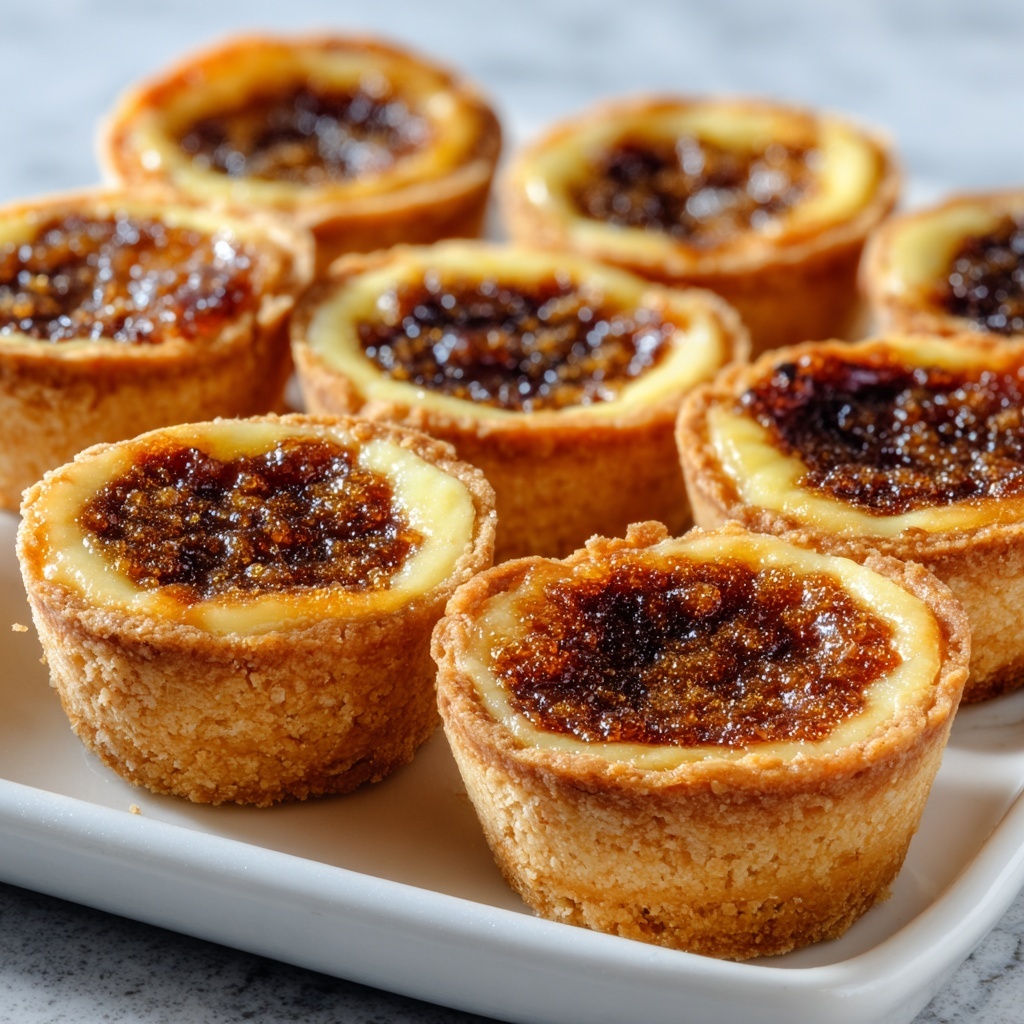
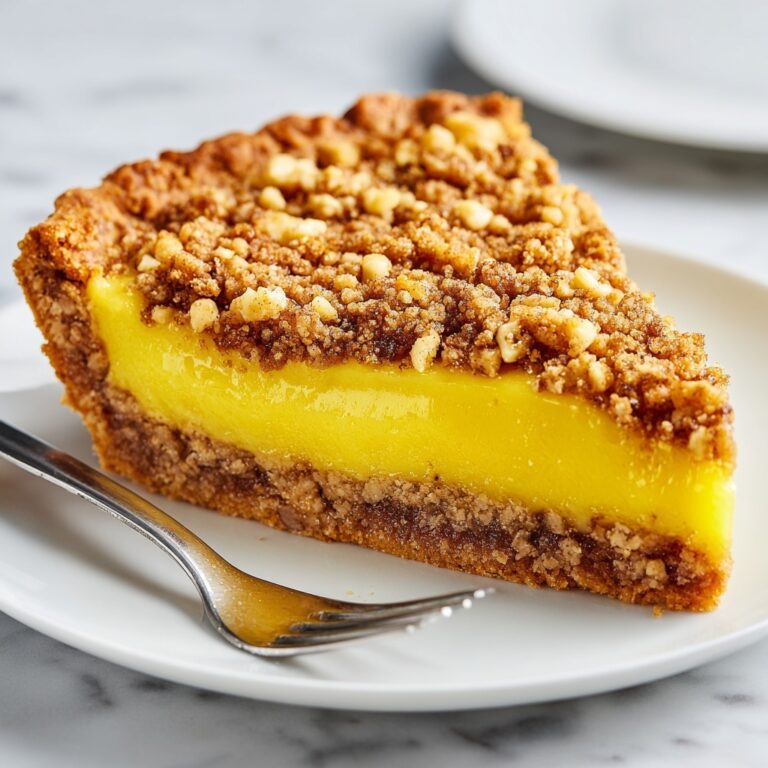
If you have a sweet tooth and crave a comforting treat that’s both rich and flaky, then you’re in for a delightful surprise with this Butter Tarts: Discover the Ultimate Sweet Pastry Recipe! Recipe. These classic Canadian pies combine buttery, flaky crusts with a luscious, gooey filling that’s perfectly caramelized with hints of vanilla and nutmeg. Whether enjoyed warm from the oven or cooled to room temperature, these butter tarts are sure to become a beloved favorite in your baking repertoire. Let’s dive into the magic behind this irresistible dessert.
Ingredients You’ll Need
This Butter Tarts: Discover the Ultimate Sweet Pastry Recipe! Recipe relies on simple but essential ingredients, each carefully chosen to build layers of flavor and texture. The balance between the buttery crust and luscious filling is what truly makes these tarts unforgettable.
- 1 cup all-purpose flour: Provides the perfect structural base for a flaky, tender crust.
- 1/4 teaspoon sea salt: Enhances flavor and balances sweetness.
- 1/2 cup cold unsalted butter, diced: The star of the crust, delivering richness and flakiness.
- 3 tablespoons chilled water: Helps bind the dough without making it tough.
- 1/2 cup packed dark brown sugar: Gives a deep, caramel-like sweetness to the filling.
- 1/2 cup light corn syrup: Creates that signature gooey texture within the butter tart.
- 1 large egg, beaten: Binds the filling ingredients together perfectly.
- 1 teaspoon pure vanilla extract: Adds aromatic warmth and depth.
- 1/4 teaspoon ground nutmeg: Offers a subtle, comforting spice that complements the sweetness.
- 1/2 cup chopped walnuts or dried cranberries (optional): Adds a lovely crunch or tart contrast to the sweet filling.
How to Make Butter Tarts: Discover the Ultimate Sweet Pastry Recipe! Recipe
Step 1: Crafting the Perfect Pastry Dough
Begin by mixing the all-purpose flour with the sea salt in a large bowl. Incorporate the cold, diced butter by rubbing it between your fingers or using a pastry cutter until the mixture resembles tiny pebbles. This process ensures those flaky layers you love!
Step 2: Bringing the Dough Together
Slowly drizzle in the chilled water, gently mixing until the dough just starts to form clumps. Avoid overworking it to keep the crust tender. Shape the dough into a flat disk, wrap it well in plastic wrap, and chill it in the refrigerator for at least 30 minutes—this rest period is key for the perfect crumble.
Step 3: Preparing to Bake
Preheat your oven to 375°F (190°C), setting the stage for golden, bubbling butter tarts.
Step 4: Shaping the Tart Shells
On a lightly floured surface, roll out the chilled dough to about 1/8 inch thickness. Use a round cutter slightly larger than your muffin tin cups to cut circles, then press each gently into the tins, creating delicate pastry shells ready to cradle the irresistible filling.
Step 5: Mixing the Decadent Filling
In a separate bowl, whisk together dark brown sugar, corn syrup, beaten egg, vanilla extract, and nutmeg until smooth and well combined. This mixture is the heart of what makes these butter tarts unforgettable.
Step 6: Adding Optional Texture and Flavor
If you love a bit of crunch or a tart twist, sprinkle a few chopped walnuts or dried cranberries at the bottom of each pastry shell before filling. These little additions bring delightful contrast to the sweet, gooey center.
Step 7: Filling and Baking the Tarts
Pour the luscious filling carefully into each shell, filling about three-quarters full to allow for bubbling without overflowing. Bake the tarts for 20-25 minutes until the filling is set and beautifully golden on top—a sure sign they are ready.
Step 8: Cooling to Perfection
Allow the butter tarts to cool in the muffin tin for roughly 10 minutes before transferring them to a wire rack. Cooling helps the filling to firm up just enough so that each bite holds together with that delightful balance of gooey and crisp.
How to Serve Butter Tarts: Discover the Ultimate Sweet Pastry Recipe! Recipe
Garnishes
While these butter tarts shine on their own, a light dusting of powdered sugar, a drizzle of warm caramel sauce, or a dollop of whipped cream can elevate their decadence. Fresh berries or a sprinkle of cinnamon can also add a refreshing contrast to their sweetness.
Side Dishes
Pair your butter tarts with a scoop of vanilla ice cream for a classic combo or serve alongside a robust cup of freshly brewed coffee or black tea to balance the richness without overpowering the delicate flavors.
Creative Ways to Present
For gatherings, arrange butter tarts on a tiered dessert stand to showcase their golden crusts beautifully. Try serving mini versions alongside espresso shots or assemble a butter tart ice cream sandwich for a playful twist that’ll impress guests.
Make Ahead and Storage
Storing Leftovers
Butter tarts keep well at room temperature in an airtight container for up to two days. For longer storage, refrigerate them wrapped in plastic wrap or stored in a sealed box to maintain freshness without drying out the pastry or filling.
Freezing
You can freeze baked butter tarts for up to three months by wrapping each tart individually in plastic wrap and placing them in a freezer-safe container or bag. Thaw overnight in the fridge before reheating for best results.
Reheating
To enjoy butter tarts warm, heat them gently in a preheated oven at 325°F (165°C) for 8-10 minutes. This revitalizes the crispness of the pastry while softening the filling to its gooey glory once again.
FAQs
Can I make butter tarts without nuts or cranberries?
Absolutely! The nuts and cranberries are optional and can be omitted if you prefer a classic, smooth filling. You can also experiment with other mix-ins or keep it simple for the pure buttery flavor.
Is it necessary to chill the dough?
Chilling the dough is very important because it relaxes the gluten and solidifies the butter, resulting in a flakier, more tender crust. Skipping this step may lead to tougher pastry.
Can I use a store-bought pie crust instead?
Yes, store-bought crusts can save time and work well, but making your own pastry dough will give you that extra buttery, flaky texture that makes this Butter Tarts: Discover the Ultimate Sweet Pastry Recipe! Recipe truly special.
How sweet are butter tarts?
Butter tarts are delightfully sweet but balanced by the buttery pastry and optional tart cranberries or crunchy nuts. Their sweetness makes them perfect for those who love rich, sugary desserts without being overpowering.
What’s the best way to avoid soggy crusts?
Make sure to press the dough firmly and evenly into the muffin tins and pre-chill the dough to prevent shrinking. Optionally, you can blind bake the shells for a few minutes before filling, but it’s not essential for this recipe.
Final Thoughts
There is something truly special about making and sharing the Butter Tarts: Discover the Ultimate Sweet Pastry Recipe! Recipe. From the tender, flaky crust to the luxuriously sweet filling bubbling to golden perfection, it’s a dessert that feels like a warm hug from the inside out. Whether you’re baking for a holiday, a casual get-together, or just to treat yourself, these tarts will bring smiles and satisfied sighs all around. Give this recipe a try and let its buttery magic brighten your kitchen and your day!
Print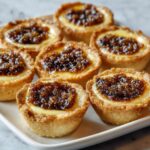
Butter Tarts: Discover the Ultimate Sweet Pastry Recipe! Recipe
- Prep Time: 20 minutes
- Cook Time: 25 minutes
- Total Time: 55 minutes
- Yield: 12 servings
- Category: Dessert
- Method: Baking
- Cuisine: Canadian
Description
Indulge in the classic Canadian dessert with this ultimate Butter Tarts recipe. Featuring a flaky pastry crust filled with a rich and gooey sweet filling made from dark brown sugar, corn syrup, and a hint of nutmeg, these tarts are perfect for any occasion. Optional chopped walnuts or dried cranberries add delightful texture and flavor to this timeless treat.
Ingredients
For the Pastry:
- 1 cup all-purpose flour
- 1/4 teaspoon sea salt
- 1/2 cup cold unsalted butter, diced
- 3 tablespoons chilled water
For the Filling:
- 1/2 cup packed dark brown sugar
- 1/2 cup light corn syrup
- 1 large egg, beaten
- 1 teaspoon pure vanilla extract
- 1/4 teaspoon ground nutmeg
- 1/2 cup chopped walnuts or dried cranberries (optional)
Instructions
- Mix the Pastry Ingredients: In a large bowl, combine the flour and sea salt. Use your fingers or a pastry cutter to blend in the cold unsalted butter until the mixture resembles tiny pebbles, ensuring the butter stays cold for a flaky crust.
- Form and Chill the Dough: Gradually drizzle in the chilled water, mixing gently until the dough begins to come together. Shape the dough into a flat disk, wrap it in plastic wrap, and refrigerate for at least 30 minutes to firm up.
- Preheat the Oven: Set your oven to 375°F (190°C) to get ready for baking the tarts.
- Roll and Cut the Pastry: On a lightly floured surface, roll the dough to about 1/8 inch thickness. Using a round cutter, cut circles that fit into a muffin tin. Fit each circle gently into the muffin cups, shaping them into shells.
- Prepare the Filling: In a separate bowl, whisk together the dark brown sugar, light corn syrup, beaten egg, vanilla extract, and ground nutmeg until smooth and well combined.
- Assemble the Tarts: Optionally, place a few chopped walnuts or dried cranberries at the bottom of each pastry shell. Carefully pour the filling mixture into each shell, filling them to about three-quarters full to prevent overflow during baking.
- Bake the Tarts: Place the muffin tin in the preheated oven and bake for 20-25 minutes or until the filling is set and the tops have turned a beautiful golden brown.
- Cool the Tarts: Remove the tarts from the oven and allow them to cool in the muffin tin for 10 minutes. Then transfer them to a wire rack to cool completely before serving for the best texture and flavor.
Notes
- Ensure the butter and water are cold to achieve a flaky pastry crust.
- Fill the pastry shells only about three-quarters full to prevent filling from spilling over during baking.
- Optional nuts or dried fruits complement the sweet filling and add texture.
- Store baked tarts in an airtight container at room temperature for up to 3 days, or refrigerate for up to a week.
- For a richer flavor, use dark corn syrup instead of light if preferred.
