
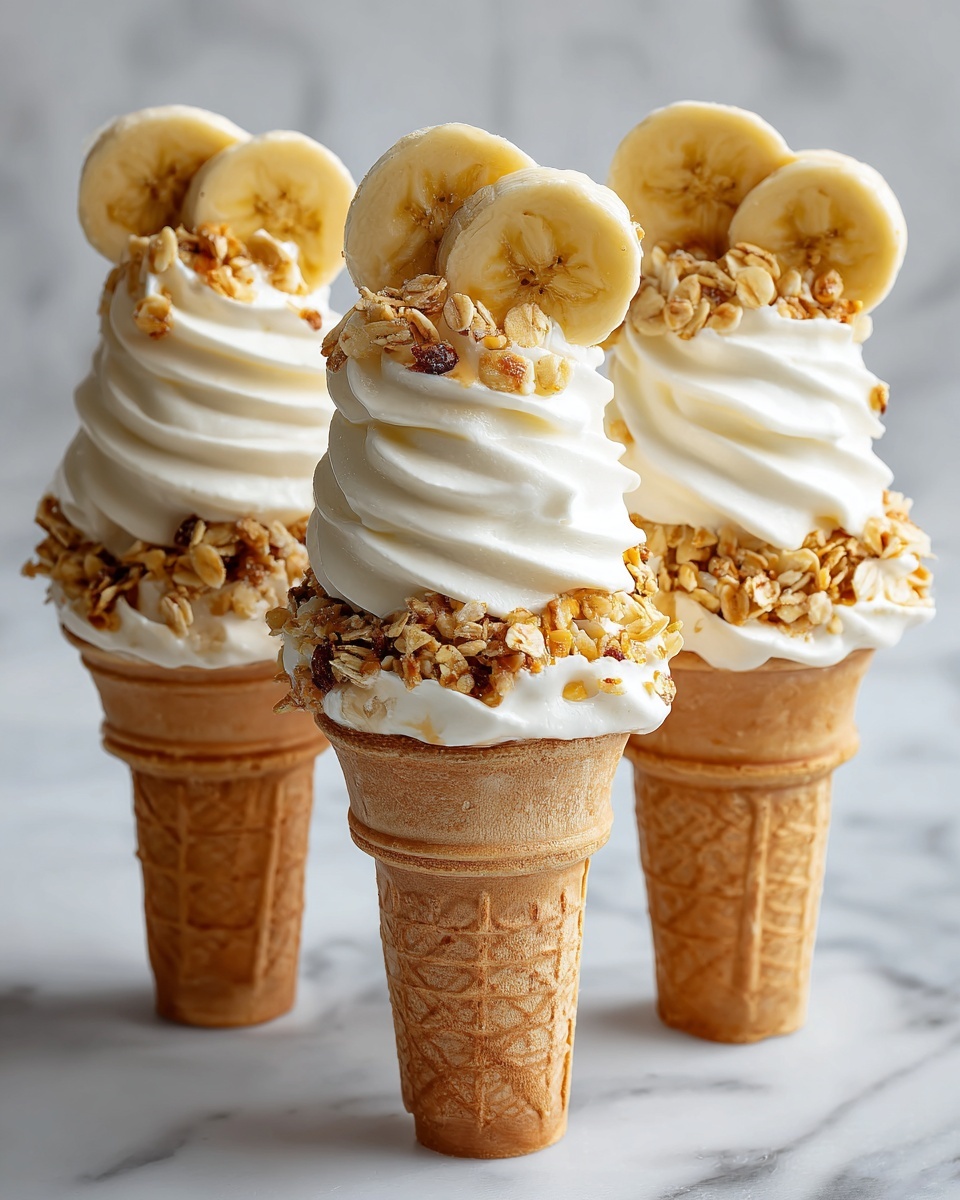
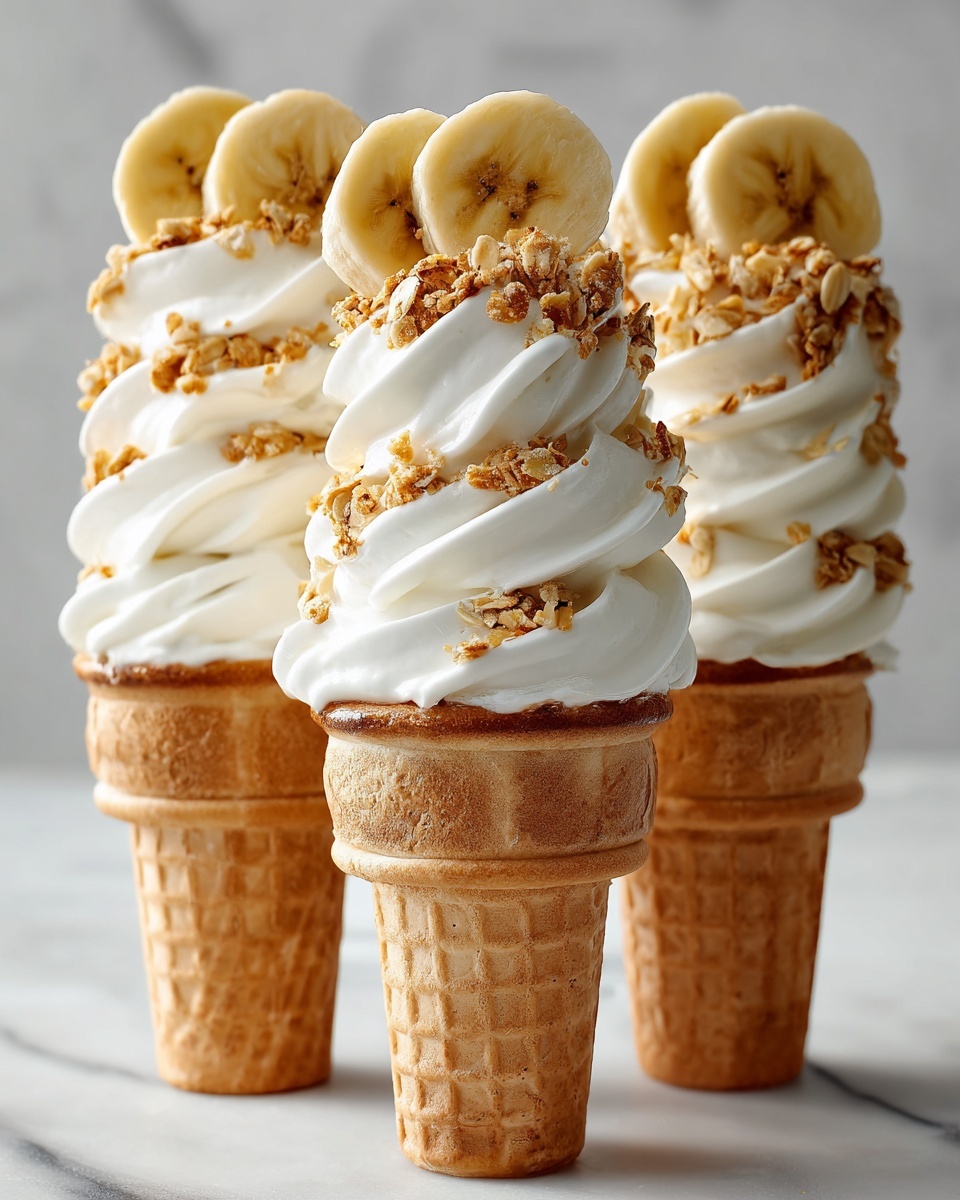
If you’re looking for a fun and irresistible dessert to wow your friends or treat yourself, this Banana Pudding Cheesecake Cones Recipe is exactly what you need. Imagine the creamy, tangy richness of cheesecake meeting the sweet, comforting flavors of banana pudding, all packed into cute, crunchy sugar cones. It’s a handheld delight that brings together luscious mashed bananas, velvety cream cheese filling, and the nostalgic crunch of crushed vanilla wafers. This unique twist on classic banana pudding will quickly become your go-to dessert when you want something both charming and unbelievably tasty.
Ingredients You’ll Need
Gathering the right ingredients is key to nailing this Banana Pudding Cheesecake Cones Recipe. Each ingredient plays a crucial role—from the smooth cream cheese that gives body and tang to the ripe bananas that add natural sweetness and creaminess, to the crunchy vanilla wafers that deliver texture and a hint of nostalgia.
- Cream cheese (8 oz, softened): Provides the luscious, tangy base that makes the filling irresistibly creamy.
- Granulated sugar (1/2 cup): Balances the tartness of the cream cheese with a touch of sweetness.
- Vanilla extract (1 tsp): Enhances the overall flavor with warm, aromatic notes.
- Heavy cream (1 cup): Whipped to fluffy perfection to lighten the rich cheesecake filling.
- Ripe bananas (2, mashed): Adds natural sweetness and that unmistakable banana pudding charm.
- Vanilla wafers (1 cup, crushed): Infuses delightful crunch and classic flavor throughout the filling.
- Sugar cones (6): The crunchy vessel that holds all this goodness, making the dessert playful and portable.
How to Make Banana Pudding Cheesecake Cones Recipe
Step 1: Prepare the Cream Cheese Mixture
Begin by beating the softened cream cheese with granulated sugar and vanilla extract until completely smooth and creamy. This step is essential because a smooth base guarantees a luscious filling that melts in your mouth.
Step 2: Whip the Heavy Cream
Next, in a clean bowl, whip the heavy cream until it forms stiff peaks. This airy whipped cream is what lightens up the dense cream cheese, creating a filling that’s both rich and fluffy.
Step 3: Combine Cream Cheese and Whipped Cream
Gently fold the whipped cream into the cream cheese mixture, taking care not to deflate the whipped cream. This folding technique maintains the airy texture that makes this Banana Pudding Cheesecake Cones Recipe so delightful.
Step 4: Fold in Bananas and Crushed Vanilla Wafers
Now mix in the mashed bananas along with the crushed vanilla wafers. These add natural sweetness, flavor depth, and that perfect textural contrast that keeps every bite interesting and nostalgic.
Step 5: Fill the Sugar Cones
Carefully spoon the cheesecake mixture into each sugar cone. Press the filling gently to pack it well, ensuring each bite has the perfect balance of creamy filling and crunchy cone.
Step 6: Chill to Set
Place the filled cones upright in the refrigerator for at least one hour. Chilling helps the filling firm up, allowing the flavors to meld beautifully and making the cones easier to enjoy without mess.
Step 7: Serve and Enjoy
Once chilled, your Banana Pudding Cheesecake Cones Recipe is ready to wow your taste buds. Serve them straight from the fridge for a cool, creamy treat that’s bursting with classic southern charm.
How to Serve Banana Pudding Cheesecake Cones Recipe
Garnishes
To elevate the presentation, add a few creative garnishes like a small drizzle of caramel or chocolate sauce over the top, a sprinkle of crushed vanilla wafers, or even a thin banana slice perched right on the rim of the cone. These little touches can make your Banana Pudding Cheesecake Cones Recipe feel truly special and photo-worthy.
Side Dishes
While these cones shine as a standalone dessert, pairing them with a refreshing fruit salad or a scoop of light sorbet offers a balanced finish to your meal. Fresh berries or a simple citrus salad provide a tangy contrast that complements the creamy banana pudding flavors perfectly.
Creative Ways to Present
For an extra fun twist, serve these cones in a decorative cone holder or nestled upright in a bed of crushed wafers or banana chips. You can even place them in colorful cupcake liners to prevent drips and add a pop of color, making it a perfect dessert for parties or gatherings.
Make Ahead and Storage
Storing Leftovers
If you have any leftover Banana Pudding Cheesecake Cones Recipe, store them in an airtight container in the refrigerator for up to 2 days. The cones may soften slightly over time, but the filling will remain delectably creamy and flavorful.
Freezing
Freezing is not recommended for this recipe since the texture of the cheesecake filling and bananas can change, becoming grainy or watery once thawed. For the best experience, enjoy these cones fresh or chilled.
Reheating
Because this is a chilled dessert, there’s no need for reheating. Serving straight from the fridge keeps the filling firm and the cones crisp enough to hold the filling perfectly.
FAQs
Can I use regular pudding instead of mashed bananas?
You can substitute instant banana pudding for the mashed bananas for a quicker version, but fresh ripe bananas add natural flavor and texture that really brings the Banana Pudding Cheesecake Cones Recipe to life.
How long can I prepare these cones in advance?
Preparing and chilling the cones up to a day ahead is ideal. Any longer, and the cones might start to lose their crispness, but the filling flavor remains delicious.
Can I make this recipe dairy-free?
Yes! Use dairy-free cream cheese and coconut whipped cream as substitutes. Just note that the flavor and texture might vary slightly, but it’s still a wonderful treat.
What size sugar cones should I use?
Standard-sized sugar cones work perfectly for this recipe, offering the right balance of crunchy shell and filling capacity to enjoy every bite.
Is it possible to make these into mini servings?
Absolutely! Use smaller sugar cones or mini waffle cones. Just reduce the portion of filling accordingly, and you’ll have bite-sized treats perfect for parties.
Final Thoughts
This Banana Pudding Cheesecake Cones Recipe is such a joyful spin on two beloved desserts rolled into one. It’s playful, creamy, and totally satisfying whether you’re serving it at a summer gathering or just craving something sweet and comforting. I wholeheartedly encourage you to whip up a batch and enjoy every delightful mouthful—the smiles are guaranteed!
Print
Banana Pudding Cheesecake Cones Recipe
- Prep Time: 15 minutes
- Cook Time: 0 minutes
- Total Time: 1 hour 15 minutes
- Yield: 6 servings
- Category: Dessert
- Method: No-Cook
- Cuisine: American
Description
Delight in these Banana Pudding Cheesecake Cones, a creamy, fruity twist on classic cheesecake served in fun, handheld cones. Combining smooth cream cheese, whipped cream, ripe bananas, and crunchy vanilla wafers, these cones make a perfect no-bake dessert that chills to a delightful, rich texture.
Ingredients
Filling
- 1 package (8 oz) cream cheese, softened
- 1/2 cup granulated sugar
- 1 tsp vanilla extract
- 1 cup heavy cream
- 2 ripe bananas, mashed
- 1 cup vanilla wafers, crushed
Serve
- 6 sugar cones
Instructions
- Prepare cream cheese mixture: In a large mixing bowl, beat the softened cream cheese, granulated sugar, and vanilla extract together until the mixture is smooth and creamy without lumps.
- Whip the cream: In a separate chilled bowl, whip the heavy cream using a mixer until stiff peaks form, indicating the cream is fully aerated and holds shape.
- Combine mixtures: Gently fold the whipped cream into the cream cheese mixture, taking care to preserve the airy texture, until fully combined and smooth.
- Add bananas and wafers: Fold in the mashed ripe bananas and the crushed vanilla wafers carefully to maintain some texture and even distribution throughout the filling.
- Fill cones: Spoon the cheesecake filling carefully into each sugar cone, pressing gently to pack the filling securely without breaking the cones.
- Chill: Place the filled cones upright in the refrigerator for at least 1 hour to allow the filling to set and firm up for the best texture.
- Serve: Remove from the refrigerator and enjoy the banana pudding cheesecake cones chilled as a delicious, handheld dessert.
Notes
- Ensure the cream cheese is fully softened to avoid lumps in the filling.
- Whipping the cream to stiff peaks is crucial for the airy texture of the cheesecake mixture.
- Use ripe bananas for natural sweetness and better flavor integration.
- These cones are best served chilled and can be stored covered in the refrigerator for up to 24 hours.
- For extra texture, add chopped nuts or chocolate chips into the filling if desired.


