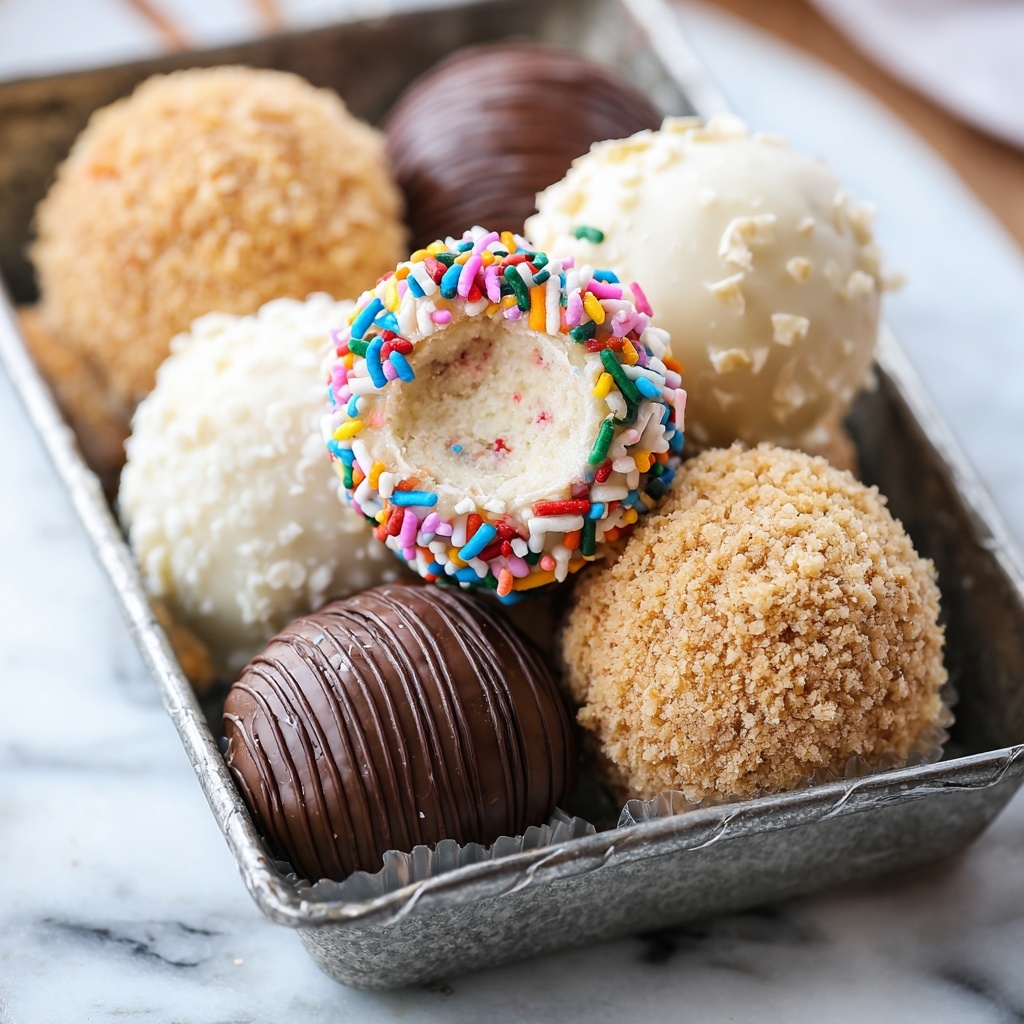
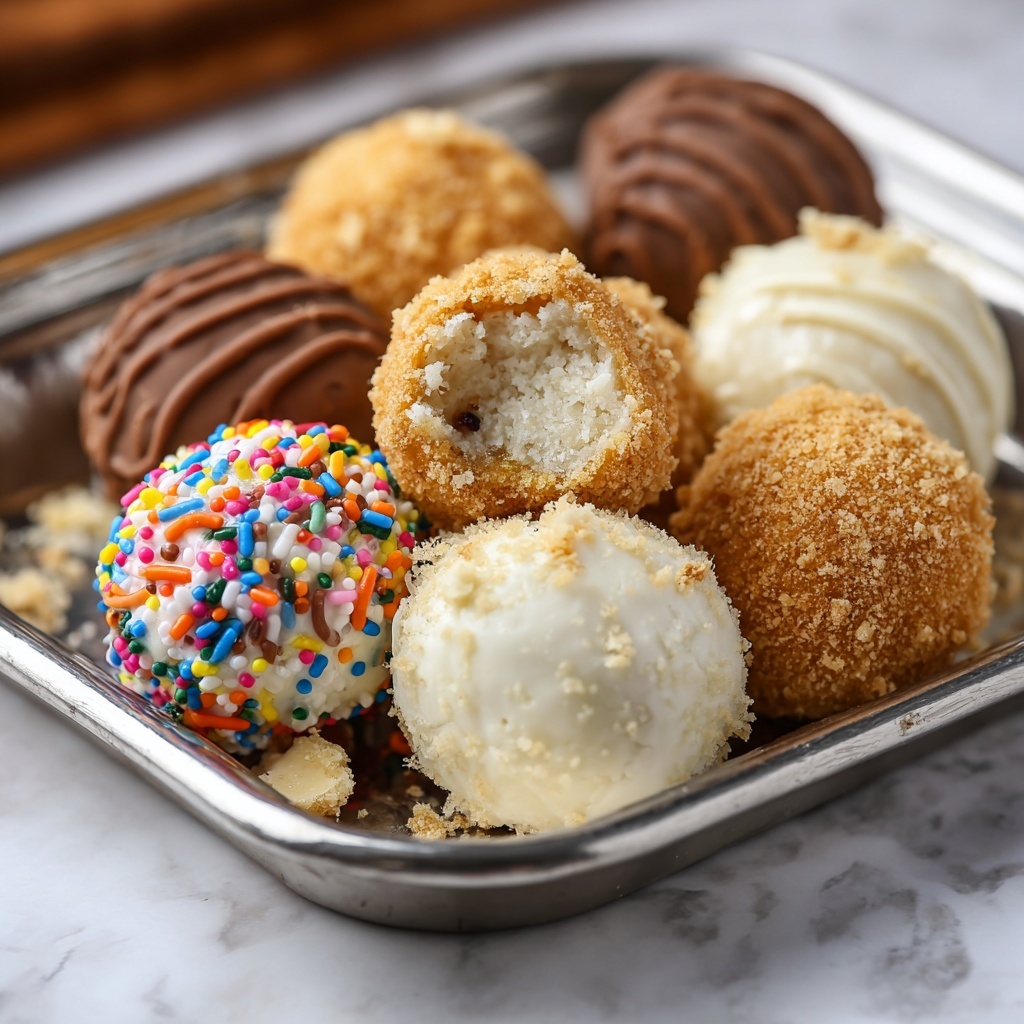
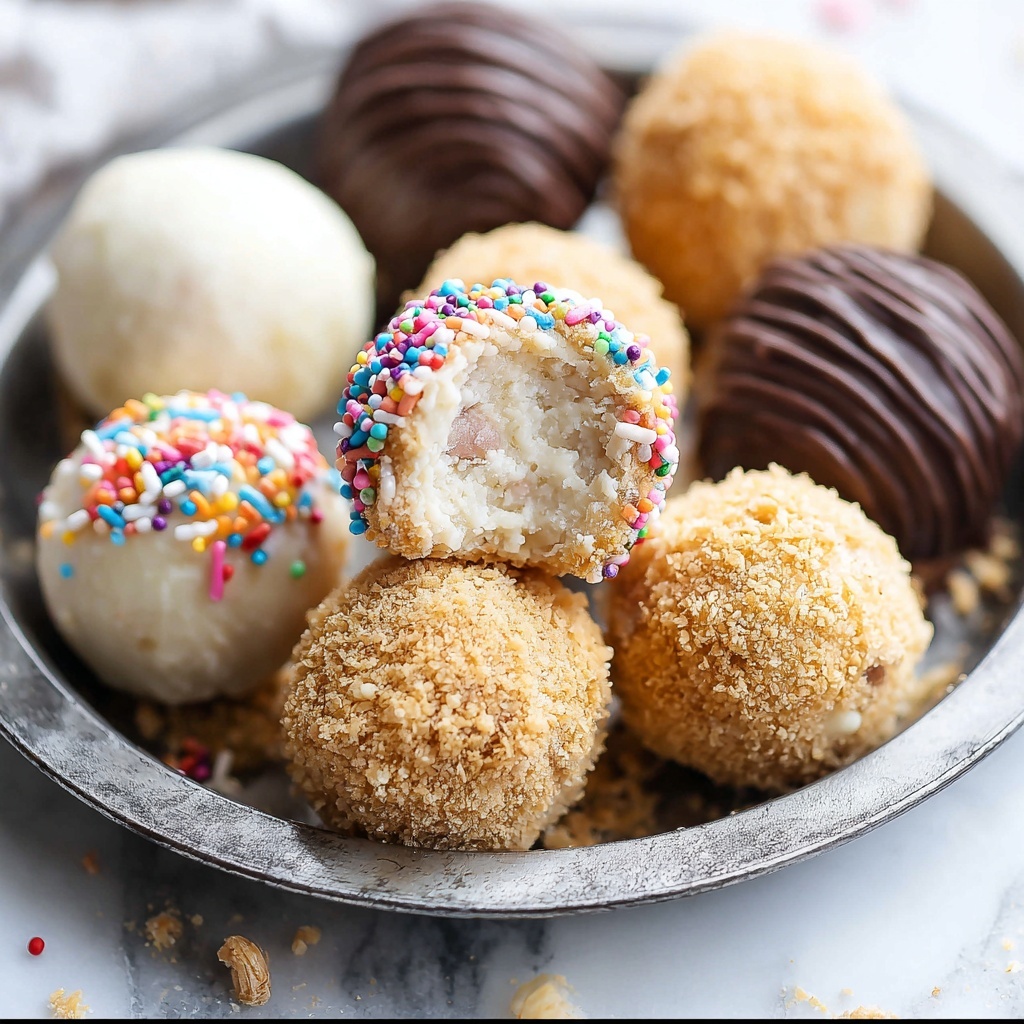
If you’re looking for a delightful treat that’s as fun to make as it is to eat, this Cheesecake Balls with Optional Toppings Recipe is going to be your new favorite. Imagine bite-sized spheres of creamy, dreamy cheesecake, perfectly balanced with the slight crunch of graham cracker crumbs and your choice of toppings from melted chocolate to sprinkles. These little gems are simple to whip up, irresistibly delicious, and perfect for sharing at any gathering or enjoying all by yourself.
Ingredients You’ll Need
The magic behind these cheesecake balls lies in their simplicity. Each ingredient plays a starring role, creating that silky, sweet, and crunchy flavor combo that makes this treat unforgettable.
- 8 oz cream cheese, softened: The rich and creamy base that forms the heart of the cheesecake balls.
- 1/2 cup powdered sugar: Adds just the right amount of sweetness and helps achieve a smooth texture.
- 1 teaspoon vanilla extract: Infuses a warm, aromatic flavor that elevates the overall taste.
- 1 cup graham cracker crumbs: For that classic graham crunch that contrasts beautifully with the silky cheesecake.
- Optional toppings (melted chocolate, crushed nuts, sprinkles, shredded coconut): These let you customize your cheesecake balls with extra texture, flavor, and flair.
How to Make Cheesecake Balls with Optional Toppings Recipe
Step 1: Prepare the Cheesecake Mixture
Start by beating the softened cream cheese in a medium bowl until it becomes smooth and creamy. This is the key to a luscious texture. Then add the powdered sugar and vanilla extract, mixing until everything is fully combined and velvety. This blend is the base of your cheesecake balls and delivers that classic sweet cheesecake flavor.
Step 2: Form the Balls
Using a small scoop or spoon, scoop out portions of the cheesecake mixture and gently roll them into 1-inch balls. Don’t worry about making them perfect—each one will have its own charm! Place the balls onto a parchment-lined baking sheet. Pop them in the fridge for about 30 minutes. Chilling helps them set so they hold their shape in the next steps.
Step 3: Coat the Cheesecake Balls
Once firm, lovingly roll each cheesecake ball in the graham cracker crumbs. This adds that satisfying crunch and classic cheesecake crust flavor. Next, elevate each ball with your favorite toppings—whether that’s a drizzle of melted chocolate, a sprinkle of crushed nuts, colorful sprinkles, or a dusting of shredded coconut. This step makes each bite more exciting and customizable.
Step 4: Chill and Serve
After coating, place the cheesecake balls back onto the parchment-lined sheet and refrigerate for another 30 minutes until they’re firm and ready to impress. Serve these chilled little beauties at your next party or enjoy them as a sweet everyday treat.
How to Serve Cheesecake Balls with Optional Toppings Recipe
Garnishes
A sprinkle of extra graham cracker crumbs, a drizzle of rich chocolate sauce, or a few fresh berries can brighten the plate and complement the cheesecake balls beautifully. These garnishes not only add appeal but also layers of taste.
Side Dishes
Pair these cheesecake balls with a fresh fruit salad, a cup of coffee or tea, or even alongside a scoop of your favorite ice cream. Such combos balance sweetness and make for a heavenly dessert experience.
Creative Ways to Present
Serve them on a wooden board with dipping bowls for melted chocolate or caramel. Or arrange them in cupcake liners for a festive touch. You can even stick small colorful flags or toothpicks in each for easy, mess-free nibbling at parties.
Make Ahead and Storage
Storing Leftovers
Store your cheesecake balls in an airtight container in the refrigerator. They will stay fresh and maintain that perfect creamy texture for up to 3 days, making them a great make-ahead dessert option.
Freezing
If you want to keep them longer, freeze the cheesecake balls on a baking sheet first, then transfer to a freezer-safe container or zip-top bag. They’ll last up to 2 months frozen without losing their creamy goodness.
Reheating
When ready to enjoy, thaw them overnight in the fridge. Because cheesecake balls are best served chilled, no reheating is needed, just let them come to a pleasant eating temperature before serving.
FAQs
Can I use flavored cream cheese for this recipe?
Absolutely! Using flavored cream cheese like strawberry or honey can add a delicious twist to your cheesecake balls. Just remember to adjust the amount of powdered sugar if using sweetened varieties.
How long do the cheesecake balls need to chill before coating?
They should chill for at least 30 minutes to firm up properly. This helps them hold their shape during the coating process and keeps them from falling apart.
What are some other topping ideas besides the ones listed?
You can get creative with crushed cookies, cinnamon sugar, chopped dried fruit, or even a light dusting of cocoa powder. The possibilities are endless and fun to explore.
Can I make these gluten-free?
Yes! Simply use gluten-free graham cracker crumbs or substitute with crushed gluten-free cookies to keep the crust crunchy and safe for gluten-sensitive guests.
Is this recipe suitable for kids to help with?
Definitely! Kids will love rolling the balls and choosing their own toppings, making it a fun and interactive cooking activity that rewards them with a yummy treat.
Final Thoughts
This Cheesecake Balls with Optional Toppings Recipe is one of those easy, crowd-pleasing desserts that feels special every single time. Whether you’re whipping them up for a party or a cozy night in, they’re guaranteed to bring smiles and satisfy that sweet craving. Go ahead, try it out—you might just find yourself making these little bites of heaven again and again!
Print
Cheesecake Balls with Optional Toppings Recipe
- Prep Time: 15 minutes
- Cook Time: 0 minutes
- Total Time: 1 hour 10 minutes
- Yield: 15 servings
- Category: Dessert
- Method: No-Cook
- Cuisine: American
- Diet: Vegetarian
Description
Delicious and creamy cheesecake balls coated with crunchy graham cracker crumbs and optional toppings like melted chocolate, nuts, sprinkles, or shredded coconut. These no-bake treats are perfect for parties or an easy sweet snack.
Ingredients
Cheesecake Mixture
- 8 oz cream cheese, softened
- 1/2 cup powdered sugar
- 1 teaspoon vanilla extract
Coating
- 1 cup graham cracker crumbs
- Optional toppings: melted chocolate, crushed nuts, sprinkles, shredded coconut
Instructions
- Prepare the Cheesecake Mixture: In a medium bowl, beat the softened cream cheese until smooth and creamy. Add the powdered sugar and vanilla extract, then mix thoroughly until all ingredients are well combined.
- Form the Balls: Using a small scoop or spoon, shape the cheesecake mixture into 1-inch balls. Place the balls on a parchment-lined baking sheet and refrigerate for 30 minutes to firm up.
- Coat the Cheesecake Balls: Roll each chilled cheesecake ball in graham cracker crumbs. For extra flavor and texture, you can also coat them with optional toppings such as melted chocolate, crushed nuts, sprinkles, or shredded coconut.
- Chill and Serve: Return the coated cheesecake balls to the baking sheet and refrigerate for another 30 minutes or until firm. Serve the cheesecake balls chilled and enjoy immediately.
Notes
- Ensure the cream cheese is fully softened for a smooth, creamy mixture.
- Use parchment paper to prevent sticking during chilling.
- Customize toppings based on your preference or dietary needs.
- Store leftover cheesecake balls in an airtight container in the refrigerator for up to 3 days.
