If you have ever wanted to bake bakery-quality bread in your own kitchen, then this Easy Homemade Dinner Rolls Recipe is just what you need. Soft, fluffy, and perfectly golden, these rolls come together with simple ingredients and straightforward steps that make the whole process enjoyable and rewarding. Whether you’re hosting a holiday feast or just craving warm, fresh rolls with dinner, this recipe guarantees a delightful aroma and irresistible flavor that will have everyone asking for seconds.
Ingredients You’ll Need
Creating these easy dinner rolls starts with a handful of simple, everyday ingredients that work beautifully together to give you the perfect texture and taste. Each component plays a crucial role — from the tender crumb to the golden crust, making this recipe approachable yet impressive.
- All-purpose flour (3 1/4 cups): Provides the essential structure to build soft, tender rolls.
- Active dry yeast (1 packet / 2 1/4 tsp): Helps the dough rise and creates that wonderful airy texture.
- Warm milk (1 cup at 110°F / 45°C): Activates the yeast and adds richness for a creamy crumb.
- Granulated sugar (1/4 cup): Feeds the yeast and adds a subtle sweetness that balances the flavors.
- Unsalted butter, melted (1/4 cup): Gives a tender crumb and a rich flavor to the rolls.
- Large egg (1): Binds the ingredients and contributes to the soft texture and color.
- Salt (1 teaspoon): Enhances all the flavors and balances out the sweetness.
How to Make Easy Homemade Dinner Rolls Recipe
Step 1: Activate the yeast
Start by combining the warm milk, active dry yeast, and sugar in a large mixing bowl. Warm milk is key here because it wakes up the yeast without killing it, and after you let this sit for 5 to 10 minutes, you’ll see the mixture get foamy and bubbly — a sure sign the yeast is alive and ready to work its magic.
Step 2: Mix in wet ingredients
Once the yeast mixture is bubbly, stir in the melted butter, egg, and salt. These ingredients help enrich the dough with flavor and create a tender texture, making your dinner rolls irresistibly soft and slightly sweet.
Step 3: Add flour gradually
Begin mixing in the all-purpose flour one cup at a time. This slow addition lets you gauge the dough’s consistency, ensuring it becomes soft but not sticky. Keep stirring until the dough starts to come together and pulls away from the sides of the bowl.
Step 4: Knead to develop gluten
Turn the dough onto a floured surface and knead for 8 to 10 minutes. This step might seem a bit like a workout, but it’s essential for developing gluten, which gives your rolls that beautiful bounce and chewiness. The dough should transform into a smooth, elastic ball that feels just right in your hands.
Step 5: First rise
Place your kneaded dough into a greased bowl and cover it with a damp cloth or plastic wrap. Leave it in a warm spot for about an hour, or until it doubles in size. This rising time is when all the developing yeast bubbles create the airy texture that makes these rolls so special.
Step 6: Shape the rolls
After the dough has risen, punch it down to release excess air. Divide it into 12 equal portions and gently shape each into a smooth ball. Shaping them consistently ensures even baking and that perfect uniform look for your batch of dinner rolls.
Step 7: Second rise
Arrange the shaped dough balls on a greased baking sheet or in a 9×13-inch baking dish. Cover them again and let them rise for 30 more minutes to puff up just right before baking. This second rise softens the dough further and helps create those tender layers inside.
Step 8: Bake to golden perfection
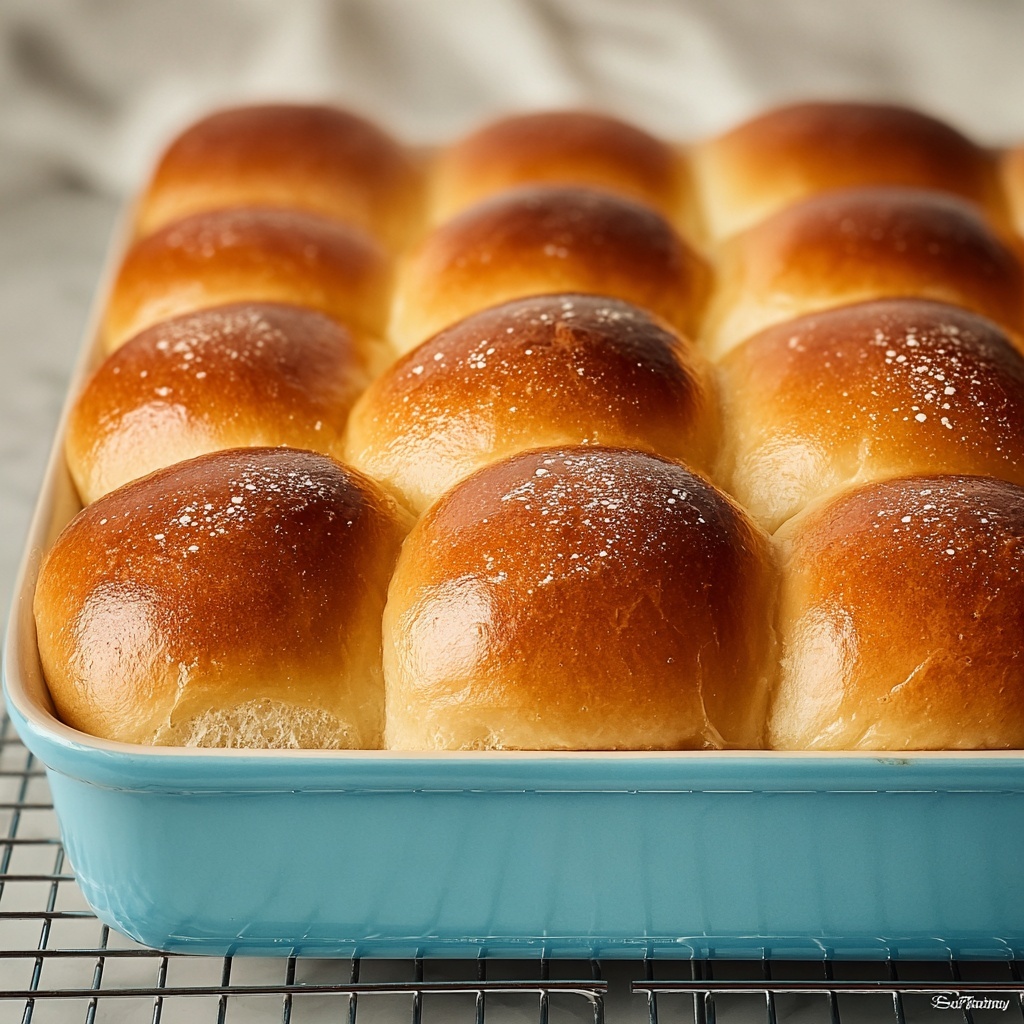
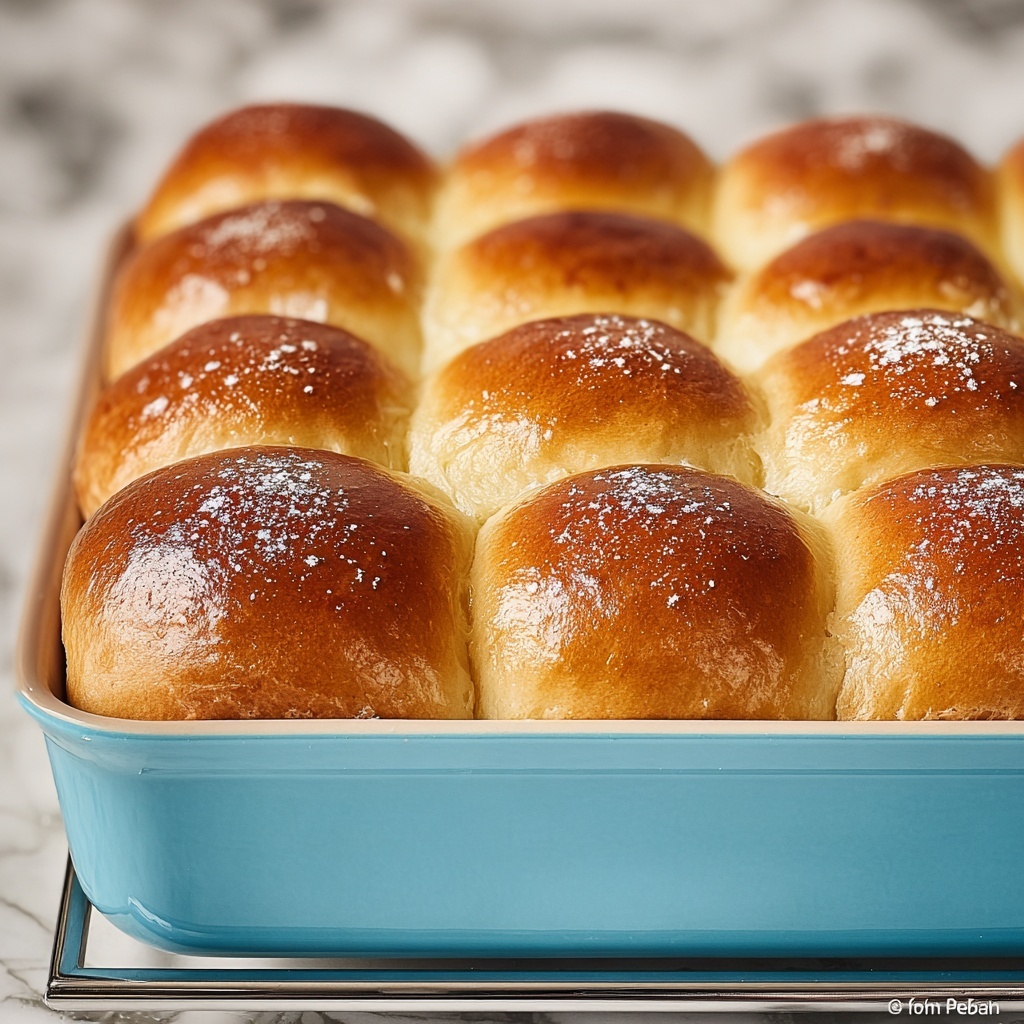
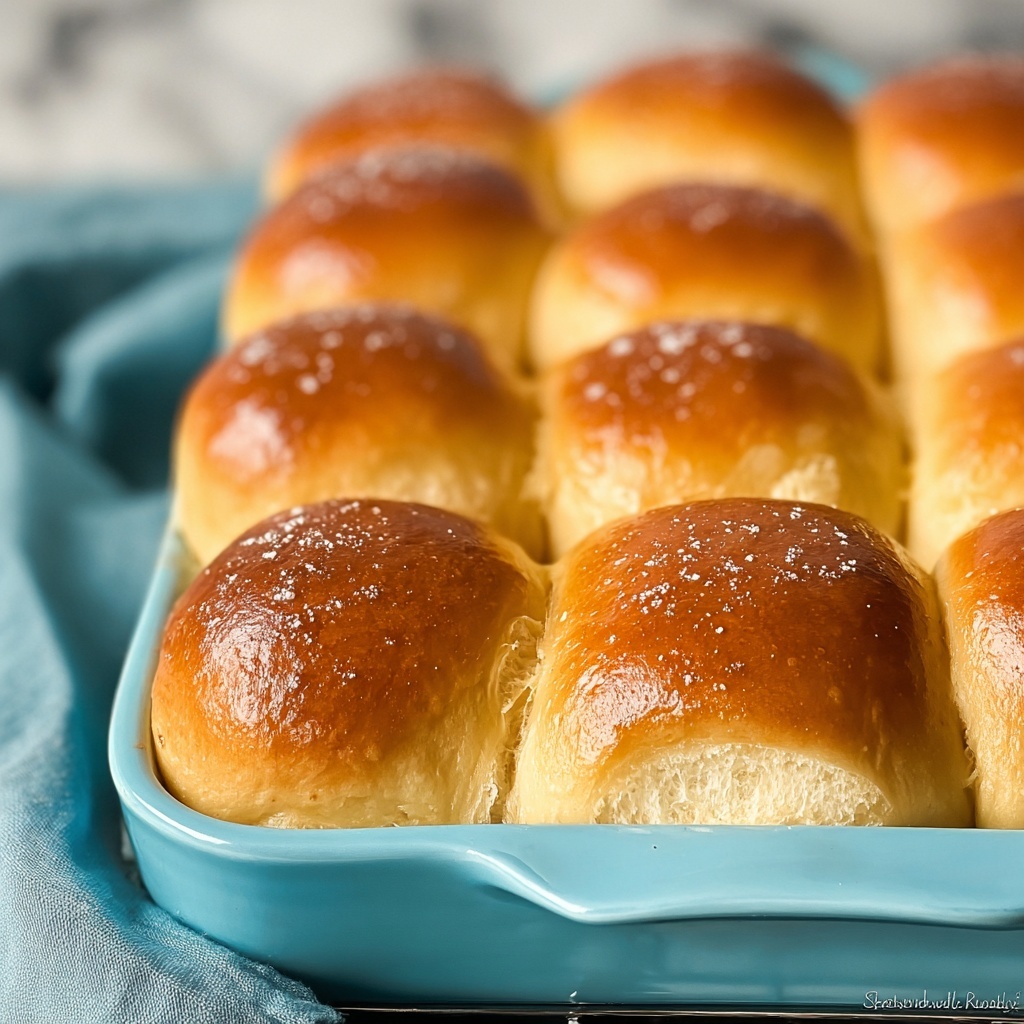
Preheat your oven to 375°F (190°C), then bake the rolls for 15 to 20 minutes. When the tops turn a gorgeous golden brown, they’re ready to come out. The smell alone at this stage is enough to make your kitchen feel like a five-star bakery!
Step 9: Brush with butter
Right after baking, brush the rolls with melted butter to give them a glossy, mouthwatering finish. This final touch adds extra flavor, a beautiful sheen, and keeps the crust soft for days.
How to Serve Easy Homemade Dinner Rolls Recipe
Garnishes
While these rolls are delicious on their own, you can elevate them with a sprinkle of flaky sea salt or some fresh herbs like rosemary or thyme. Garlic butter brushed on while warm turns them into an irresistible appetizer or accompaniment.
Side Dishes
These dinner rolls are a perfect match for hearty soups, stews, or your favorite holiday roasts. They soak up gravy and sauces beautifully, making every meal feel extra comforting and complete.
Creative Ways to Present
Try serving your rolls in a basket lined with a cozy kitchen towel for a rustic vibe, or arrange them in a pull-apart style on a platter for a fun, interactive dining experience. You can even slice them open and use them as sliders with your favorite fillings for a crowd-pleasing twist.
Make Ahead and Storage
Storing Leftovers
Allow any leftover rolls to cool completely before storing them in an airtight container at room temperature. They’ll stay fresh and soft for 2 to 3 days, perfect for quick snacks or sandwiches.
Freezing
For longer storage, freeze cooled rolls in a sealed freezer bag or container. They will keep well for up to 3 months. When you’re ready, thaw them overnight in the fridge, then warm them up to revive their soft, fresh-baked quality.
Reheating
To restore that fresh-from-the-oven softness, reheat rolls wrapped in foil at 350°F (175°C) for 10 to 15 minutes. You can also microwave them for quick warming but be careful not to overdo it, as they can dry out fast in the microwave.
FAQs
Can I use whole wheat flour instead of all-purpose flour?
Yes! You can substitute whole wheat flour for part of the all-purpose flour, but since whole wheat absorbs more liquid, you might need to adjust the milk amount slightly. Your rolls will be heartier and have a nuttier flavor.
How can I tell if my yeast is still good?
If the yeast mixture becomes bubbly and foamy when mixed with warm milk and sugar, it’s active and good to use. If there’s no foam after 10 minutes, it’s best to use fresh yeast, as old yeast won’t help the dough rise properly.
Is it possible to make these rolls without a mixer?
Absolutely! This Easy Homemade Dinner Rolls Recipe is designed to be made by hand, too. Just be prepared to knead the dough thoroughly on a floured surface for best results.
Can I add flavors like garlic or herbs to the dough?
Definitely! Adding minced garlic, chopped herbs, or even cheese to the dough before the first rise can make your rolls even more delicious and customized to your taste.
What’s the best way to keep rolls soft for longer?
Brushing freshly baked rolls with butter and storing them in an airtight container helps maintain softness. You can also place a slice of bread in the container with the rolls, which can help retain moisture.
Final Thoughts
There’s something truly special about pulling warm, soft rolls fresh from the oven, and this Easy Homemade Dinner Rolls Recipe makes that joy an everyday possibility. Whether you’re a seasoned baker or trying your hand at bread-making for the first time, this recipe brings warmth, comfort, and a touch of homemade love to your table. So grab your ingredients and start baking — you’ll be amazed at how these simple rolls become your new favorite dinner companion.
Print
Easy Homemade Dinner Rolls Recipe
- Prep Time: 20 minutes
- Cook Time: 20 minutes
- Total Time: 2 hours 10 minutes
- Yield: 12 rolls
- Category: Baking
- Method: Baking
- Cuisine: American
Description
These easy homemade dinner rolls are soft, fluffy, and golden brown, perfect for any meal. Made from scratch with simple ingredients, they involve basic yeast dough preparation, kneading, rising, and baking to create classic, pillowy rolls that are buttery and delicious.
Ingredients
Dough Ingredients
- 3 1/4 cups all-purpose flour (plus extra for kneading)
- 1 packet (2 1/4 tsp) active dry yeast
- 1 cup warm milk (110°F/45°C)
- 1/4 cup granulated sugar
- 1/4 cup unsalted butter, melted
- 1 large egg
- 1 teaspoon salt
For Brushing
- Melted butter
Instructions
- Activate yeast: Combine warm milk, active dry yeast, and granulated sugar in a large mixing bowl. Let the mixture rest for 5-10 minutes, or until it becomes foamy, indicating the yeast is active.
- Mix wet ingredients: Stir in the melted butter, egg, and salt into the yeast mixture until well combined.
- Add flour: Gradually mix in the all-purpose flour, one cup at a time, until a soft dough forms that starts to pull away from the sides of the bowl.
- Knead dough: Transfer the dough to a floured surface and knead for 8-10 minutes until it becomes smooth, elastic, and slightly tacky but not sticky.
- First rise: Place the dough in a lightly greased bowl, cover it with a damp cloth or plastic wrap, and let it rise in a warm place for about 1 hour, or until it doubles in size.
- Shape rolls: Punch down the risen dough to release air, divide it into 12 equal portions, and shape each portion into a smooth ball.
- Second rise: Arrange the dough balls on a greased baking sheet or in a 9×13-inch dish. Cover and let rise again for 30 minutes until they puff up.
- Bake: Preheat the oven to 375°F (190°C). Bake the rolls for 15-20 minutes, or until they turn golden brown on top.
- Finish: Remove the rolls from the oven and brush them with melted butter to give a glossy, rich finish. Serve warm.
Notes
- Make sure the milk is warm (not hot) to properly activate the yeast without killing it.
- Kneading develops gluten which gives the rolls their soft and stretchy texture.
- Allow the dough to rise in a draft-free, warm environment for best results.
- For softer crust, brush the tops with butter right after baking while rolls are still warm.
- You can store leftover rolls in an airtight container at room temperature for up to 2 days or freeze for longer storage.


