
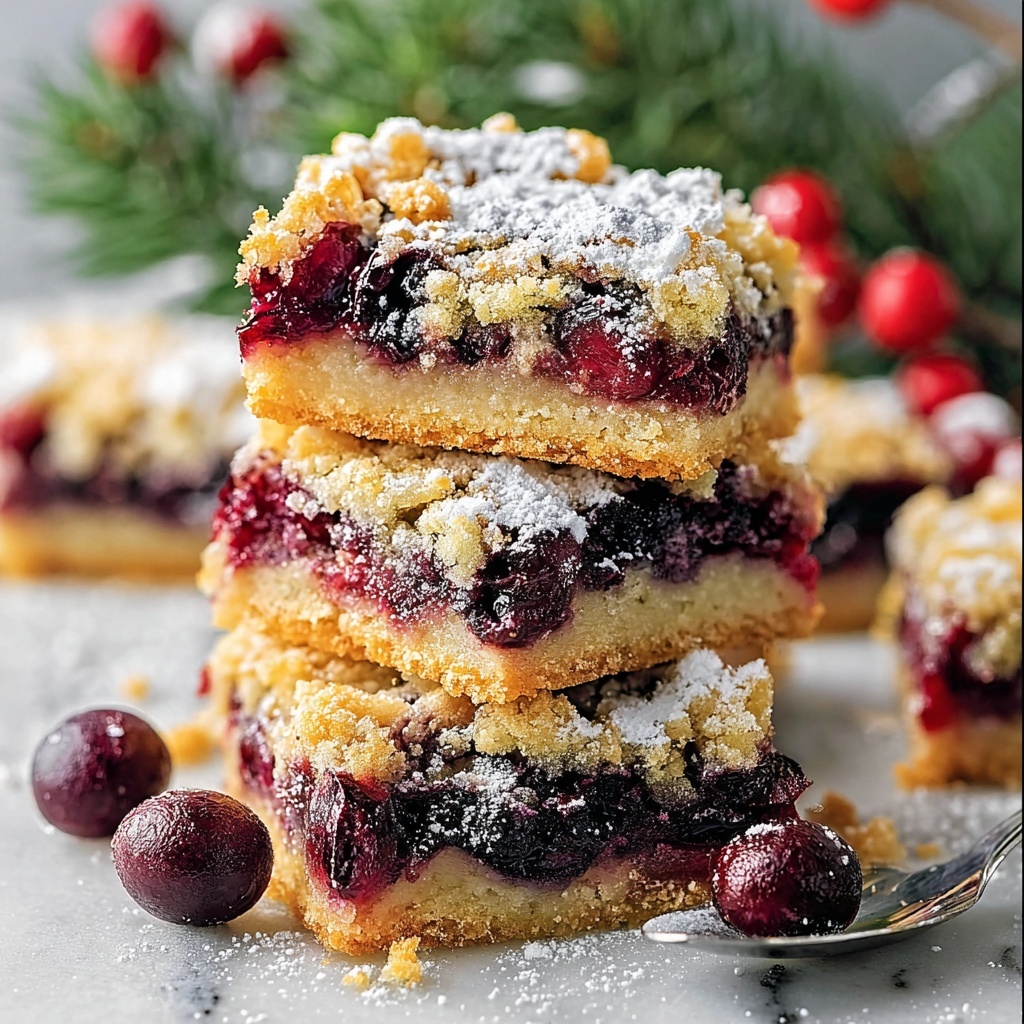
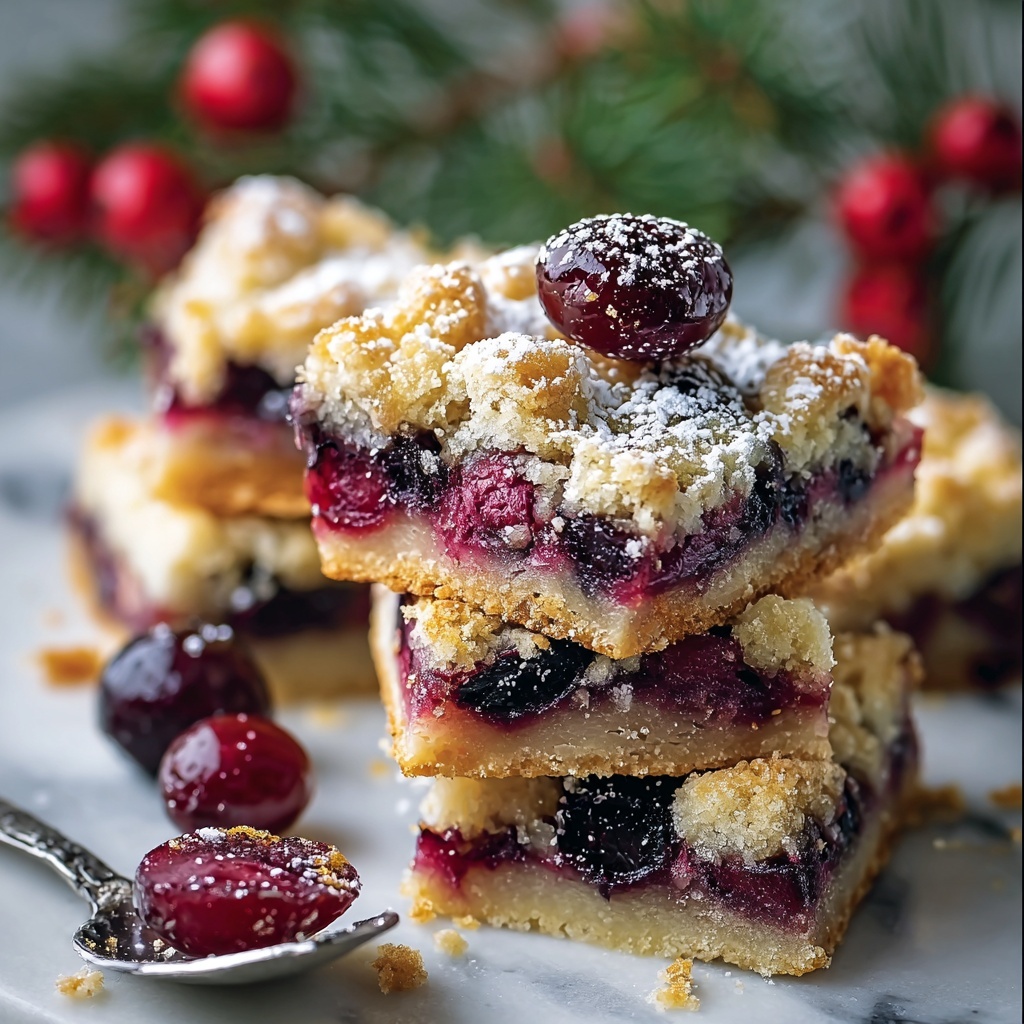
There is something truly magical about sinking your teeth into a sweet, tangy slice of cherry goodness during the holidays, and this Christmas Cherry Bars Recipe captures that festive spirit perfectly. Layers of buttery, tender crust are beautifully balanced by the luscious cherry pie filling and finished with a delicate glaze that adds just the right touch of sweetness. Whether you’re making these bars for a family gathering or gifting them to friends, each bite bursts with joyful flavors that make the season feel even more special.
Ingredients You’ll Need
These ingredients are wonderfully simple yet essential to creating that classic texture and flavor that make Christmas Cherry Bars so irresistible. Each element plays a crucial role, from the richness of the butter to the bright notes of almond extract and the sweet pop of cherries.
- 1 cup butter, softened: The base fat that brings tenderness and richness to the crust.
- 2 cups sugar: Sweetens the dough and balances the tart cherry filling perfectly.
- 1 teaspoon salt: Enhances all the flavors and prevents the bars from tasting flat.
- 4 large eggs, room temperature: Bind the dough together and provide structure.
- 1 teaspoon vanilla extract: Adds warm, comforting depth to the flavor.
- 1/4 teaspoon almond extract: Gives a subtle nutty note that complements the cherries beautifully.
- 3 cups all-purpose flour: Creates the crumbly yet sturdy base and topping layers.
- 2 cans (21 oz each) cherry pie filling: The star ingredient that delivers that classic cherry taste and juicy texture.
- 1 cup confectioners’ sugar: For the sweet and creamy glaze that finishes the bars elegantly.
- 1/2 teaspoon vanilla extract: Enriches the glaze with a sweet aroma and flavor.
- 1/2 teaspoon almond extract: Mirrors the almond note in the dough, tying the glaze and bars together.
- 2–3 tablespoons whole milk: Adjusts the glaze consistency for a smooth drizzle.
How to Make Christmas Cherry Bars Recipe
Step 1: Prepare Your Oven and Pan
Start by preheating your oven to 350°F (175°C). This temperature ensures that your bars bake evenly without burning. Then, generously spray a 15×10-inch sheet pan with baking spray—this keeps the bars from sticking and makes cleanup a breeze. Getting your oven and pan ready upfront will make the baking process smooth and stress-free.
Step 2: Cream the Butter and Sugar
In a large mixing bowl, beat together the softened butter, sugar, and salt until the mixture is light and fluffy. This step is vital because it incorporates air into the dough, giving your bars tenderness and a delicate crumb. The creaminess at this stage sets the foundation for a perfectly textured bar.
Step 3: Add Eggs and Extracts
Add the eggs one at a time, making sure to beat thoroughly after each addition. This slow incorporation ensures an even texture without curdling the batter. Then, stir in the vanilla and almond extracts. These extracts are little flavor powerhouses that give the bars a festive aroma and depth, which makes every bite feel cozy and special.
Step 4: Mix in the Flour
Gradually sift or add the all-purpose flour into the wet mixture, stirring just until a dough forms. Avoid overmixing here to keep the crust tender and crumbly rather than dense. The flour binds everything together and provides structure—think of it as the glue holding your delicious layers in harmony.
Step 5: Press Dough Base and Layer the Cherries
Reserve about 3 cups of the dough to press into the bottom of your prepared sheet pan. Spread it evenly to create a firm bottom crust that will support the cherry pie filling. Once set, spread the entire cherry pie filling over this dough layer, making sure to cover it evenly. This juicy layer is where the magic of your Christmas Cherry Bars Recipe comes through, offering that classic holiday pop of flavor.
Step 6: Add the Dough Topping
Drop spoonfuls of the remaining dough over the cherry filling in a rustic pattern. It doesn’t have to be perfect—these uneven dollops create a charming, homemade look and allow cherries to peek through in all the right places. This top layer bakes to a gorgeous golden brown, adding texture and a buttery crunch when baked.
Step 7: Bake and Cool
Bake your bars for about 35 to 40 minutes, or until the topping turns a lovely golden brown. The aroma filling your kitchen at this point is pure holiday bliss. Once out of the oven, allow the bars to cool completely in the pan to let the cherries set and the bars firm up. This patience pays off in neat, easy-to-cut squares.
Step 8: Prepare and Drizzle the Glaze
While the bars cool, whisk together the confectioners’ sugar, vanilla extract, almond extract, and milk until smooth. This glaze is the final touch that adds a shiny, sweet finish and a pleasing contrast to the tart cherries. Drizzle it liberally over the cooled bars, then let it set before slicing into squares. This glaze seals in moisture and creates an irresistibly pretty treat.
How to Serve Christmas Cherry Bars Recipe
Garnishes
These bars are gorgeous on their own, but you can elevate them with a dusting of extra confectioners’ sugar or a sprinkle of toasted sliced almonds to enhance the almond flavor. Fresh cherries or a sprig of mint add a fresh, festive touch if you want to impress guests visually and flavor-wise.
Side Dishes
Because Christmas Cherry Bars Recipe is rich and sweet, they pair wonderfully with a scoop of vanilla ice cream or a dollop of whipped cream. For a cozy holiday touch, serve them alongside warm mulled cider or a cup of spiced chai tea to complement the tart sweetness of the cherries with warm spices.
Creative Ways to Present
Consider stacking a few squares on a pretty holiday platter lined with festive napkins for a simple yet eye-catching display. For gift-giving, wrap bars individually in wax paper tied with ribbon—a charming way to share this seasonal favorite. You could also serve them in mini tart pans as single servings, perfect for a holiday party dessert table.
Make Ahead and Storage
Storing Leftovers
Keep any leftover bars stored in an airtight container at room temperature for up to 3 days. This keeps the bars fresh and the crust tender without drying out. If your kitchen is warm, you might prefer to refrigerate them, but bring them to room temperature before serving for best flavor.
Freezing
You can freeze Christmas Cherry Bars Recipe for up to 2 months. Wrap individual squares tightly in plastic wrap, then place them in a freezer-safe container or zip-top bag. Thaw at room temperature when ready to enjoy, and avoid glazing before freezing to keep it looking and tasting fresh after thawing.
Reheating
If you like your bars a bit warm, pop them in a preheated oven at 300°F (150°C) for about 10 minutes. This gently warms the cherry filling and refreshes the buttery crust without melting the glaze. You can also enjoy them cold—they’re delicious either way!
FAQs
Can I use fresh cherries instead of canned pie filling?
Fresh cherries can be used, but you’ll need to cook them down with sugar and a thickener like cornstarch to achieve the proper consistency. Canned pie filling is convenient and provides a consistent flavor and texture perfect for this recipe.
What if I don’t have almond extract?
Vanilla extract alone works just fine—though almond extract adds that lovely holiday hint that complements cherries so well. If you want to experiment, a touch of lemon zest could add a nice brightness instead.
Can I make this recipe gluten-free?
Yes, you can substitute the all-purpose flour with a gluten-free baking blend that measures cup for cup. Just be sure it contains xanthan gum or a similar binder for the best texture.
How thick should the dough layers be?
Press the bottom dough layer evenly about half an inch thick to support the filling without being too dense. The dropped dough on top can be a bit more uneven, around 1/3 inch in some places, to create that rustic, crumbly finish.
How long do these bars keep their best flavor?
For the most tender and flavorful experience, enjoy your Christmas Cherry Bars within 2 to 3 days of baking. They’re still tasty afterward but may lose a bit of their fresh, soft texture.
Final Thoughts
I honestly can’t recommend this Christmas Cherry Bars Recipe enough when you want to bring joy to your holiday table with minimal fuss and maximum flavor. The balance of buttery crust, sweet-tart cherries, and that delightful glaze makes every bite a celebration. Whether you’re baking for family or friends, this recipe will quickly become one of your seasonal favorites—so go ahead, bake a batch and watch everyone fall in love just like I did!
Print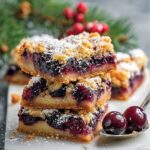
Christmas Cherry Bars Recipe
- Prep Time: 20 minutes
- Cook Time: 40 minutes
- Total Time: 1 hour
- Yield: 24 servings
- Category: Dessert
- Method: Baking
- Cuisine: American
Description
Delight in these classic Christmas Cherry Bars, featuring a buttery dough layered with sweet cherry pie filling and topped with a smooth vanilla-almond glaze. Perfect for festive gatherings, these bars combine tender crust and luscious fruit to create a nostalgic holiday treat.
Ingredients
For the Dough
- 1 cup butter, softened
- 2 cups sugar
- 1 teaspoon salt
- 4 large eggs, room temperature
- 1 teaspoon vanilla extract
- 1/4 teaspoon almond extract
- 3 cups all-purpose flour
For the Filling
- 2 cans (21 oz each) cherry pie filling
For the Glaze
- 1 cup confectioners’ sugar
- 1/2 teaspoon vanilla extract
- 1/2 teaspoon almond extract
- 2–3 tablespoons whole milk
Instructions
- Preheat Oven: Preheat your oven to 350°F (175°C) and spray a 15×10-inch sheet pan with baking spray to prepare for baking.
- Cream Butter, Sugar, and Salt: In a large bowl, cream together the softened butter, sugar, and salt until the mixture is light and fluffy, ensuring a well-mixed base for the dough.
- Add Eggs and Extracts: Add the eggs one at a time, beating well after each addition. Stir in the vanilla and almond extracts to infuse the dough with flavor.
- Incorporate Flour: Gradually add the all-purpose flour, mixing until a cohesive dough forms, being careful not to overmix.
- Press Dough Base: Press 3 cups of the dough evenly into the bottom of the prepared sheet pan, creating the base layer for the bars.
- Spread Cherry Filling: Spread the cherry pie filling evenly over the dough layer to ensure uniform sweetness in every bite.
- Top with Remaining Dough: Drop spoonfuls of the remaining dough across the cherry filling to create a textured top layer.
- Bake: Bake in the preheated oven for 35-40 minutes, or until the dough topping turns golden brown. Remove from oven and allow the bars to cool completely in the pan.
- Prepare Glaze: In a small bowl, whisk together the confectioners’ sugar, vanilla extract, almond extract, and whole milk until smooth and pourable.
- Glaze and Serve: Drizzle the glaze evenly over the cooled bars. Once the glaze has set, cut into squares and serve.
Notes
- Be sure to use room temperature eggs for better incorporation into the dough.
- Cooling completely before glazing ensures the glaze sets properly without melting.
- You can substitute cherry pie filling with other fruit fillings like blueberry or raspberry for variation.
- Store bars in an airtight container at room temperature for up to 3 days or refrigerate for longer freshness.
