
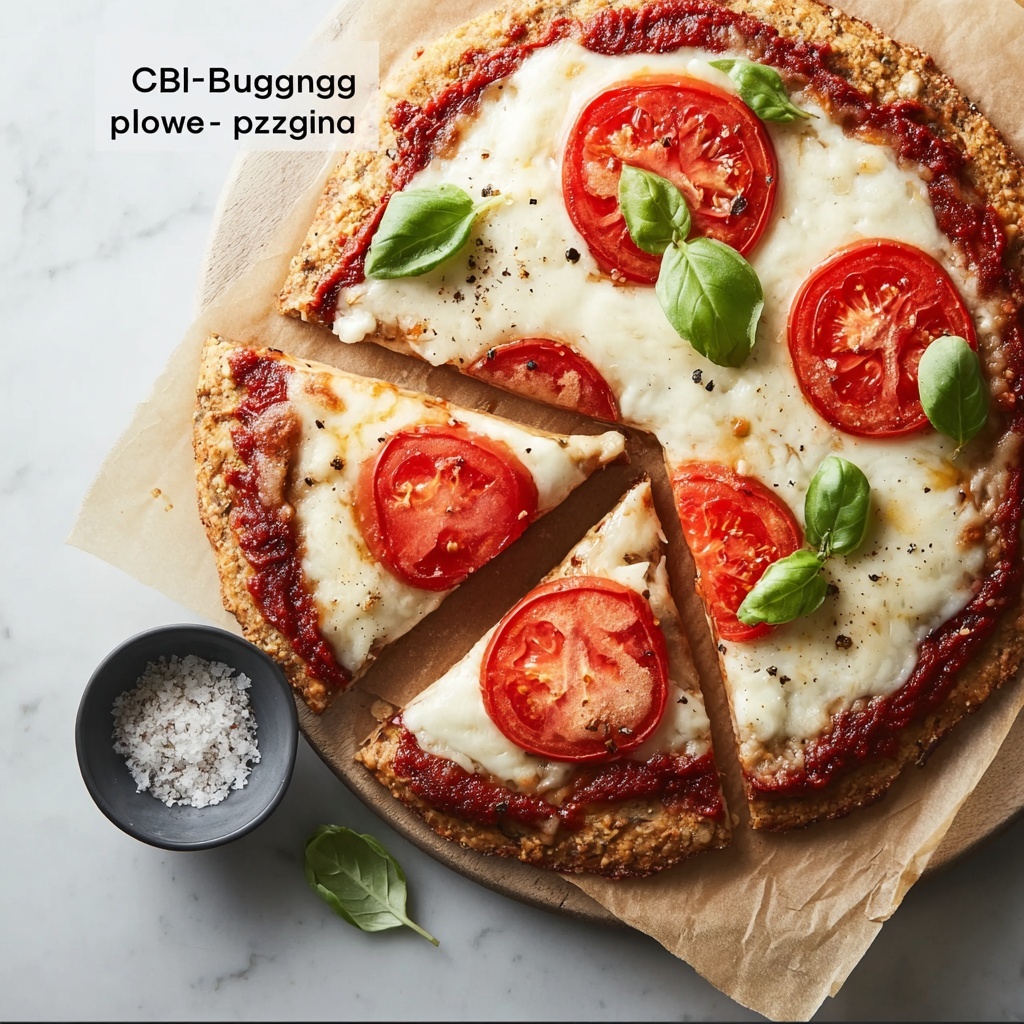
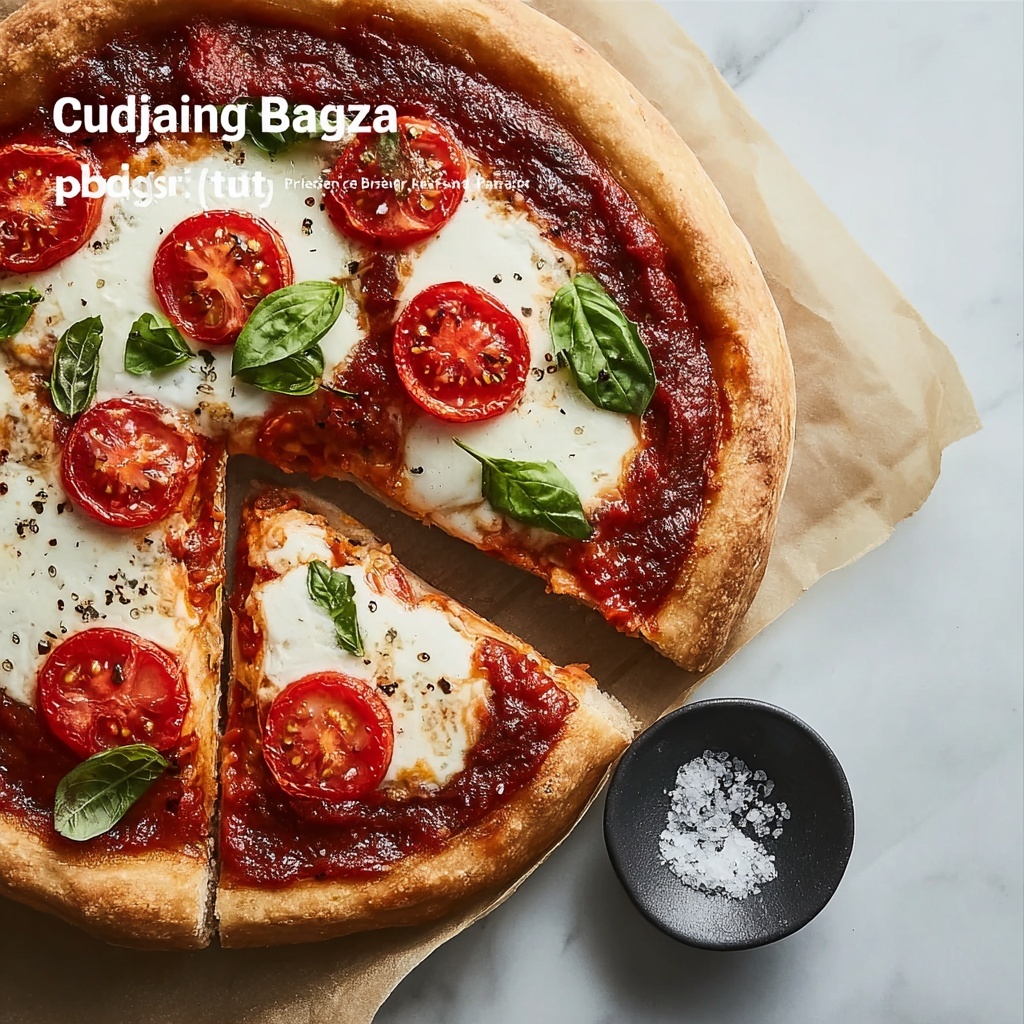
If you’ve been searching for a gluten-free pizza option that doesn’t compromise on flavor or texture, the Crispy Coconut Flour Pizza Crust You’ll Crave Every Night Recipe is about to become your new obsession. This crust is wonderfully crispy on the edges, tender inside, and packed with subtle sweetness from coconut flour that perfectly balances savory toppings. Best of all, it’s quick to whip up and yields a delightful base that holds together beautifully without any weird graininess. Trust me, once you try this recipe, you’ll find yourself reaching for it again and again when pizza night rolls around.
Ingredients You’ll Need
Keep it simple yet essential with this thoughtfully curated ingredient list that harmonizes to create the perfect crust. Each element plays a crucial role in texture, flavor, or structure, ensuring your coconut flour pizza base comes out delicious every time.
- 1 cup Coconut flour: A gluten-free flour that gives a subtle sweetness and light texture to the crust.
- 1 teaspoon Baking powder: Ensures the crust rises slightly for a soft yet crispy bite.
- 1 teaspoon Garlic powder: Adds an aromatic savory note to enhance the flavor profile.
- 1 teaspoon Onion powder: Compliments the garlic flavor with a gentle earthiness.
- 1 teaspoon Salt: Enhances and balances all the flavors in the crust.
- 3 large Egg whites: Provide important structure and lightness without heaviness.
- 2 tablespoons Olive oil: Gives a rich, silky texture and subtle Mediterranean flair.
How to Make Crispy Coconut Flour Pizza Crust You’ll Crave Every Night Recipe
Step 1: Preheat and Prep Your Pans
Start by heating your oven to 350°F. Line two 8-inch round cake pans with parchment paper; this prevents sticking and helps the crusts release easily once baked. Preparation is key here—getting your pans ready early ensures a smooth process.
Step 2: Combine the Dry Ingredients
Sift together the coconut flour, baking powder, garlic powder, and onion powder in a mixing bowl. Sifting is a small but important step that prevents lumps and ensures even distribution, giving your crust a perfectly consistent texture.
Step 3: Whip the Egg Whites
Using a stand mixer, beat the egg whites and salt on medium-high until they form soft peaks. This will create an airy base for your crust that is crucial for its light and crispy texture. Don’t rush this step; properly whipped egg whites make all the difference.
Step 4: Combine Wet and Dry Mixtures
Gently fold the sifted coconut flour mixture into the whipped egg whites, mixing until fully blended. Then, incorporate the olive oil to enrich the batter and add a subtle silkiness that makes your crust irresistible. This step requires a gentle hand to maintain those airy peaks.
Step 5: Bake the Crusts
Divide the batter evenly between the two prepared pans. Bake for 15 to 20 minutes at 350°F until the crusts are lightly golden and firm to the touch. Keep an eye on them so they don’t overbake, as you want that crisp but tender balance.
Step 6: Remove and Prepare for Toppings
Once baked, allow the crusts to cool slightly before carefully peeling the parchment paper away. Then, increase your oven temperature to 400°F, placing a pizza stone on a lower rack to warm up. This will give your final bake a crisp finish.
Step 7: Add Your Favorite Toppings and Final Bake
Top each crust with your favorite cooked meats, vegetables, and cheese. Pop them back in the oven on the heated pizza stone for 4 to 5 minutes, just until everything is heated through and the edges turn delightfully crispy.
How to Serve Crispy Coconut Flour Pizza Crust You’ll Crave Every Night Recipe
Garnishes
The best part about this crust is how well it pairs with fresh garnishes like torn basil, a sprinkle of chili flakes, or a drizzle of extra virgin olive oil after baking. These final touches add bursts of flavor and a gourmet feel that elevate your homemade pizza to restaurant quality.
Side Dishes
Keep your meal balanced by serving your coconut flour crust pizza with light side salads—think mixed greens with a tangy vinaigrette or roasted vegetables for a hearty but healthy complement. These sides add freshness and texture contrast that make each bite more exciting.
Creative Ways to Present
If you want to impress guests or change things up, try cutting the pizza crust into bite-sized squares for a party appetizer or layering two crusts with different toppings for a fun pizza stack. The crisp texture holds up beautifully to creative serving ideas.
Make Ahead and Storage
Storing Leftovers
Once cooled completely, store leftover crusts wrapped tightly in plastic wrap or in an airtight container in the refrigerator. They keep well for up to 3 days and maintain the crispness when reheated thoughtfully.
Freezing
You can freeze baked crusts by wrapping them individually in foil and placing them into a freezer bag. When frozen properly, they stay fresh for up to a month, giving you a handy shortcut for future pizza nights.
Reheating
To bring back that perfect crisp from refrigerated or frozen crusts, reheat in a preheated oven at 375°F for about 5 to 7 minutes. Avoid microwaving as it can make the crust soggy and chewy—oven heat preserves the delightful crunch you love.
FAQs
Can I use whole eggs instead of egg whites?
Whole eggs add richness but can make the crust denser and less crispy. This recipe relies on whipped egg whites to keep the base light and airy, so for the best texture, stick with egg whites.
Is coconut flour the only flour that works here?
Coconut flour is unique in this recipe because of its moisture absorption and sweetness. Using other flours will change the texture and may require altering liquid ratios, so coconut flour is your best bet for replicating this crisp crust.
Can I make this crust dairy-free?
Yes! This recipe is naturally dairy-free since it doesn’t call for cheese or butter in the crust itself. Just be sure your toppings also align with your dietary needs.
What toppings work best on this crust?
Since the crust is subtly sweet and savory, toppings like tomato sauce, mozzarella, fresh veggies, grilled chicken, or even tropical fruits like pineapple work really well, creating a balanced and delicious pizza.
How thin can I roll or spread the crust batter?
The batter spreads best within the 8-inch pans as indicated. Spreading it too thin may cause breakage, and too thick will make it heavy. This recipe aims for that perfect balance of crisp edge and tender center.
Final Thoughts
Making the Crispy Coconut Flour Pizza Crust You’ll Crave Every Night Recipe is more than just a fun cooking project — it’s a delicious gateway to healthier pizza nights without skimping on flavor or crunch. Whether you’re gluten-free or just pizza-curious, this crust opens a world of possibilities with its perfect texture and subtle sweetness. I can’t wait for you to try it and discover how easy and satisfying homemade pizza can be with this fabulous base!
Print
Crispy Coconut Flour Pizza Crust You’ll Crave Every Night Recipe
- Prep Time: 10 minutes
- Cook Time: 25 minutes
- Total Time: 35 minutes
- Yield: 2 servings
- Category: Dinner
- Method: Baking
- Cuisine: American
- Diet: Gluten Free
Description
This Crispy Coconut Flour Pizza Crust recipe offers a delicious gluten-free alternative to traditional pizza dough. Made with coconut flour, egg whites, and a blend of flavorful spices, it creates a subtly sweet, crispy base you’ll love. Perfectly baked and topped with your favorite ingredients, this pizza crust is a great option for a light and healthy dinner.
Ingredients
Dry Ingredients
- 1 cup Coconut flour (a gluten-free flour that gives a subtle sweetness)
- 1 teaspoon Baking powder (ensures the crust rises)
- 1 teaspoon Garlic powder (adds an aromatic savory note)
- 1 teaspoon Onion powder (compliments the garlic flavor)
- 1 teaspoon Salt (enhances the flavors)
Wet Ingredients
- 3 large Egg whites (provides structure)
- 2 tablespoons Olive oil (gives a rich flavor)
Instructions
- Preheat the oven: Set your oven to 350°F (175°C) to prepare for baking the pizza crusts.
- Prepare the pans: Line two 8-inch round cake pans with parchment paper to prevent sticking and ease removal of the crusts.
- Mix dry ingredients: In a mixing bowl, sift together the coconut flour, baking powder, garlic powder, and onion powder to combine and aerate the mixture.
- Beat egg whites: Using a stand mixer on medium-high speed, beat the egg whites and salt until soft peaks form, creating a light and airy base.
- Combine mixtures: Gently fold the sifted dry ingredients into the beaten egg whites, mixing until well blended.
- Add olive oil: Stir in the olive oil until fully incorporated, ensuring a smooth batter.
- Divide batter: Evenly distribute the mixture between the two prepared cake pans.
- Bake the crusts: Place the pans in the preheated oven and bake for 15-20 minutes until the crusts are set and slightly golden.
- Cool and remove: Allow the crusts to cool slightly before carefully peeling away the parchment paper.
- Preheat oven for topping: Increase oven temperature to 400°F (205°C) and place a pizza stone on a lower rack to heat.
- Add toppings: Top each crust with your favorite cooked meats or vegetables.
- Final bake: Bake the topped pizzas on the heated pizza stone for 4-5 minutes until the toppings are heated through and crust is crispy.
Notes
- Beating the egg whites to soft peaks is crucial for achieving the fluffy and crispy texture of the crust.
- Use parchment paper for easy removal and to keep the crust intact.
- Preheating the pizza stone helps to crisp the crust during the final bake.
- Choose cooked toppings to avoid soggy crust and ensure everything heats evenly.
- This recipe is naturally gluten-free and low in carbs, making it suitable for gluten-sensitive and low-carb diets.


