
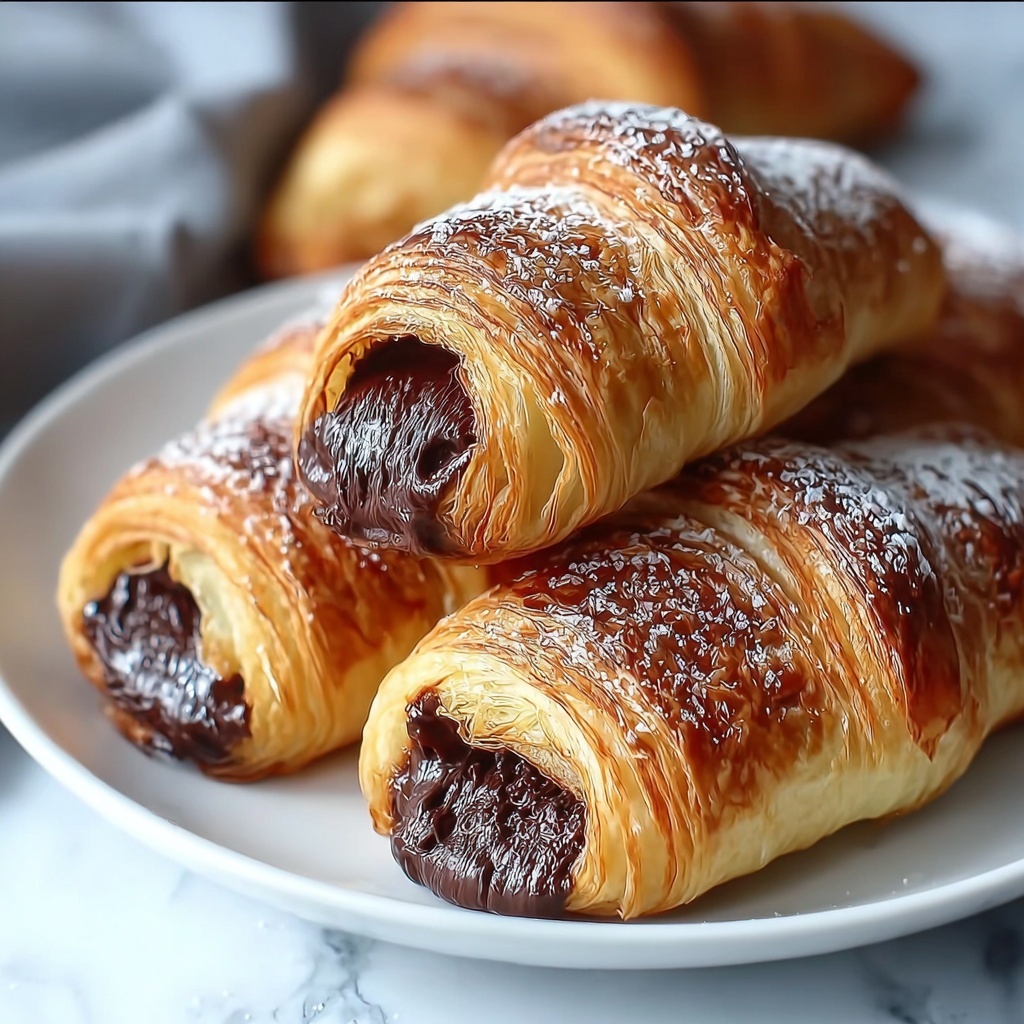
Get ready to fall in love with flaky layers of buttery perfection paired with rich, melty chocolate in this Decadent Homemade Chocolate Croissants Recipe. Whether you’re baking for a special morning treat or impressing friends with your baking skills, these croissants deliver a spectacular blend of texture and flavor that feels straight out of a Parisian bakery right in your own kitchen. The crisp exterior gives way to soft, chocolate-filled pockets, making every bite an irresistible delight.
Ingredients You’ll Need
The magic behind this recipe lies in its simplicity and quality ingredients. Each one plays an essential role in creating the perfect croissant texture, beautiful color, and well-balanced sweetness that makes these chocolate croissants so unforgettable.
- 4 cups All-Purpose Flour: The foundation of your dough; bread flour can be swapped in for extra chewiness.
- 1/4 cup Granulated Sugar: Adds sweetness; you can substitute brown sugar for a deeper, caramel note.
- 1 tsp Salt: Enhances flavors and balances sweetness perfectly.
- 2 tsp Instant Yeast: Helps the dough rise beautifully; active dry yeast requires warm milk to activate.
- 1 cup Cold Whole Milk: Provides moisture and richness; almond or oat milk works great for dairy-free options.
- 1 cup Unsalted Butter: The star of lamination; make sure it’s cold to create those signature flaky layers.
- 1/2 cup All-Purpose Flour (for butter blend): Helps thicken the butter so it layers evenly within the dough.
- 1 cup Chocolate Batons or Semi-Sweet Chocolate: Pick your favorite dark chocolate for a sophisticated edge.
- 1 Large Egg: Brushed on top for an enviable golden shine.
- 2 tbsp Milk: Mixed with the egg to ensure a glossy finish.
- Powdered Confectioners’ Sugar (optional): For that extra touch of elegance dusted over warm croissants.
How to Make Decadent Homemade Chocolate Croissants Recipe
Step 1: Prepare the Dough
Start by mixing the flour, sugar, salt, and yeast gently in a bowl. Slowly add cold whole milk and knead for about 5 minutes until the dough becomes soft but still a bit tacky. The cool milk helps control fermentation, which is key to that tender crumb. Pop the dough in the fridge for 30 minutes to relax and chill—it’s a crucial step for easier rolling later.
Step 2: Make the Butter Layer
While the dough chills, combine the softened butter and half a cup of flour in another bowl. Work them together until smooth and form this mixture into a flat rectangle about half an inch thick. Refrigerate it for 30 minutes to firm up. This butter block will be the secret to your croissants’ irresistible flakiness.
Step 3: Enclose the Butter
Roll out the chilled dough into a larger rectangle and place the butter layer right in the center. Fold the dough over the butter, sealing all edges carefully so the butter doesn’t escape. This encased butter will create those beautiful flaky layers when rolled and folded multiple times. Chill again for another 30 minutes to keep everything firm and manageable.
Step 4: Laminate with Turns
Time for rolling and folding magic. Roll the dough out and fold it over like a letter, then refrigerate for a rest period. Repeat this rolling and folding process two more times for a total of three “turns.” Each turn builds more layers, so don’t rush this step. After the final turn, refrigerate your dough for at least 4 hours or overnight; patience here makes all the difference.
Step 5: Shape and Fill
Roll the dough into a long rectangle, about a quarter inch thick. Cut into equal-sized smaller rectangles and place a piece of chocolate baton on one end of each. Roll them carefully into croissant shapes, enclosing the chocolate inside. Let these proof for 1 hour at room temperature to puff up, then chill again for another hour. This slow proofing is essential for that perfect rise.
Step 6: Bake to Golden Perfection
Preheat your oven to 400°F (204°C). Brush each croissant with a glossy egg wash made by mixing the egg with milk—this step ensures a beautifully shiny, golden crust. Bake for about 20 minutes or until they turn a rich golden brown and fill your kitchen with that irresistible aroma of fresh pastry and chocolate. Cool on a wire rack and dust with confectioners’ sugar if desired for a touch of flair.
How to Serve Decadent Homemade Chocolate Croissants Recipe

Garnishes
A light dusting of powdered sugar adds a simple yet stunning finishing touch to these croissants, highlighting their golden crust while adding a subtle sweetness. You can also drizzle a little melted chocolate or sprinkle chopped nuts for extra texture and visual appeal.
Side Dishes
Pair these croissants with fresh berries or a dollop of whipped cream to brighten the flavors. A cup of freshly brewed coffee or a frothy cappuccino complements the rich chocolate beautifully and makes for a perfect indulgent breakfast or afternoon treat.
Creative Ways to Present
Serve your croissants nestling on a wooden board lined with parchment paper for a rustic charm. For a brunch buffet, place them alongside jams, honey, and butter curls. You can even slice them open and add fresh fruit or a smear of mascarpone for a mini dessert twist that’s sure to impress.
Make Ahead and Storage
Storing Leftovers
Once completely cooled, store your croissants in an airtight container at room temperature for up to two days. This keeps their delicate texture intact and the chocolate luscious without drying out the pastry.
Freezing
To enjoy them later, freeze the baked croissants by wrapping each one tightly in plastic wrap and placing them into a freezer bag. They’ll keep well for up to a month, perfect for a spontaneous gourmet breakfast any day of the week.
Reheating
Warm croissants gently in a preheated oven at 350°F (175°C) for about 5 to 7 minutes. This brings back that delicate crispness on the outside and revives the gooey chocolate center, almost like fresh from the bakery again.
FAQs
Can I use regular dry yeast instead of instant yeast?
Yes, you can! Just be sure to activate the active dry yeast in warm milk before mixing it with the other ingredients. This step wakes up the yeast to give your dough the best rise.
Is there a dairy-free option for the butter and milk?
Absolutely. You can substitute the milk with almond, oat, or any other plant-based milk. For butter, use a cold, solid vegan butter that’s suitable for baking to maintain those flaky layers.
How long should the lamination process take?
Including chilling times, expect around 4 to 5 hours minimum, but you can refrigerate overnight after the final turn for even better layering. Patience during lamination results in the best flaky texture.
Can I make these croissants smaller or bigger?
Definitely! Just adjust the size of your dough rectangles and chocolate pieces accordingly. Smaller croissants bake faster, so keep an eye on them to avoid over-baking.
What if I don’t have chocolate batons?
No worries—chocolate chips, chopped bars, or even chocolate spread work wonderfully. Just be sure to seal the croissants well so the chocolate doesn’t leak during baking.
Final Thoughts
Making the Decadent Homemade Chocolate Croissants Recipe might seem like an adventure, but trust me, it’s a rewarding one that fills your home with the most incredible aromas. Once you taste those perfectly flaky layers and velvety chocolate, you’ll want to bake these again and again. So roll up your sleeves, have fun with the process, and enjoy every buttery, chocolatey bite!
Print
Decadent Homemade Chocolate Croissants Recipe
- Prep Time: 1 hour 30 minutes
- Cook Time: 20 minutes
- Total Time: 5 hours 50 minutes
- Yield: 12 servings
- Category: Breakfast, Pastry
- Method: Baking
- Cuisine: French
Description
Master the art of French baking with these decadent homemade chocolate croissants. Featuring flaky, buttery layers wrapped around rich chocolate, this recipe guides you through each step, from preparing the dough and lamination to the perfect golden finish. Ideal for a special breakfast or indulgent treat, these croissants combine classic technique with accessible ingredients for a truly impressive bake.
Ingredients
Dough Ingredients
- 4 cups All-Purpose Flour (Consider using bread flour for a chewier texture)
- 1/4 cup Granulated Sugar (Substitute with brown sugar for a richer flavor)
- 1 tsp Salt (Enhances overall flavor)
- 2 tsp Instant Yeast (Active dry yeast can be used but needs warm milk for activation)
- 1 cup Cold Whole Milk (Dairy-free alternatives include almond or oat milk)
Butter Layer
- 1 cup Unsalted Butter (Ensure it’s cold for successful lamination)
- 1/2 cup All-Purpose Flour (Helps thicken the butter layer for easy handling)
Filling and Finishing
- 1 cup Chocolate Batons or Semi-Sweet Chocolate (Dark chocolate is a wonderful alternative)
- 1 Large Egg (Gives a beautiful golden color)
- 2 tbsp Milk (Improves shine of the egg wash)
- Powdered Confectioners’ Sugar (Optional, to dust before serving)
Instructions
- Mix and Knead Dough: In a large mixing bowl, combine the all-purpose flour, granulated sugar, salt, and instant yeast. Gradually pour in the cold whole milk and knead the mixture for about 5 minutes until you achieve a soft but slightly tacky dough. Once kneaded, cover the dough and refrigerate it for 30 minutes to rest and chill.
- Prepare Butter Rectangle: In a separate bowl, beat together the cold unsalted butter and half a cup of flour until smooth and pliable. Shape this butter mixture into a flat rectangle about ½ inch thick. Wrap and refrigerate this butter rectangle for at least 30 minutes to firm up for lamination.
- Incorporate Butter into Dough: Roll the chilled dough out into a larger rectangular shape on a lightly floured surface. Place the cold butter rectangle in the center of the dough. Fold the dough edges over to fully encase the butter, making sure to seal the edges tightly. Return the dough to the refrigerator and chill for another 30 minutes before rolling.
- Perform Rolling and Folding (Turns): Roll the dough into a large rectangle again. Fold the dough in thirds like a letter (this is one turn). Repeat this rolling and folding process two more times for a total of three turns, which creates the signature flaky layers. After each turn, refrigerate the dough for at least 30 minutes. After completing all three turns, refrigerate the dough for at least 4 hours or overnight to relax and chill thoroughly.
- Shape Croissants with Chocolate: Roll the rested dough into a long rectangle about ¼ inch thick. Cut the dough into equal-sized rectangles suitable for individual croissants. Place a piece of chocolate baton or semi-sweet chocolate on each rectangle, then carefully roll the dough around the chocolate to form croissant shapes. Arrange the shaped croissants on a baking tray and let them proof at room temperature for 1 hour to rise. Following proofing, refrigerate the croissants for an additional hour to firm up before baking.
- Preheat and Bake: Preheat your oven to 400°F (204°C). Whisk together the large egg and 2 tablespoons of milk to create an egg wash. Gently brush the egg wash over each croissant to ensure a glossy, golden finish. Bake the croissants for about 20 minutes or until they turn a rich golden brown and puff up beautifully. Remove from oven and cool on a wire rack.
- Serve: Once cooled slightly, dust the croissants lightly with powdered confectioners’ sugar if desired. Serve warm or at room temperature for a delicious, flaky, chocolate-filled pastry experience.
Notes
- Ensure the butter and dough remain cold throughout the lamination process to achieve flaky layers.
- Use bread flour for a chewier, more structured croissant if preferred.
- Substitute dairy milk with almond or oat milk for a dairy-free version, adjusting proofing time as needed.
- The multiple resting times are crucial for dough development and lamination quality.
- Chocolate batons or semi-sweet chocolate can be replaced by dark chocolate but choose high-quality chocolate for best flavor.
- Proof croissants in a warm but not hot place to avoid over-proofing.
- Store leftover croissants in an airtight container; reheat gently in the oven before serving to maintain crispiness.


