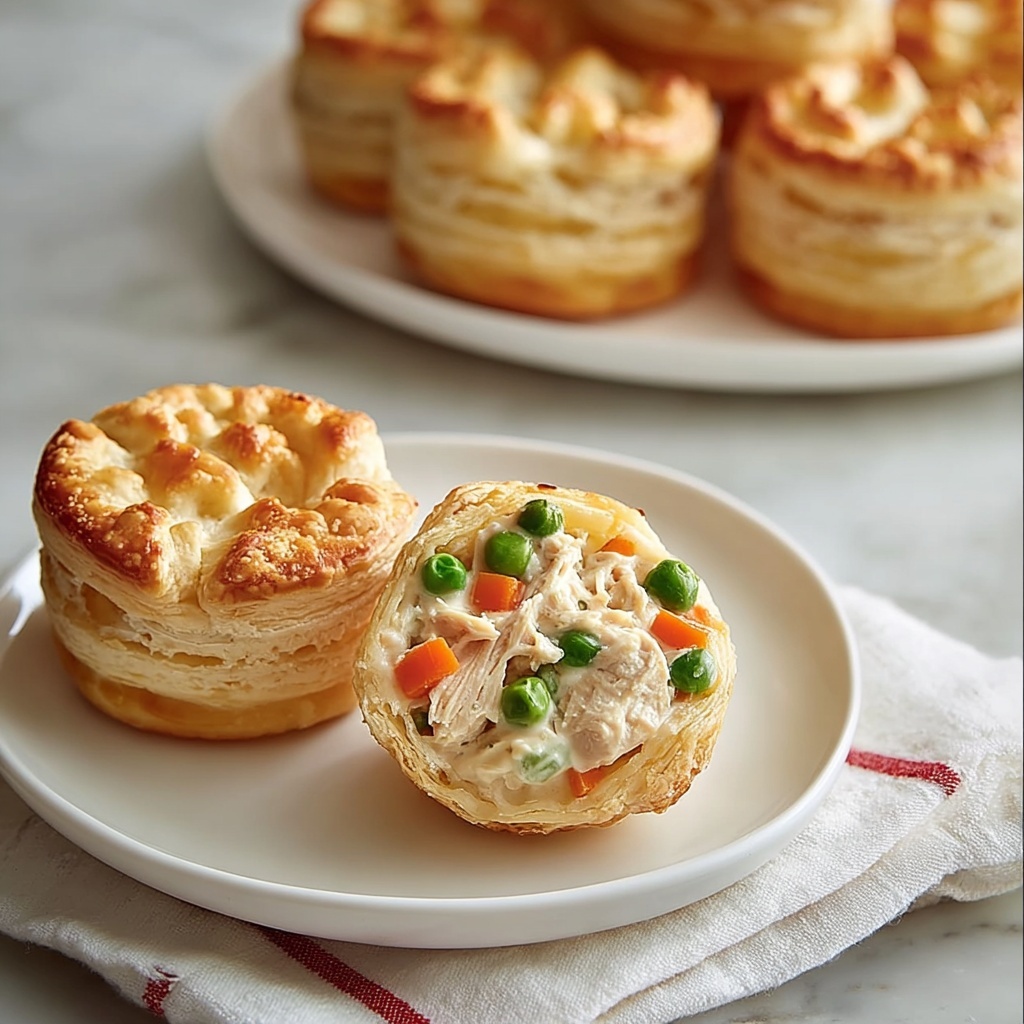
If you are looking for a cozy, scrumptious meal that feels like a warm hug on a plate, this Mini Chicken Pot Pie with Grands Biscuits Recipe is exactly what you need. Perfectly flaky biscuit crusts cradle a creamy, flavorful chicken and vegetable filling that’s both comforting and satisfying. It’s one of those dishes that instantly brings smiles around the table, blending simple ingredients into something truly special. Whether you’re making a quick weeknight dinner or hosting friends, these mini pot pies are easy to love and even easier to share.
Ingredients You’ll Need
This recipe calls for straightforward ingredients that come together beautifully to create the perfect balance of textures and flavors. Each component plays a crucial role, from the flaky biscuit shells to the rich, creamy filling bursting with tender chicken and garden veggies.
- 16.3 oz refrigerated Grands biscuits (8 count): These flaky biscuits form the irresistible golden crust that holds everything together.
- ¼ cup unsalted butter: Adds richness and helps soften the vegetables for a velvety filling.
- 1 small white onion, finely chopped: Provides a subtle sweetness and depth of flavor.
- 3 cloves garlic, minced: Infuses the filling with a fragrant warmth.
- 1 cup frozen peas and carrots: Brings fresh bursts of color and a touch of natural sweetness.
- 2 tablespoons all-purpose flour: Thickens the creamy base so it’s perfectly luscious, not runny.
- 1 cup cooked shredded chicken: The hearty protein star of the dish.
- 1 cup heavy cream: Creates a rich, smooth sauce that ties everything together.
- ¼ teaspoon black pepper: Adds a gentle spice that lifts the flavors.
- 1 teaspoon salt: Essential for enhancing every ingredient’s natural taste.
- ½ teaspoon dry thyme: Brings an earthy, herbal note that rounds out the filling beautifully.
How to Make Mini Chicken Pot Pie with Grands Biscuits Recipe
Step 1: Prepare the Chicken Mixture
Start by melting the butter in a large pan over medium-high heat. Toss in the finely chopped onion, frozen peas and carrots, and minced garlic. Cooking this mixture until the onion looks translucent, around three minutes, unlocks those wonderful savory flavors and softens everything just right.
Step 2: Thicken the Filling
Sprinkle the flour directly over your sautéed vegetables and stir thoroughly to coat them evenly. Next, add your cooked shredded chicken and cook everything together for an additional minute. This step is important because it helps the flour absorb the butter and juices, creating a silky base for the filling.
Step 3: Add Cream and Seasonings
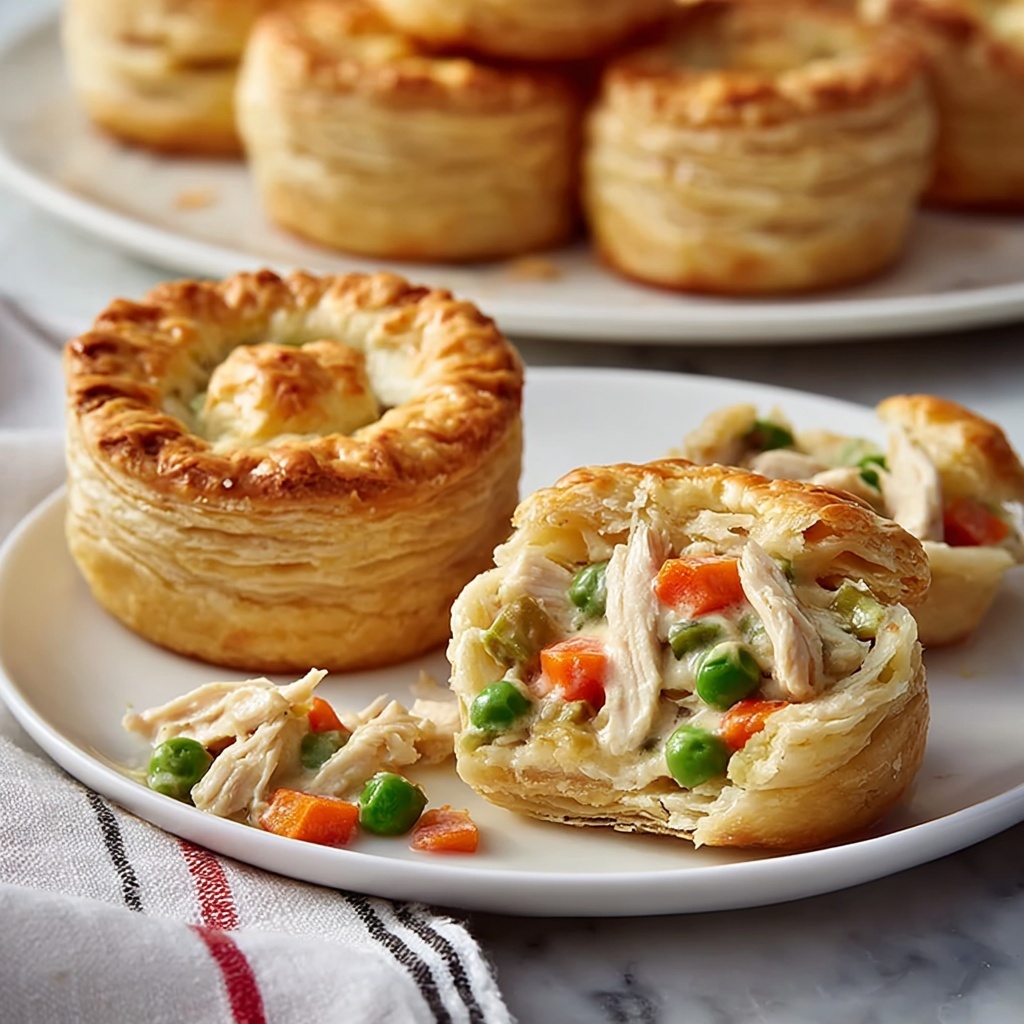
Pour in the heavy cream and season with salt, black pepper, and dry thyme. Keep stirring the mixture—it will start to thicken within about two minutes. This creamy, herb-infused filling is the heart of the Mini Chicken Pot Pie with Grands Biscuits Recipe, providing rich flavor with every bite.
Step 4: Assemble the Mini Pot Pies
Preheat your oven to 350°F (175°C) and grease a muffin pan lightly. Take each Grands biscuit and flatten it into a round about 5 inches in diameter. Press these biscuit rounds gently into the muffin cups, creating little shells ready to be filled.
Step 5: Fill and Bake
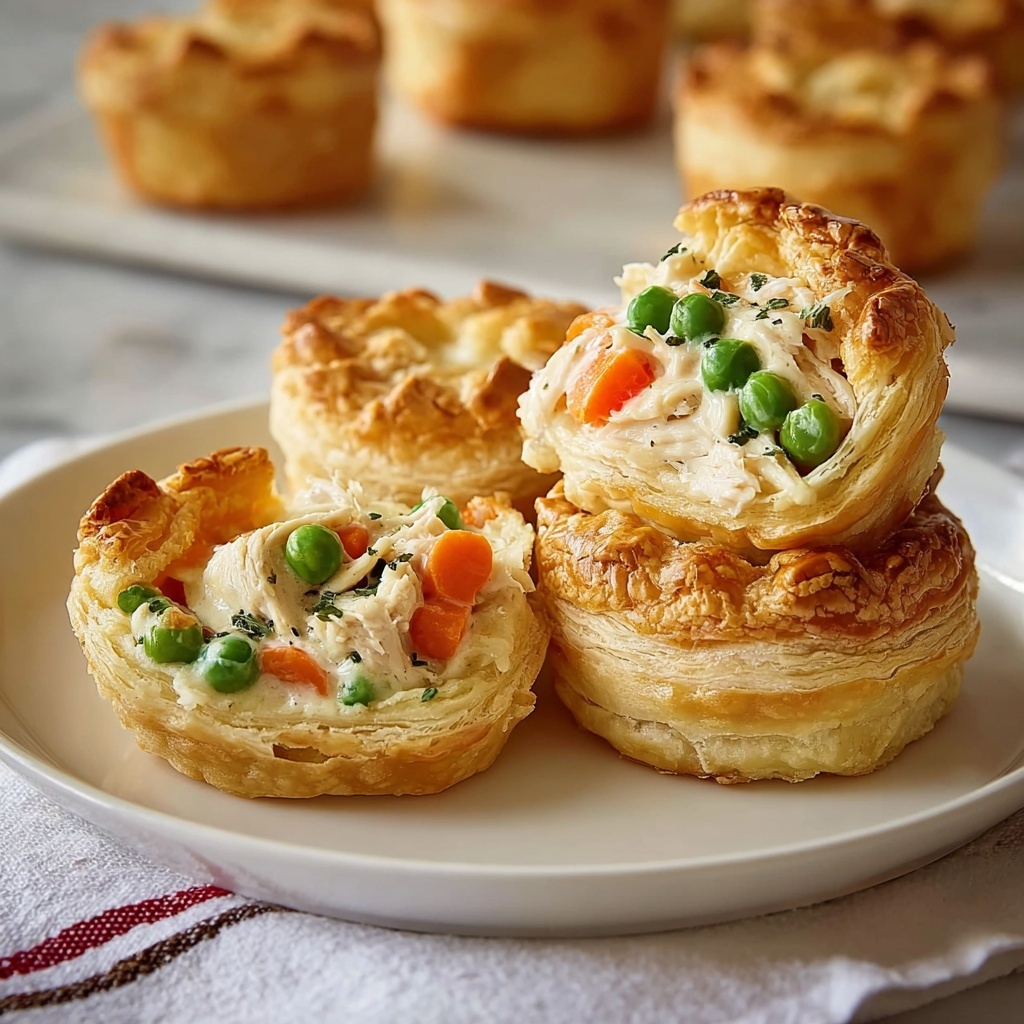
Spoon about a quarter cup of the chicken mixture into each biscuit shell, filling them generously but leaving room for the biscuits to rise. Bake in the oven for 15 to 17 minutes or until the biscuits turn a perfect golden brown and are cooked through.
Step 6: Cool and Serve
Once out of the oven, let the mini pot pies cool for two minutes in the pan before carefully removing. Serve them warm, because that creamy filling and flaky crust are simply irresistible right out of the oven.
How to Serve Mini Chicken Pot Pie with Grands Biscuits Recipe
Garnishes
A sprinkle of freshly chopped parsley or a few grated Parmesan shavings add a fresh, bright touch to the warm pies. These little extras elevate the presentation and bring a pop of color that makes the dish even more inviting.
Side Dishes
Pair with a crisp green salad dressed lightly in lemon vinaigrette or roasted seasonal vegetables for a balanced meal. A bowl of tomato soup also pairs beautifully, creating a nostalgic comfort-food combo.
Creative Ways to Present
Serve the mini pot pies on a rustic wooden board with small ramekins of ketchup or hot sauce for those who like a bit of a kick. For a charming twist, line a basket with a colorful cloth napkin and nestle the pies inside—perfect for family dinners or casual gatherings.
Make Ahead and Storage
Storing Leftovers
Store any leftover mini pot pies in an airtight container in the refrigerator for up to 3 days. They’ll keep their shape and flavor well, making them a great option for quick lunches or snacks.
Freezing
If you want to prepare ahead, assemble the mini pot pies and freeze them before baking. Wrap tightly in plastic wrap and foil, then freeze for up to 2 months. When ready to use, you can bake them straight from frozen by adding a few extra minutes to the baking time.
Reheating
For the best texture, reheat leftovers or frozen pies in a preheated oven at 350°F until warmed through and crisp on the outside. Microwaving can make the biscuits soggy, so the oven is definitely the way to go for that fresh-out-of-the-oven goodness.
FAQs
Can I use a different type of biscuit dough?
Absolutely! While Grands biscuits offer a perfect flaky texture, you can substitute with any refrigerated biscuit dough you prefer, though the size and thickness might affect baking time slightly.
Is it possible to make this recipe vegetarian?
Yes! Simply replace the shredded chicken with a hearty vegetable medley or seasoned tofu. Mushrooms work especially well for a savory, meaty texture that complements the creamy filling.
How can I make this recipe gluten-free?
Use gluten-free biscuits or make your own gluten-free dough, and swap the all-purpose flour with a gluten-free flour blend designed for thickening. This way, you get the same delicious pot pie without gluten.
Can I prepare the filling ahead of time?
Definitely. The creamy chicken mixture can be made a day ahead and refrigerated. When assembling, just warm it slightly for easier filling and then bake as directed.
What’s the best way to reheat leftovers without drying them out?
Reheat in the oven wrapped loosely in foil to maintain moisture, then uncover for the last few minutes to crisp the biscuits back up. This keeps the filling creamy and the crust flaky.
Final Thoughts
You really can’t go wrong with the Mini Chicken Pot Pie with Grands Biscuits Recipe. It’s simple, satisfying, and perfect for sharing those cozy, homey food moments we all crave. Give this recipe a try, and I promise it’ll become one of your favorite go-to comfort meals that brings warmth and smiles every time.
Print
Mini Chicken Pot Pie with Grands Biscuits Recipe
- Prep Time: 15 minutes
- Cook Time: 20 minutes
- Total Time: 35 minutes
- Yield: 8 servings
- Category: Main Course
- Method: Baking
- Cuisine: American
Description
This Mini Chicken Pot Pie recipe features flaky refrigerated biscuits filled with a creamy chicken and vegetable mixture. Perfectly portioned in a muffin tin, these savory pot pies are quick to prepare and bake into a comforting, golden-brown meal that serves 8 people.
Ingredients
Biscuits
- 16.3 oz refrigerated Grands biscuits (8 count)
Filling
- ¼ cup unsalted butter
- 1 small white onion, finely chopped
- 3 cloves garlic, minced
- 1 cup frozen peas and carrots
- 2 tablespoons all-purpose flour
- 1 cup cooked shredded chicken
- 1 cup heavy cream
- ¼ teaspoon black pepper
- 1 teaspoon salt
- ½ teaspoon dry thyme
Instructions
- Prepare the Chicken Mixture: In a large pan, melt the unsalted butter over medium-high heat. Add the finely chopped white onion, frozen peas and carrots, and minced garlic. Cook the mixture, stirring occasionally, until the onion becomes translucent, approximately 3 minutes.
- Add Flour and Chicken: Sprinkle the all-purpose flour evenly over the vegetables and stir well to combine. Add the cooked shredded chicken to the pan and cook for an additional 1 minute to incorporate the ingredients.
- Make the Creamy Sauce: Pour in the heavy cream and season with salt, black pepper, and dry thyme. Continuously stir the mixture until it thickens, which should take about 2 minutes. Remove from heat once thickened.
- Prepare Oven and Muffin Pan: Preheat your oven to 350°F (175°C). Grease a muffin pan to prevent sticking of the biscuits.
- Form Biscuit Shells: Flatten each refrigerated biscuit into a 5-inch round shape. Press each round firmly into the greased muffin cups to create a shell that will hold the filling.
- Fill Biscuit Shells: Spoon about ¼ cup of the prepared chicken mixture into each biscuit shell, ensuring an even distribution of filling among all 8 servings.
- Bake the Pot Pies: Place the muffin pan in the preheated oven and bake for 15-17 minutes or until the biscuit shells turn golden brown and are cooked through.
- Cool and Serve: Allow the mini pot pies to cool in the pan for 2 minutes before carefully removing them. Serve warm and enjoy your comforting meal!
Notes
- You can substitute frozen mixed vegetables for peas and carrots if preferred.
- If you want a lighter version, consider using half-and-half instead of heavy cream, though the filling may be less thick.
- Leftover pot pies can be refrigerated and reheated in the oven for best crispness.
- Make sure to grease the muffin pan well to avoid sticking when removing the pot pies.
- Use cooked shredded chicken from rotisserie or leftover roast chicken to save time.

