
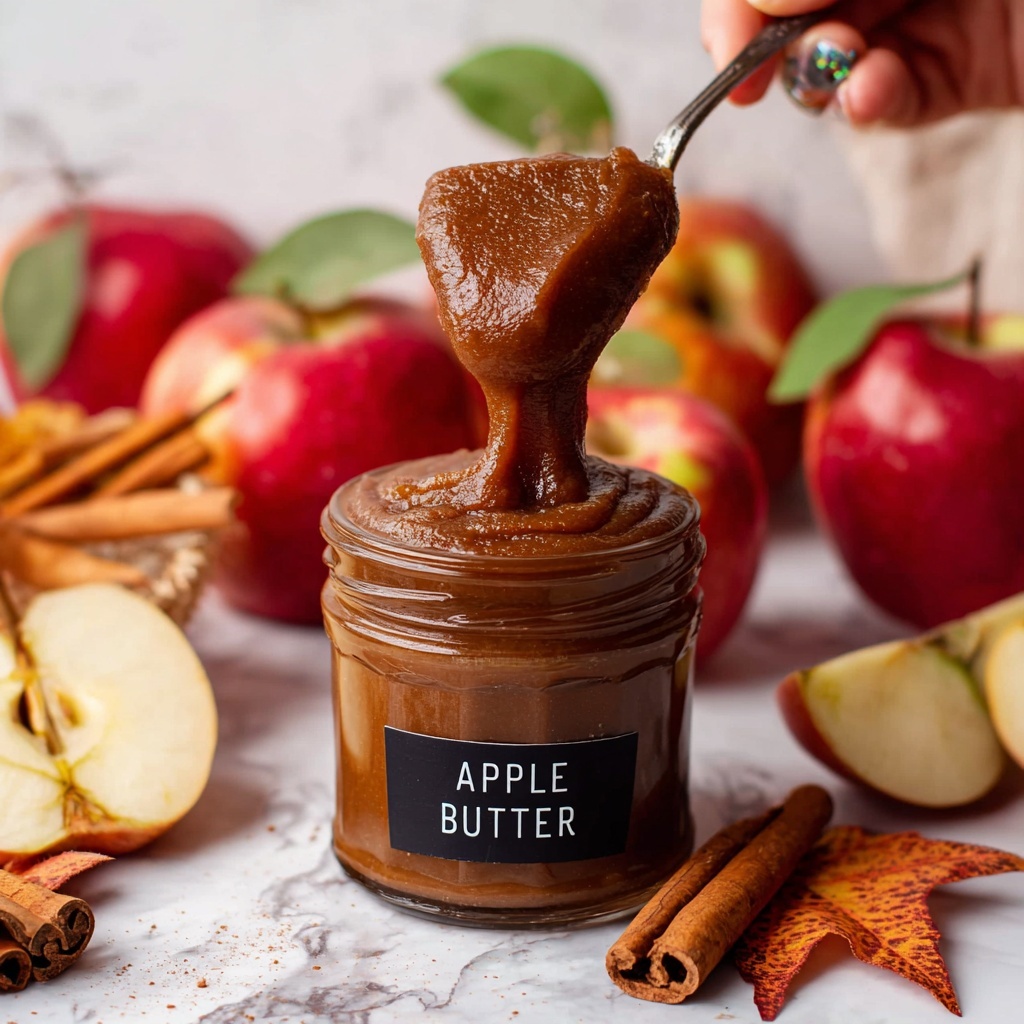
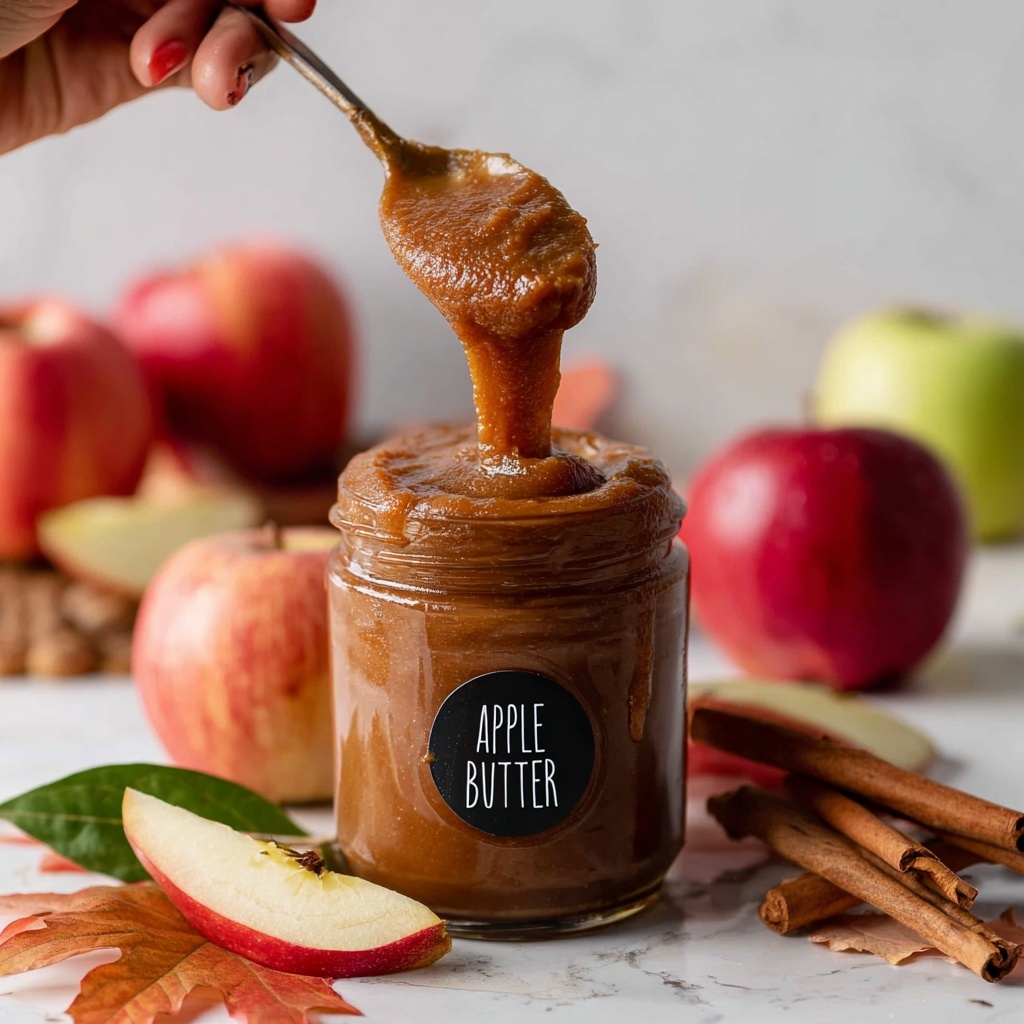
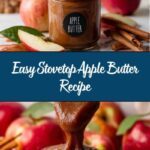
If you love the idea of capturing the cozy flavors of autumn in a jar, then you are absolutely going to adore this Easy Stovetop Apple Butter Recipe. It’s a comforting, deeply spiced spread made from simple ingredients that simmer down into a luscious, velvety treat perfect for toast, desserts, or any time you want a burst of apple deliciousness. What makes this recipe truly special is how effortlessly it transforms everyday apples into an aromatic spread that feels like a warm hug on chilly days.
Ingredients You’ll Need
Crafting the perfect apple butter starts with a handful of simple but essential ingredients, each playing a crucial role in building rich flavor, smooth texture, and that iconic warm color. Getting these right means your apple butter will shine in both taste and appearance.
- 7-8 Red Apples (1kg when cored): Choose firm and sweet apples for the best balance of flavor and sweetness; they soften perfectly when cooked down.
- 100 g Brown Sugar: Adds deep sweetness and a hint of molasses richness that complements the spices beautifully.
- 240 ml Apple Cider or Apple Juice: Provides liquid to cook the apples and infuses more apple flavor; be sure not to use apple cider vinegar here.
- 2 teaspoons Vanilla Extract: Enhances the warmth of the spices and gives the apple butter a lovely aromatic depth.
- 2 teaspoons Ground Cinnamon: The star spice in apple butter, cinnamon adds unmistakable warmth and sweetness.
- ½ teaspoon Ground Nutmeg: Brings a subtle nuttiness that rounds out the spice blend.
- ¼ teaspoon Ground Cloves: Just a pinch adds a bold, slightly sharp note that elevates the overall complexity.
- ¼ teaspoon Sea Salt: Balances the sweetness and amplifies the flavors in every spoonful.
How to Make Easy Stovetop Apple Butter Recipe
Step 1: Prepare the Apples
Start by removing the cores from your apples and chopping them into manageable 1 to 2-inch cubes. This size helps the apples break down nicely during cooking without turning into a complete mush too early. Toss all these cubed apples into a medium saucepan along with the brown sugar, apple cider, vanilla, spices, and salt. The combined ingredients set the stage for incredible depth of flavor as they cook.
Step 2: Simmer and Softening
Bring the mixture up to a gentle simmer over medium heat. Stir occasionally with a rubber spatula to prevent sticking and to help the apples cook evenly. As the hour passes, you’ll notice the liquid reducing, and the apples won’t just soften—they’ll start collapsing into a tender, aromatic base. After an hour, remove the pan from the heat and let it cool slightly for about 10 minutes. This rest helps things settle before blending.
Step 3: Blend to Velvety Smooth
Now comes the magic moment to create that silky texture apple butter is known for. Transfer the cooked apple mixture to a high-speed blender or food processor. Blitz until the entire batch becomes smooth and creamy with no visible chunks. This step transforms the cooked apple mixture into a spreadable delight that’s downright irresistible.
Step 4: Reduce and Intensify Flavor
Pour the blended apple butter back into the saucepan and place it over medium-low heat. Cover the saucepan with a lid—careful here as it will spit occasionally while thickening! Cook for 30 minutes, stirring every 5 to 10 minutes to prevent burning. This slow reduction concentrates the flavors and thickens the spread to perfect consistency. Remember to lift the lid carefully to avoid hot splatters.
Step 5: Cool and Store
Once your apple butter has thickened beautifully, remove it from the heat and allow it to cool to room temperature, about 30 minutes. Then, transfer it into clean airtight jars or containers and pop them in the refrigerator. Your homemade apple butter is now ready to enjoy or save for later!
How to Serve Easy Stovetop Apple Butter Recipe
Garnishes
Adding a little extra flair to your apple butter serving can make it even more inviting. Sprinkle a dusting of cinnamon or a light drizzle of honey on top when serving to enhance sweetness and warmth. For a fun twist, top with a small dollop of whipped cream or a sprinkle of toasted nuts for added texture and flavor contrast.
Side Dishes
This apple butter pairs wonderfully with a variety of dishes. Spread it thickly on warm crusty bread or buttery toast for breakfast or snack time. It’s also incredible alongside pork chops or roasted chicken, where its sweet and spiced profile cuts through savory richness beautifully. Consider serving it with oatmeal or yogurt for a cozy morning treat.
Creative Ways to Present
Looking to impress guests? Serve the apple butter as part of a cheese board along with sharp cheddar or creamy brie. It can also double as a luscious topping for pancakes, waffles, or even ice cream. For a festive touch, use mini jars as charming homemade gifts or party favors — everyone loves a jar of something delicious made with love!
Make Ahead and Storage
Storing Leftovers
Your apple butter keeps beautifully in the fridge for up to two weeks when sealed tightly. Make sure to use sterilized jars for keeping the flavors fresh and to prevent spoilage. Stir before using as natural settling can happen, but the flavors only get better with time.
Freezing
To enjoy your apple butter long after making it, freezing is a fantastic option. Transfer the cooled apple butter into freezer-safe containers or bags, leaving some headspace for expansion. Frozen apple butter will maintain its rich taste and silky texture for up to six months, ready to be thawed whenever a craving strikes.
Reheating
When you’re ready to serve refrigerated or thawed apple butter, gently warm it on the stovetop over low heat or in short bursts in the microwave. Stir occasionally to keep the texture smooth and prevent scorching. Warm apple butter enhances the spices and spreads even easier.
FAQs
Can I use different types of apples for this recipe?
Absolutely! While red apples work wonderfully due to their natural sweetness and color, mixing in tart apples like Granny Smith can add a lovely balance to the flavor. Just ensure you have about 1 kilogram of cored apples for the recipe to turn out right.
What’s the difference between apple cider and apple cider vinegar here?
Apple cider in this recipe refers to the sweet, unfiltered apple juice you can drink, providing moisture and flavor. Apple cider vinegar is acidic and pungent, which would overpower the delicate sweetness, so avoid using that in this recipe.
Is it necessary to blend the apple mixture?
Yes, blending is key to getting that smooth and creamy texture typical of apple butter. Leaving chunks would change the spreadability and overall experience, but if you prefer a chunkier style, you could pulse briefly to keep some texture.
How long does it take to make this Easy Stovetop Apple Butter Recipe?
The entire process takes about 1 hour and 35 minutes, including simmering, blending, and the final reduction. It’s a bit of waiting but worth every minute for the rich flavor.
Can I add more spices or adjust sweetness?
Feel free! The beauty of this Easy Stovetop Apple Butter Recipe is its flexibility. You can increase cinnamon or nutmeg, add a pinch of ginger, or adjust the brown sugar to your preferred level of sweetness. Just taste as you go to find your perfect blend.
Final Thoughts
There’s something truly special about making your own apple butter from scratch, especially with a recipe as straightforward and rewarding as this Easy Stovetop Apple Butter Recipe. Whether you’re spreading it on morning toast or gifting jars to loved ones, this apple butter brings a slice of cozy comfort into your home. I can’t wait for you to try it and fall in love with the flavors as much as I do!
Print
Easy Stovetop Apple Butter Recipe
- Prep Time: 15 minutes
- Cook Time: 1 hour 30 minutes
- Total Time: 1 hour 45 minutes
- Yield: 12 servings
- Category: Condiment
- Method: Stovetop
- Cuisine: American
- Diet: Vegetarian
Description
This Easy Stovetop Apple Butter recipe is a delicious and comforting spread made from simmered and blended apples with aromatic spices. Perfectly smooth and creamy, it’s cooked slowly on the stovetop to develop rich flavors and a luscious texture, ideal for spreading on toast, muffins, or dolloping on desserts.
Ingredients
Apples
- 7–8 red apples (about 1 kg when cored)
Sweeteners and Liquids
- 100 g brown sugar
- 240 ml apple cider or apple juice (not apple cider vinegar)
Spices and Flavorings
- 2 teaspoons vanilla extract
- 2 teaspoons ground cinnamon
- ½ teaspoon ground nutmeg
- ¼ teaspoon ground cloves
- ¼ teaspoon sea salt
Instructions
- Prepare: Remove the cores from the apples and cut them into 1-2 inch cubes. Place the cubed apples into a medium saucepan along with brown sugar, apple cider or juice, vanilla extract, cinnamon, nutmeg, cloves, and sea salt.
- Cook: Bring the mixture to a simmer over medium heat. Let it cook for 1 hour, stirring occasionally with a rubber spatula to prevent sticking. During this time, the liquid will reduce and the apples will soften significantly. After 1 hour, remove the pan from heat and let it cool for 10 minutes.
- Blend: Transfer the slightly cooled apple mixture into a high-speed blender or food processor. Blitz the mixture thoroughly for several minutes until it becomes completely smooth and creamy, ensuring no chunks remain.
- Reduce: Pour the blended apple butter back into the saucepan and return to medium-low heat. Cover the saucepan with a lid to prevent splatters, and cook for another 30 minutes. Stir carefully every 5-10 minutes to avoid burning and to encourage thickening, taking care when removing the lid as the mixture will spit.
- Cool and Store: Remove from heat and allow the apple butter to cool to room temperature, approximately 30 minutes. Transfer the finished apple butter into clean airtight jars or sealed containers and refrigerate. It can be stored for several weeks when kept chilled.
Notes
- Use sweet, tart red apples such as Fuji, Gala, or Honeycrisp for the best flavor balance.
- Ensure to use apple cider or sweet apple juice; do not substitute with vinegar as it will alter the flavor.
- The cooking process develops natural sweetness and thickens the apple butter; be patient for best results.
- When blending, a high-speed blender or food processor works best to achieve a creamy texture.
- Store in sterilized jars to extend shelf life.


