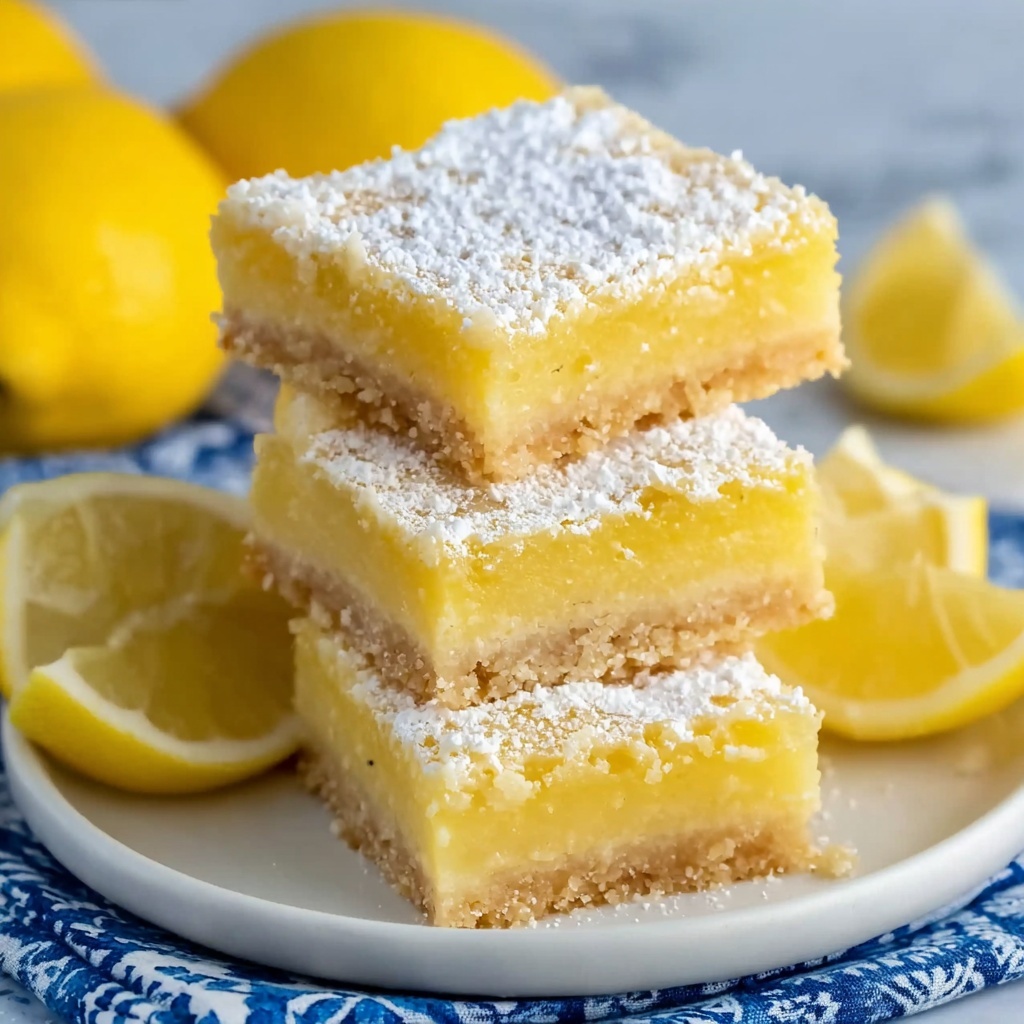
If you’ve been searching for a delightful dessert that’s bursting with fresh citrus flavor and perfectly fits your dietary needs, this Easy Gluten-Free Lemon Bars Recipe is the answer. It’s a luscious, tangy treat that balances a buttery crust with a silky lemon filling, all without any gluten. The charm of this recipe lies in its simplicity—using straightforward, accessible ingredients that come together effortlessly to create a dessert that feels both special and refreshing. Whether it’s a sunny afternoon pick-me-up or a light finish to a dinner party, these lemon bars bring a joyful zest that’s impossible to resist.

Ingredients You’ll Need
Getting ready to make these lemon bars is a breeze because the ingredients are as simple as they are essential. Each element plays a crucial role in the overall taste, texture, and brightness of the final dessert. From the rich butter that forms the crisp crust to the freshly squeezed lemon juice that infuses the filling with vibrant flavor, every ingredient counts.
- Unsalted butter (½ cup or 1 stick, at room temperature): Provides a rich, tender base for the crust and helps achieve that perfect buttery snap.
- Granulated sugar (¼ cup for crust, 1 cup for filling): Adds the right amount of sweetness to balance the tartness of the lemons.
- Lemon zest (1 tbsp for crust, 1 tbsp for filling): Brings a fresh and aromatic citrus punch that really boosts the flavor complexity.
- Vanilla extract (1 tsp): A subtle undertone that enhances the overall sweetness and aroma.
- Gluten-free all-purpose flour (1 cup for crust, ½ cup for filling): Keeps the recipe safe for gluten-sensitive diets while ensuring a light, tender texture.
- Kosher salt (⅛ tsp for crust and filling): Balances the sweetness and brightens all the flavors.
- Eggs (3, at room temperature): Essential for binding the filling and providing a smooth, custard-like consistency.
- Freshly squeezed lemon juice (½ cup): The star ingredient that gives these bars their refreshing, tangy zest.
How to Make Easy Gluten-Free Lemon Bars Recipe
Step 1: Preheat and Prepare Your Pan
Start by heating your oven to 350°F. Greasing the baking dish not only prevents sticking but lining it with parchment paper ensures easy removal of the bars later. This simple prep step sets you up for success from the very beginning.
Step 2: Prepare the Crust
In a large bowl, cream together the softened unsalted butter, granulated sugar, lemon zest, and vanilla extract until the mixture is light and fluffy. This combination builds the base flavor of your crust. Next, sprinkle in the gluten-free flour and kosher salt, mixing just until everything is uniform. Press this dough firmly into your prepared pan, then poke holes evenly across the surface using a fork—this helps the crust bake evenly and keeps it from puffing up. Pop it into the oven and bake until it’s golden and set.
Step 3: Make the Filling
While your crust is baking, whisk together the eggs, sugar, freshly squeezed lemon juice, lemon zest, gluten-free flour, and kosher salt in a clean bowl. Beat until the mixture is silky smooth and creamy. This filling will bake to a beautifully firm but tender consistency that compliments the crisp crust perfectly. Once your crust is ready, pour the filling evenly over the hot base and return to the oven to bake until set—it should jiggle slightly but hold its shape.
Step 4: Cool and Slice
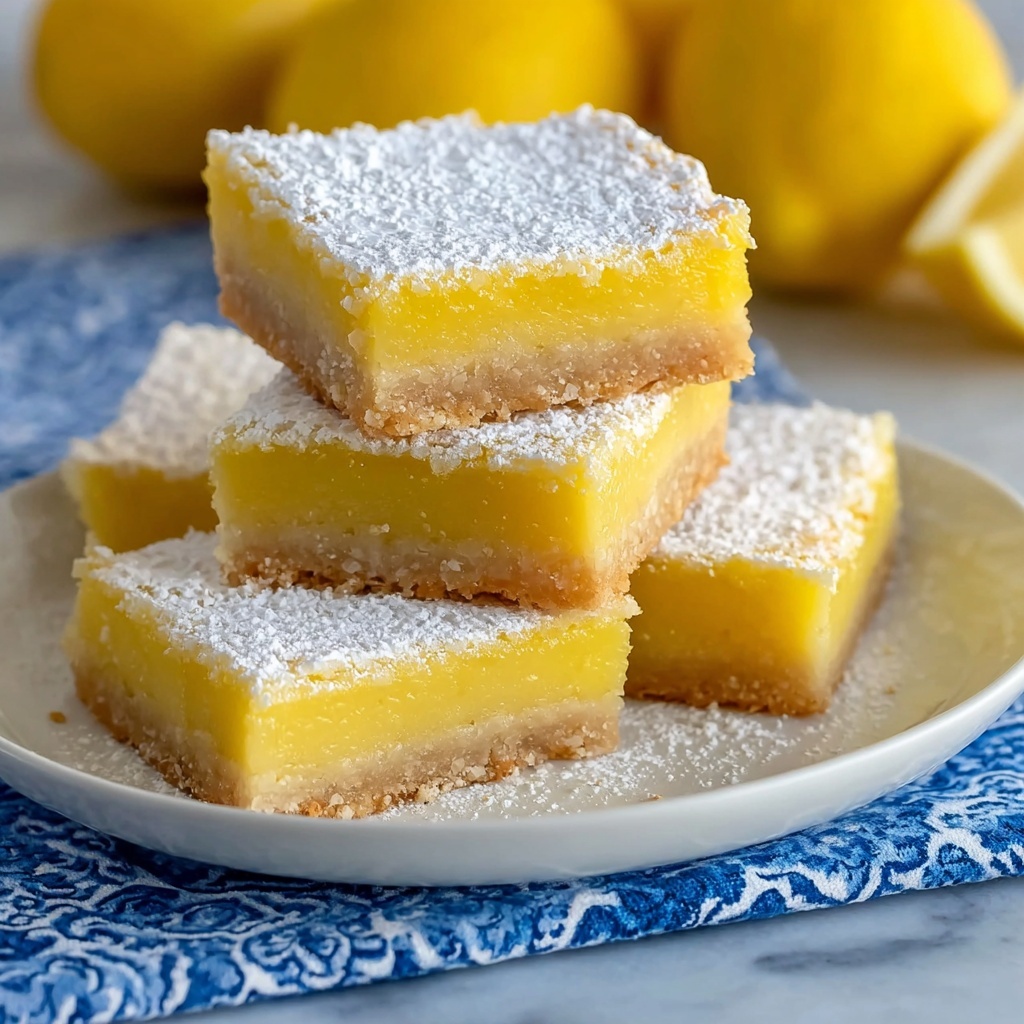
Let the bars cool completely in the pan to finish setting up. Then lift them out using the edges of the parchment paper and place on a wire rack. For that charming, bakery-style finish, dust generously with powdered sugar. Slice into squares and get ready to enjoy sunshine in every bite.
How to Serve Easy Gluten-Free Lemon Bars Recipe
Garnishes
Add a bit of flair by sprinkling powdered sugar atop the bars just before serving, or a fine zest of lemon peel on each square for a fresh pop of color and aroma. A few fresh mint leaves complement the citrus notes beautifully and add a refreshing hint of green.
Side Dishes
These lemon bars are wonderful on their own, but if you want to build a full dessert plate, consider pairing with a scoop of vanilla ice cream or a dollop of whipped cream. Fresh berries like raspberries or blueberries bring a contrasting sweetness and make for a vibrant presentation.
Creative Ways to Present
For a more elegant touch, serve the lemon bars on a rustic wooden board with mixed nuts and edible flowers scattered around. Alternatively, cut them into mini rectangles and skewer with a decorative toothpick for delightful finger foods at your next gathering. Presenting them with a drizzle of honey or a thin line of raspberry coulis can add a gourmet touch.
Make Ahead and Storage
Storing Leftovers
After enjoying these lemon bars, store any leftovers in an airtight container in the refrigerator for up to 4 days. Keeping them chilled not only preserves freshness but also helps maintain their perfect texture, ensuring each bite is as delightful as the first.
Freezing
Feeling ahead? These bars freeze beautifully, making them a convenient treat to savor later. Wrap individual bars tightly in plastic wrap and place in a freezer-safe container or bag for up to 3 months. When ready to indulge, thaw them overnight in the fridge for best results.
Reheating
To bring back just-baked warmth, reheat lemon bars gently in a low oven (about 300°F) for 5 to 7 minutes. Avoid the microwave to keep the crust crisp and the filling creamy. This quick step revitalizes their fresh-from-the-oven appeal perfectly.
FAQs
Can I use a different gluten-free flour blend?
Absolutely! Most all-purpose gluten-free flour blends that contain xanthan gum will work well here. Just make sure your blend is designed for baking so the texture stays light and tender.
Is it necessary to use eggs in this recipe?
Yes, eggs play a crucial role in setting the filling and creating the custard-like texture of lemon bars. If you need an egg-free alternative, you might explore specialized vegan baking options, but it will alter the texture.
How tart are these lemon bars?
They have a lively but balanced tartness thanks to the fresh lemon juice and zest, offset by the sweet sugar and buttery crust. If you prefer less tart, you can reduce the lemon juice slightly without losing the essence of the dish.
Can I make these lemon bars in a larger pan?
Yes, you can scale this recipe up for a 9×13-inch pan, but keep an eye on baking times. The bars may bake a few minutes longer since the depth will be less, so start checking for doneness around 25 minutes.
What is the best way to cut lemon bars cleanly?
Use a sharp knife wiped clean between slices. Chilling the bars completely before cutting also helps produce neat, clean edges without cracking or crumbling.
Final Thoughts
Making this Easy Gluten-Free Lemon Bars Recipe is like welcoming sunshine into your kitchen, simple yet incredibly rewarding. It’s a dessert that hits all the right notes with bright lemon flavor, a tender crumbly crust, and that perfect balance of sweet and tart. I hope you enjoy making and sharing these lemon bars as much as I do—they’re sure to become a favorite go-to treat for any occasion.
Print
Easy Gluten-Free Lemon Bars Recipe
- Prep Time: 15 minutes
- Cook Time: 45 minutes
- Total Time: 1 hour
- Yield: 16 servings
- Category: Dessert
- Method: Baking
- Cuisine: American
- Diet: Gluten Free
Description
This Easy Gluten Free Lemon Bars recipe features a buttery, tender crust topped with a tangy, smooth lemon filling. Perfectly balanced with fresh lemon juice and zest, these bars are a refreshing, naturally gluten-free treat ideal for any occasion.
Ingredients
Crust
- ½ cup unsalted butter (1 stick), at room temperature
- ¼ cup granulated sugar
- 1 tbsp lemon zest (grated on a Microplane)
- 1 tsp vanilla extract
- 1 cup gluten-free all-purpose flour
- ⅛ tsp kosher salt
Filling
- 3 eggs at room temperature
- 1 cup granulated sugar
- ½ cup lemon juice, freshly squeezed
- 1 tbsp lemon zest (grated on a Microplane)
- ½ cup gluten-free all-purpose flour
- ⅛ tsp kosher salt
Instructions
- Preheat Oven: Preheat your oven to 350°F (175°C). Grease an 8×8-inch baking dish and line it with overlapping rectangles of parchment paper to ensure easy removal of the lemon bars.
- Prepare the Crust: In a large bowl, beat the unsalted butter, granulated sugar, lemon zest, and vanilla extract together until smooth and creamy. Add the gluten-free all-purpose flour and kosher salt, mixing until the dough is uniform. Press this mixture evenly into the prepared baking dish. Use a fork to poke holes all over the crust to prevent bubbling during baking. Bake the crust for about 15-18 minutes until lightly golden and set.
- Make the Filling: While the crust bakes, beat the eggs, granulated sugar, freshly squeezed lemon juice, lemon zest, gluten-free flour, and kosher salt together in a bowl until the mixture is smooth and fully combined.
- Bake with Filling: Once the crust is baked, carefully pour the lemon filling evenly over the hot crust. Return the baking dish to the oven and bake for an additional 25-30 minutes or until the filling is set and no longer jiggly in the center.
- Cool and Serve: Remove the lemon bars from the oven and let them cool completely in the pan on a wire rack. When cool, lift the bars out using the parchment paper, dust the top with powdered sugar if desired, slice into 16 squares, and serve.
Notes
- Room temperature butter and eggs ensure better mixing and texture.
- Freshly squeezed lemon juice and zest maximize the lemon flavor.
- Use gluten-free all-purpose flour to keep the recipe gluten free without compromising texture.
- Line the pan with parchment paper for easy removal and cleaner slicing.
- Store leftover lemon bars in an airtight container in the refrigerator for up to 5 days.

