
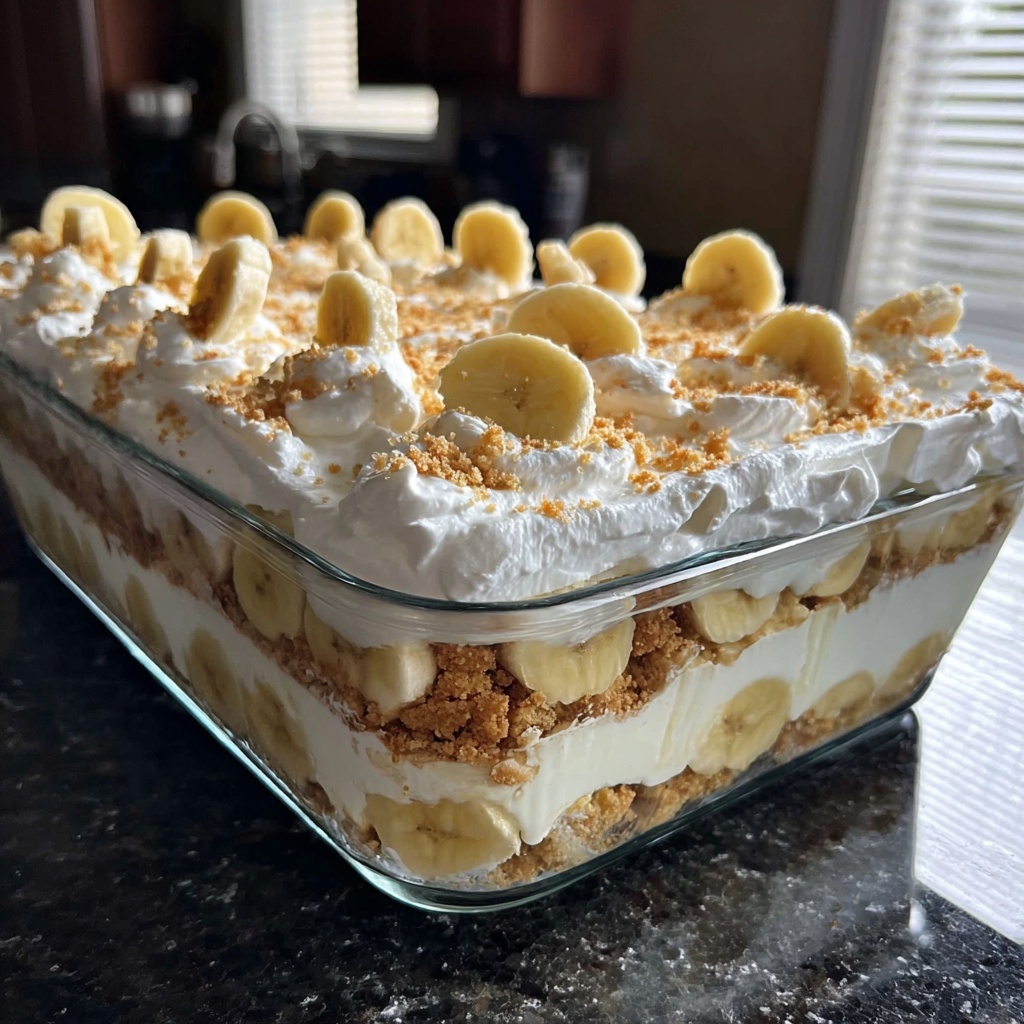
If you have a sweet tooth and a love for comforting, nostalgic desserts, then you absolutely have to try The Best Banana Pudding Ever Recipe. This delightful treat combines creamy, luscious pudding with fresh banana slices and crunchy vanilla wafers to create layers of pure joy. Every spoonful melts in your mouth with a perfect balance of sweetness and texture, making it an irresistible dessert that feels like a warm hug from childhood. Whether you’re serving it at a family gathering or just craving something special, this recipe is bound to become a cherished favorite.
Ingredients You’ll Need
This recipe truly shines because of its straightforward, classic ingredients. Each one plays a key role: from the sweet vanilla wafers adding crunch, to the fresh bananas providing fruity freshness, and the rich pudding delivering that creamy texture.
- Vanilla wafers: The perfect crispy base that softens beautifully as it soaks in the pudding.
- Ripe bananas: Use perfectly ripe bananas for natural sweetness and optimal softness.
- Sugar: Balances the flavors with the right amount of sweetness without overpowering.
- All-purpose flour: Helps thicken the pudding to a creamy consistency.
- Salt: Enhances all the flavors subtly, giving the pudding depth.
- Milk: The base for your pudding, creating that silky texture.
- Egg yolks: Add richness and help set the pudding as it cools.
- Vanilla extract: Brings warmth and fragrance to elevate every bite.
- Heavy whipping cream: Whipped to soft peaks for the luscious, fluffy topping.
How to Make The Best Banana Pudding Ever Recipe
Step 1: Prepare the Pudding Base
Start by combining sugar, flour, and salt in a saucepan. These dry ingredients create the foundation of your pudding’s texture and sweetness. Gradually whisk in the milk to avoid lumps, then cook over medium heat until the mixture thickens beautifully, signaling that your pudding is coming to life.
Step 2: Enrich with Egg Yolks
Whisk in the egg yolks and continue cooking for an additional two minutes. This step is essential because the egg yolks give the pudding its classic richness and smooth consistency. Don’t rush it here; patience creates that creamy, custard-like texture.
Step 3: Add Vanilla for Flavor
Once thickened, remove the saucepan from the heat and stir in the vanilla extract. This is the moment your kitchen will fill with an irresistible, warm aroma that signals the deliciousness to come.
Step 4: Layer Your Dessert
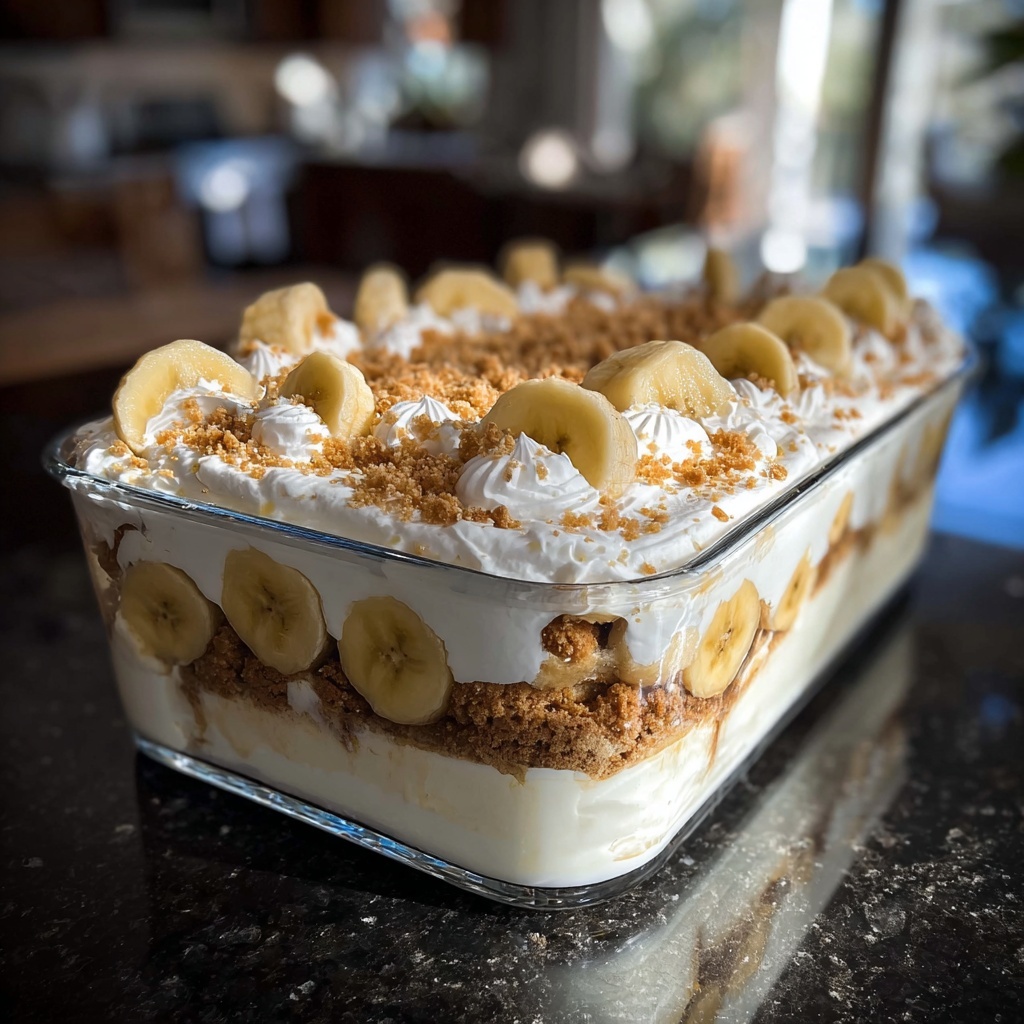
Grab your favorite serving dish and start layering. Begin with a layer of vanilla wafers for that satisfying crunch, then add a generous layer of sliced bananas for fresh, fruity sweetness. Top it with a hearty spoonful of the pudding mixture. Repeat these layers until you run out of ingredients—this layering is what creates the magic.
Step 5: Top with Whipped Cream
Beat the heavy cream until it forms stiff peaks. Spread this luxuriously fluffy topping over your final layer. The whipped cream adds lightness and an elegant finish that balances all the rich layers beneath.
Step 6: Chill Thoroughly
Place your banana pudding in the refrigerator for at least four hours. This step isn’t just about cooling; it allows the wafers to soften perfectly, the flavors to meld together, and the pudding to set, resulting in a dessert that slices beautifully and delights with every bite.
How to Serve The Best Banana Pudding Ever Recipe
Garnishes
For a little extra wow factor, sprinkle crushed vanilla wafers or cookie crumbs on top just before serving. You can also add a few banana slices or a light drizzle of caramel sauce to enhance the flavor and presentation. A mint leaf or two can provide a fresh, vibrant contrast.
Side Dishes
This banana pudding pairs wonderfully with a hot cup of coffee or tea, making it an ideal dessert for brunch or afternoon gatherings. It also complements simple grilled meats or light salads if you’re serving it as part of a larger meal.
Creative Ways to Present
If you’re feeling fancy, serve the pudding in individual glass parfait cups or mason jars layered beautifully for a charming, personal touch. Add edible flowers or a dusting of cinnamon for a creative twist that’s bound to impress guests.
Make Ahead and Storage
Storing Leftovers
This banana pudding keeps beautifully in an airtight container in the refrigerator for up to three days. The flavors continue to develop, and the texture remains creamy and luscious—just be sure to cover it well to prevent the bananas from browning.
Freezing
While freezing banana pudding isn’t recommended because the bananas may turn mushy and the texture changes, if you must, transfer it to a freezer-safe container and freeze for up to one month. Thaw overnight in the fridge and expect some texture differences.
Reheating
This pudding is best enjoyed cold or at room temperature, so reheating is generally not necessary. If you prefer it slightly warm, gently microwave single servings for just a few seconds, being careful not to melt the whipped topping.
FAQs
Can I use other types of cookies instead of vanilla wafers?
Absolutely! While vanilla wafers are traditional and offer that perfect balance of crunch and sweetness, you can experiment with ladyfingers or even graham crackers for different textures and flavors. Just keep in mind how each cookie absorbs moisture.
What if I don’t have heavy whipping cream?
You can substitute with chilled whipping cream or even a mixture of cream cheese and whipped topping for a slightly different but tasty finish. However, heavy whipping cream whipped to stiff peaks will give the best light and airy result.
How ripe should the bananas be?
Choose bananas that are ripe but still firm. You want them sweet and flavorful, but not mushy since they will continue to soften while chilling. Overripe bananas may cause the pudding to become too soggy.
Can I make this pudding vegan or dairy-free?
To make a vegan or dairy-free version, substitute milk with almond or oat milk, use a plant-based pudding thickener, and replace the heavy cream with coconut cream whipped into peaks. Keep in mind the texture and flavor will shift, but it can still be delicious.
How long does the pudding need to chill?
A minimum of four hours in the fridge is critical for the pudding to set properly and the layers to meld. If you have more time, overnight chilling actually improves its flavor and texture even more.
Final Thoughts
There’s something truly special about The Best Banana Pudding Ever Recipe that turns a simple dessert into an unforgettable experience. With each creamy bite, layered with fresh bananas and the nostalgic crunch of vanilla wafers, you’ll find yourself reaching for seconds (or thirds!). I can’t recommend it enough—go ahead and make this recipe your next sweet indulgence. You won’t regret it!
Print
The Best Banana Pudding Ever Recipe
- Prep Time: 15 minutes
- Cook Time: 15 minutes
- Total Time: 4 hours 30 minutes
- Yield: 8 servings
- Category: Dessert
- Method: Stovetop
- Cuisine: Southern American
Description
A classic Southern dessert featuring layers of creamy vanilla pudding, ripe bananas, and crunchy vanilla wafers, topped with fluffy whipped cream. Perfectly chilled, this banana pudding offers a delightful combination of textures and flavors that’s irresistibly comforting.
Ingredients
Dry Ingredients
- 1 box of vanilla wafers
- 1 cup of sugar
- 1/2 cup of all-purpose flour
- 1/4 teaspoon of salt
Fresh Ingredients
- 4 ripe bananas, sliced
- 4 cups of milk
- 3 large egg yolks
- 1 teaspoon of vanilla extract
- 1 cup of heavy whipping cream
Instructions
- Prepare the pudding base: In a saucepan, combine sugar, flour, and salt. Gradually whisk in milk to avoid lumps and cook over medium heat, stirring continuously until the mixture thickens.
- Add egg yolks: Whisk the egg yolks in a separate bowl, then slowly incorporate them into the thickened milk mixture in the saucepan. Continue cooking for another 2 minutes while stirring to ensure the pudding is smooth and rich.
- Flavor the pudding: Remove the saucepan from heat and stir in the vanilla extract, which adds a warm aromatic note to the pudding.
- Layer the dessert: In a serving dish, arrange a layer of vanilla wafers followed by a layer of sliced bananas and then a layer of the prepared pudding. Repeat these layers until all ingredients are used, finishing with a layer of pudding on top.
- Whip the cream: Beat the heavy whipping cream until stiff peaks form, creating a light and airy topping.
- Top and chill: Spread the whipped cream evenly over the top layer of pudding and refrigerate the dessert for at least 4 hours. This chilling time allows the flavors to meld and the wafers to soften perfectly, enhancing the dessert’s texture and taste.
Notes
- Use ripe bananas for the best natural sweetness and flavor.
- Layer the dessert just before chilling to prevent the wafers from becoming overly soggy.
- For a lighter option, substitute heavy cream with whipped topping or use half-and-half in the pudding.
- Ensure frequent stirring during pudding preparation to avoid lumps and scorching.
- The dessert can be made a day ahead and stored covered in the refrigerator.

