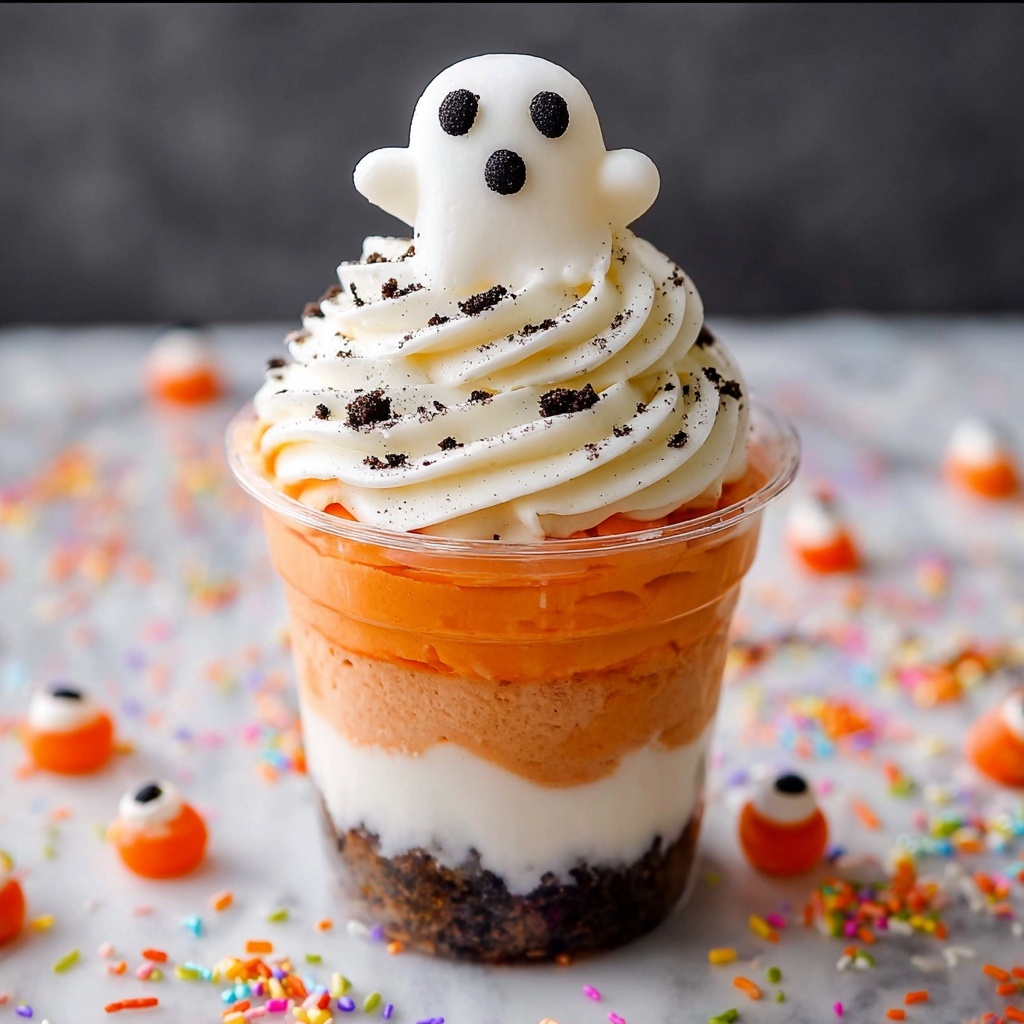
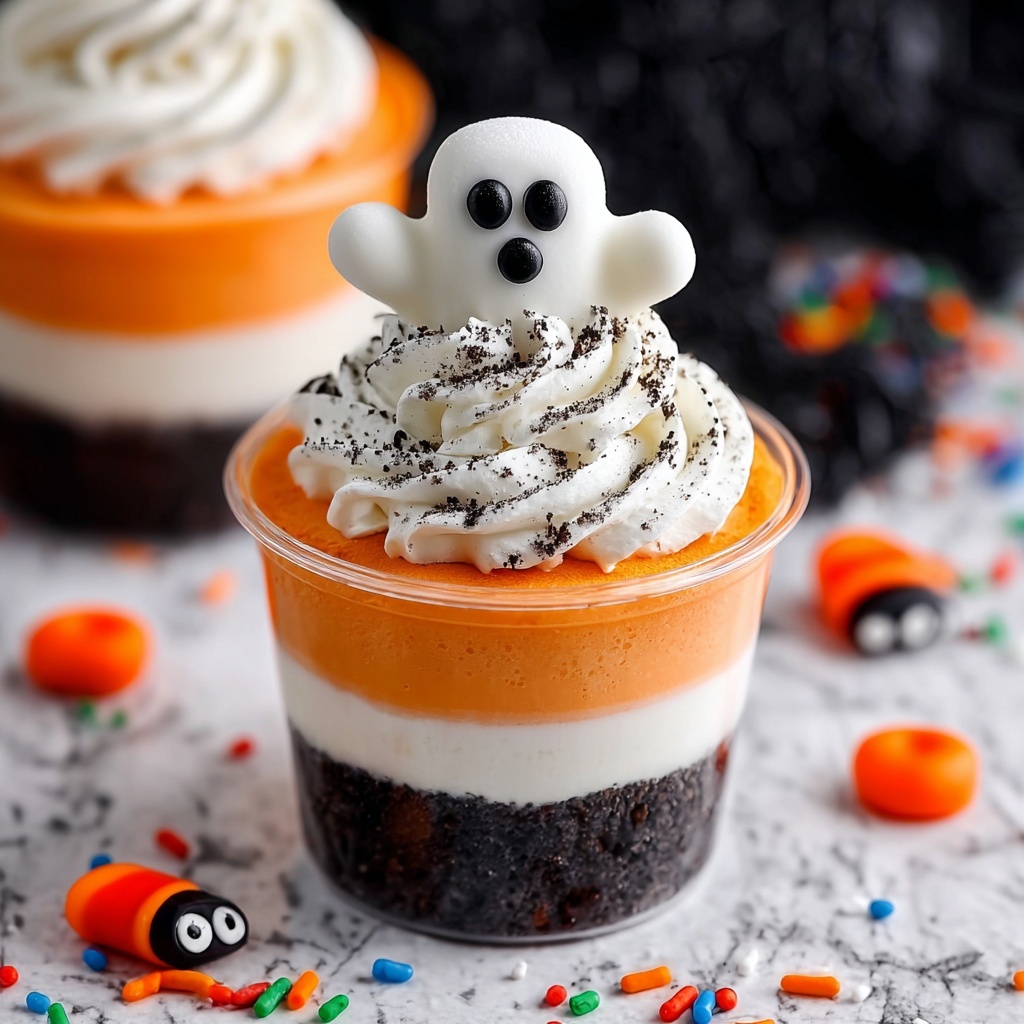
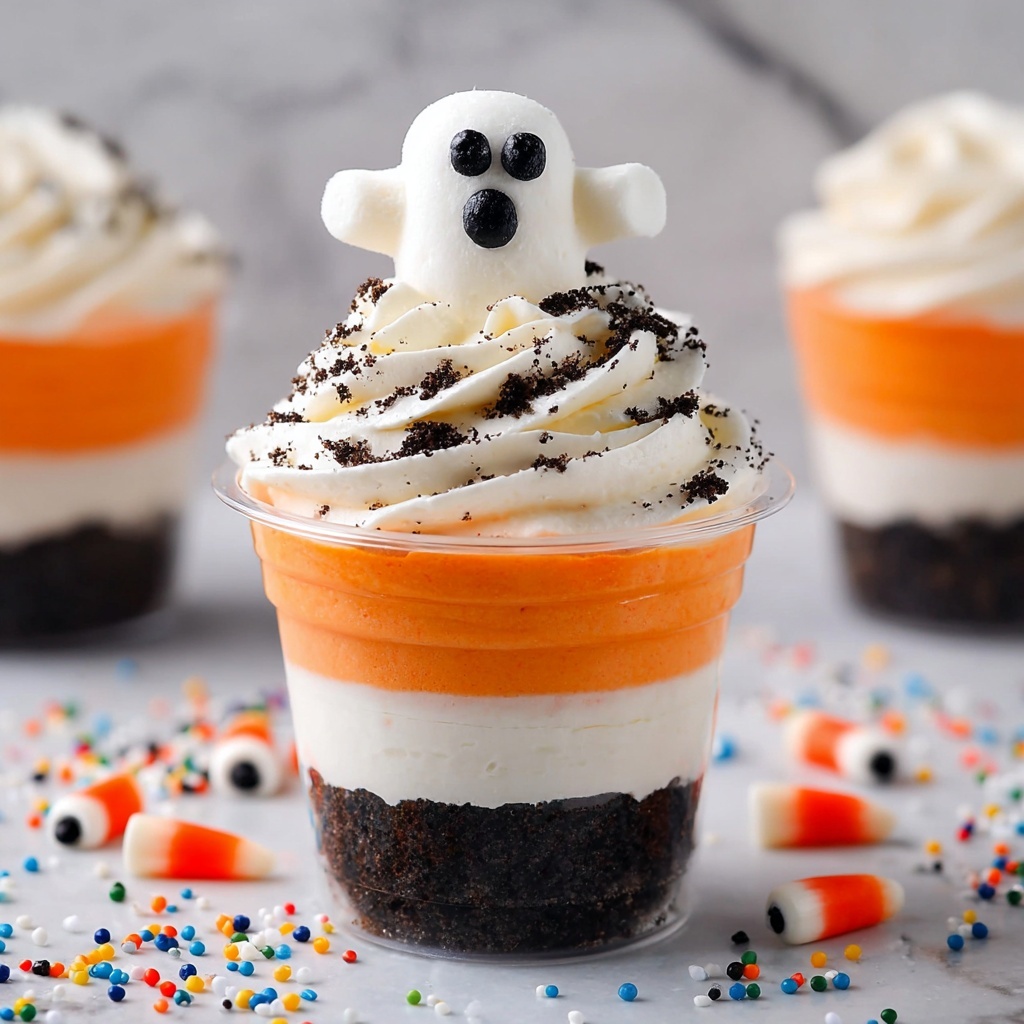
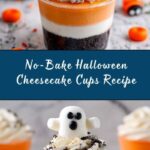
If you’re looking for a fun, festive, and utterly delicious treat to brighten up your spooky celebrations, this No-Bake Halloween Cheesecake Cups Recipe is exactly what you need. These vibrant cheesecake cups blend creamy textures with festive orange and purple layers that not only taste heavenly but look incredible in any Halloween spread. Easy to prepare and requiring no oven time, this recipe lets you whip up a crowd-pleaser that’s as delightful to make as it is to eat.
Ingredients You’ll Need
These ingredients are simple, easy to find, and each plays a crucial role in building the flavor, texture, and visual appeal of the cheesecake cups. From the buttery graham cracker crust to the light, fluffy cream cheese filling, every component contributes to making these festive bites a hit.
- Graham cracker crumbs (1 1/2 cups): The perfect crunchy base that adds a buttery and slightly sweet layer to contrast the creamy filling.
- Melted butter (1/4 cup): Helps bind the crust together for a firm structure.
- Sugar (2 tablespoons): Adds just a touch of extra sweetness to balance flavors.
- Cream cheese, softened (8 ounces): The star ingredient providing a rich and velvety texture to the cheesecake layer.
- Powdered sugar (1/2 cup): Smoothly sweetens the filling without graininess.
- Vanilla extract (1 teaspoon): Enhances the cheesecake’s flavor with warm, aromatic depth.
- Whipped topping (1 cup): Lightens the cheesecake mixture for a fluffy, airy finish.
- Orange and purple food coloring: These vibrant hues bring Halloween spirit to life in each cup.
- Crushed chocolate sandwich cookies (1 cup): Adds a delightful crunch and chocolatey contrast on top.
- Halloween sprinkles or candy decorations: For festive flair and colorful finishing touches.
How to Make No-Bake Halloween Cheesecake Cups Recipe
Step 1: Prepare the Crust
Start by combining the graham cracker crumbs, melted butter, and sugar in a bowl. Mix until the crumbs are evenly coated and sticky enough to hold together. Spoon this mixture evenly into your serving cups and gently press down with the back of a spoon to create a firm, compact crust layer that will hold the cheesecake filling perfectly.
Step 2: Make the Cheesecake Filling
In a separate bowl, beat the softened cream cheese until completely smooth and creamy, without lumps. Add in powdered sugar and vanilla extract, mixing again until everything is fully incorporated. This mixture is the foundation of your cheesecake flavor—rich, sweet, and perfectly tangy.
Step 3: Fold in Whipped Topping
Next, gently fold in the whipped topping to your cream cheese mix. This step is key because it lightens the texture dramatically, giving you cheesecake cups that feel fluffy and airy instead of dense and heavy. Be gentle to keep as much volume as possible.
Step 4: Tint the Mixtures
Divide your cheesecake mixture evenly into two separate bowls. Add orange food coloring to one bowl and purple food coloring to the other. Stir both until the colors are bright and even. This creates a playful and eye-catching Halloween effect that will impress both kids and adults.
Step 5: Layer the Cheesecake Cups
Alternate spoonfuls of orange and purple cheesecake layers over the prepared crust in each cup. The key is to create distinct layers that showcase the contrast beautifully, turning every cup into a mini work of art that screams Halloween party fun.
Step 6: Add Toppings and Chill
Sprinkle the top of each cheesecake cup with crushed chocolate sandwich cookies, then add a generous scattering of Halloween sprinkles or candy decorations. Refrigerate the cups for at least two hours to set up and chill before serving. This no-bake treat gets even better as it rests!
How to Serve No-Bake Halloween Cheesecake Cups Recipe
Garnishes
Don’t be shy with your garnishes! Halloween sprinkles bring a festive crunch and burst of color, while crushed chocolate cookies add texture and richness. You can also toss on edible glitter or small candy eyeballs for extra spooky fun that guests will love.
Side Dishes
Serve these cheesecake cups alongside other light and complementary treats like fresh berries, citrus slices, or a small assortment of cookies. They work beautifully as a sweet finale on a Halloween dessert table filled with an array of textures and flavors.
Creative Ways to Present
For an extra special touch, serve your No-Bake Halloween Cheesecake Cups Recipe in clear mason jars or mini pumpkin-shaped containers so the colorful layers shine through. You might even add mini spoons with festive handles or place them on a decorated platter surrounded by Halloween-themed decor for maximum impact.
Make Ahead and Storage
Storing Leftovers
If you have leftovers, simply cover the cheesecake cups tightly with plastic wrap or use airtight containers and keep them refrigerated. They will stay fresh for up to 3 days, making them a convenient treat to enjoy beyond your Halloween party.
Freezing
You can freeze these cups if needed, but keep in mind that the texture might slightly change—whipped topping can become a bit grainy after thawing. To freeze, wrap each cup well and place in a freezer-safe container for up to 2 months. Thaw in the refrigerator before serving.
Reheating
Since this is a no-bake cheesecake, reheating is not recommended. These cups are best enjoyed chilled straight from the fridge to preserve the creamy and refreshing texture that makes this recipe so irresistible.
FAQs
Can I use a different crust if I don’t have graham crackers?
Absolutely! Crushed Oreos or your favorite cookie crumbs work wonderfully as a crust substitute, adding a chocolatey twist and extra flavor depth to your cheesecake cups.
Is it possible to make this recipe vegan?
To make these cheesecake cups vegan, swap cream cheese for a dairy-free alternative, use vegan whipped topping, and ensure your cookies and sprinkles are vegan-friendly. It may alter the taste and texture slightly but still offers a tasty plant-based option.
How long do these cheesecake cups need to chill?
At least two hours in the fridge are best to allow the flavors to meld and the layers to firm up properly, ensuring they hold their shape and taste amazing.
Can I adjust the colors to match another holiday or theme?
Definitely! This No-Bake Halloween Cheesecake Cups Recipe is flexible—switch out the orange and purple coloring for any hues you want to match birthdays, other holidays, or personal preferences.
What’s the best way to serve these to a crowd?
Make them ahead of time and keep them chilled in the fridge. Arrange on a large serving tray so guests can grab and enjoy easily. Using clear cups also adds a wow factor and helps with portion control.
Final Thoughts
Making and sharing this No-Bake Halloween Cheesecake Cups Recipe is like inviting a burst of color and festive fun into your kitchen. It’s so easy to whip up, looks incredible, and tastes like a special occasion in every bite. Whether you’re hosting a party or just craving a seasonal treat, these cups will make your Halloween celebration sweeter and more memorable. I can’t wait for you to try them and see how much joy this little dessert can bring to the table!
Print
No-Bake Halloween Cheesecake Cups Recipe
- Prep Time: 20 minutes
- Cook Time: 0 minutes
- Total Time: 2 hours 20 minutes
- Yield: 6 cups
- Category: Dessert
- Method: No-Cook
- Cuisine: American
- Diet: Vegetarian
Description
These No-Bake Halloween Cheesecake Cups are a delightful and festive dessert perfect for celebrating the spooky season. Layered with colorful orange and purple cheesecake mixtures atop a crunchy graham cracker crust, then topped with crushed chocolate cookies and Halloween sprinkles, they combine creamy texture and fun holiday flair without any baking required.
Ingredients
Crust
- 1 1/2 cups graham cracker crumbs
- 1/4 cup melted butter
- 2 tablespoons sugar
Cheesecake Filling
- 8 ounces cream cheese, softened
- 1/2 cup powdered sugar
- 1 teaspoon vanilla extract
- 1 cup whipped topping
- Orange and purple food coloring
Toppings
- 1 cup crushed chocolate sandwich cookies
- Halloween sprinkles or candy decorations
Instructions
- Prepare the crust: In a bowl, combine the graham cracker crumbs, melted butter, and sugar until the mixture is evenly moistened. Spoon this mixture into serving cups and press down firmly to create an even crust layer at the bottom of each cup.
- Make the cheesecake filling: In a separate mixing bowl, beat the softened cream cheese until smooth and creamy. Add the powdered sugar and vanilla extract and mix well to incorporate.
- Fold in whipped topping: Gently fold the whipped topping into the cream cheese mixture until light and creamy, taking care not to deflate the mixture.
- Color the cheesecake mixture: Divide the cheesecake filling evenly into two bowls. Add orange food coloring to one bowl and purple food coloring to the other, mixing each until the color is well distributed.
- Assemble the cups: Alternate spoonfuls of the colored cheesecake mixtures over the crust in each cup to create festive, layered colors. You can layer by alternating colors or gently swirling together for a marbled effect.
- Add the toppings: Sprinkle the crushed chocolate sandwich cookies on top and decorate with Halloween-themed sprinkles or candy decorations to finish.
- Chill to set: Refrigerate the assembled cheesecake cups for at least 2 hours to allow the filling to firm up before serving.
Notes
- Use clear serving cups to showcase the vibrant orange and purple cheesecake layers for a fun presentation.
- You can substitute the graham cracker crust with crushed Oreos for a richer, chocolatey base.
- Prepare these cheesecake cups a day in advance to make party day preparation easier.
