If you’re looking to add a little extra sparkle and sweetness to your holiday baking, the Christmas Lights Royal Icing Sugar Cookies Recipe is an absolute must-try. These cheerful sugar cookies capture the magic of twinkling Christmas lights with glossy royal icing in vibrant colors and delicate black piping that mimics festive light strands. Every bite is a delightful blend of buttery cookie and smooth, sweet icing that feels just like a holiday celebration on your tongue. Whether you’re decorating with the kids or gifting them to friends, these cookies light up any Christmas occasion with charm and classic flavor.
Ingredients You’ll Need
These ingredients are straightforward and pantry-friendly, yet each plays an essential role in creating the perfect texture, taste, and look for your Christmas Lights Royal Icing Sugar Cookies Recipe. From the smooth butter that makes the dough tender to the meringue powder that gives the icing its beautiful stiffness, every element matters.
- 2 3/4 cups all purpose flour: The foundation of your cookies, providing structure and the perfect crumb.
- 1 teaspoon baking powder: Helps the cookies rise slightly for a soft, tender bite.
- 1/2 teaspoon salt: Enhances all the sweet flavors and balances the dough perfectly.
- 1 cup unsalted butter, softened: Adds richness and a melt-in-your-mouth texture.
- 1 cup granulated sugar: Sweetens and contributes to the cookie’s crisp edges.
- 1 large egg: Binds the dough for a smooth, workable consistency.
- 2 teaspoons vanilla extract: Brings warmth and depth to the flavor.
- 1/2 teaspoon almond extract (optional): Adds a subtle, festive nuttiness that complements vanilla.
- 2 cups powdered sugar for royal icing: The base for that shiny, pipeable frosting.
- 1 1/2 tablespoons meringue powder: Gives the royal icing its signature glossy finish and sturdiness when dried.
- 3 to 4 tablespoons warm water: Used to adjust the royal icing to the perfect consistency.
- Assorted gel food coloring: For painting those iconic, colorful Christmas lights onto your cookies.
- Black decorating icing: Essential for outlining the light strands and adding contrast.
- Small round piping tip: Makes decorating the light bulbs and lines precise and fun.
- Parchment paper for baking: Prevents sticking and promotes even baking.
How to Make Christmas Lights Royal Icing Sugar Cookies Recipe
Step 1: Prepare the Dough
Start by whisking together the all purpose flour, baking powder, and salt to ensure every bite is perfectly balanced and tender. In a separate large bowl, beat the softened butter and sugar until light and fluffy, creating a creamy base that will blend smoothly with your dry ingredients. Add the egg, vanilla, and almond extract, mixing well to combine all those warm, festive flavors.
Step 2: Combine and Chill
Gradually add the dry mixture to the wet ingredients, stirring just until a soft dough forms—you want it pliable but not sticky. Divide this dough in half, wrap each portion tightly in plastic wrap, and chill in the fridge for at least one hour. This step is great for controlling spread during baking and makes rolling out much easier.
Step 3: Roll and Cut
Once chilled, preheat your oven to 350°F and line baking sheets with parchment paper. On a lightly floured surface, roll the dough out to about 1/4 inch thickness. Use cookie cutters or simply cut into rectangles or festive holiday shapes that will mimic Christmas lights for a fun, personal touch.
Step 4: Bake and Cool
Arrange your cutouts on the baking sheets and bake for 8 to 10 minutes until the edges are lightly golden but the centers remain soft. It’s that perfect sweet spot for texture. Let the cookies cool completely on wire racks before moving on to decorating; warm cookies risk melting your royal icing.
Step 5: Make the Royal Icing
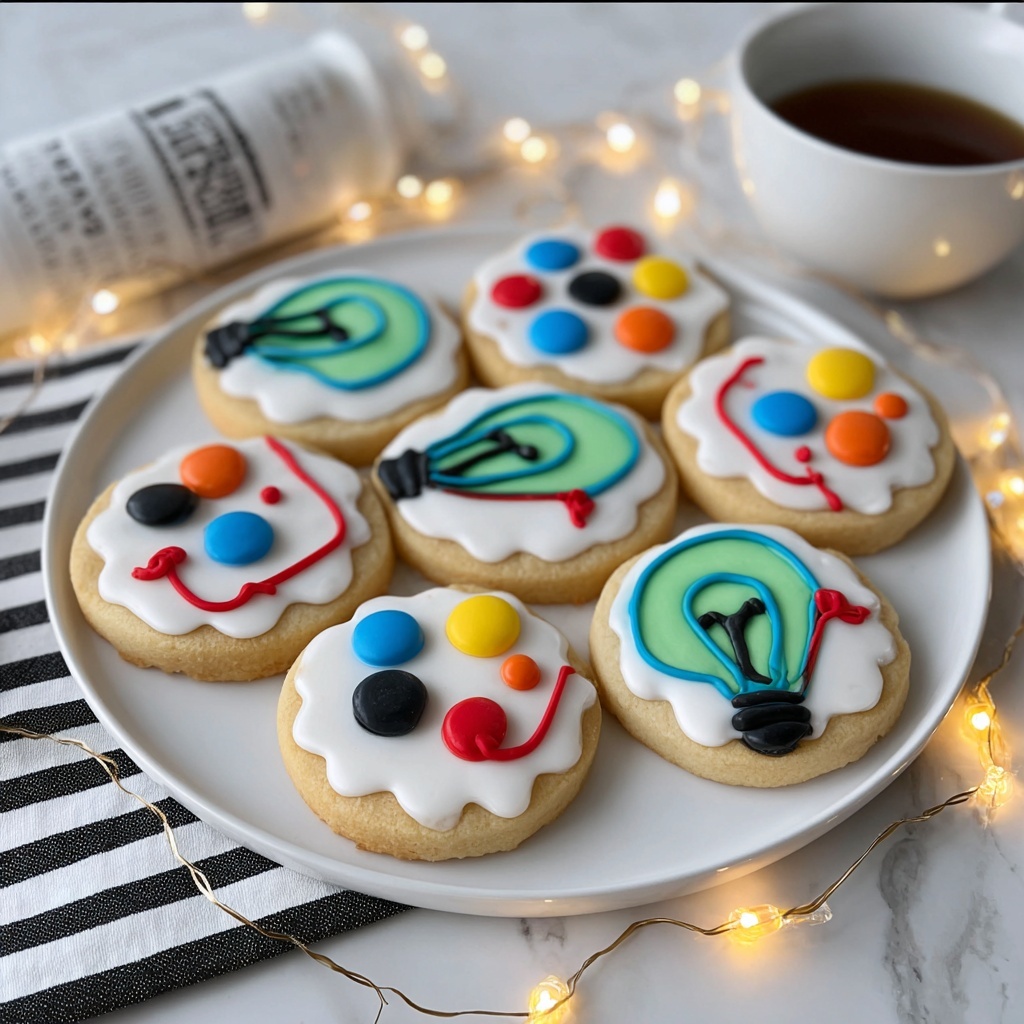
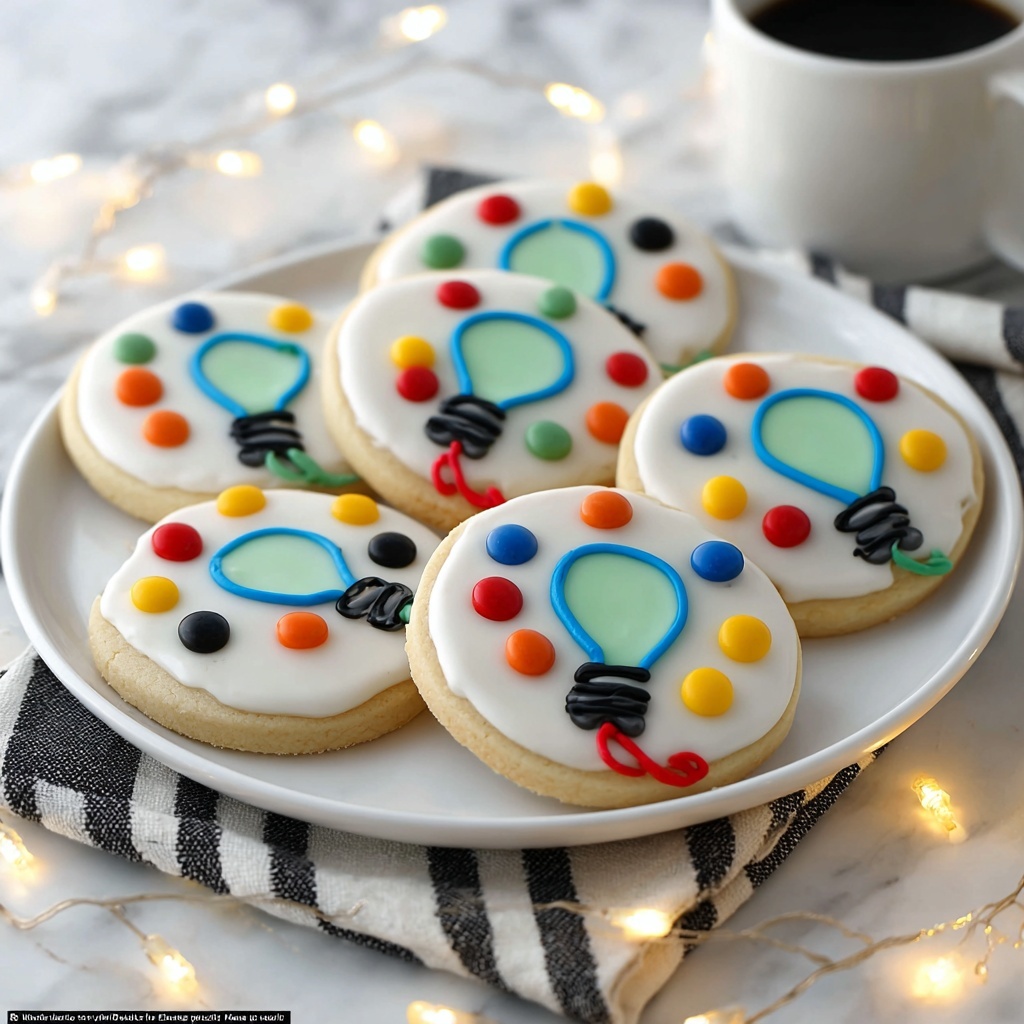
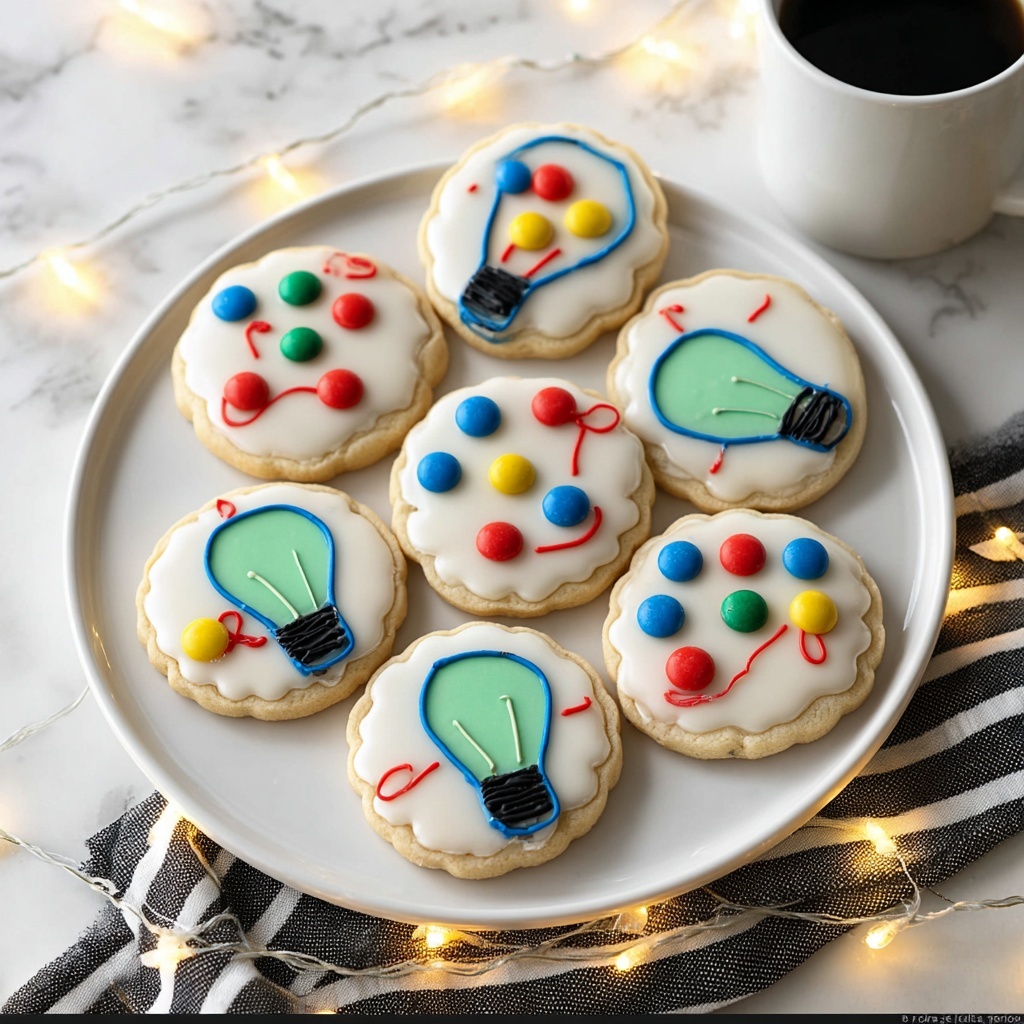
Combine powdered sugar, meringue powder, and warm water in a bowl, then beat vigorously until the icing is smooth, glossy, and thick but pipeable. Divide it into several small bowls and tint each with your chosen gel food colors, capturing a palette of red, green, yellow, and blue for the perfect Christmas light effect.
Step 6: Decorate with Christmas Spirit
Spread or pipe a smooth base layer of icing onto each cooled cookie and let it set completely. Using your black decorating icing with a small round tip, pipe thin, slightly curved lines resembling electrical strands across the cookie surface. Along those lines, pipe small, brightly colored dots to represent glowing Christmas light bulbs. Let everything dry thoroughly—this can take several hours or overnight—to ensure your designs stay sharp and sturdy.
How to Serve Christmas Lights Royal Icing Sugar Cookies Recipe
Garnishes
While these cookies are beautifully decorated on their own, a light dusting of edible glitter or a few tiny silver sugar pearls placed strategically can add that extra sparkle, making the lights truly twinkle. Fresh peppermint sprigs on the plate can also enhance the holiday vibe and offer a refreshing contrast between bites.
Side Dishes
These cookies pair wonderfully with a warm cup of spiced hot cocoa or a creamy eggnog, balancing their sweet crunch with cozy, comforting beverages. If you’re serving a holiday brunch or afternoon tea, add these cookies alongside gingerbread or cinnamon-dusted treats to create a festive dessert spread.
Creative Ways to Present
Presentation makes everything feel more special. Arrange your Christmas Lights Royal Icing Sugar Cookies Recipe in a clear glass jar layered with more colorful cookies, tied with a red satin ribbon for gift-giving. You can also display them on a tiered dessert stand for a holiday party centerpiece that’s both delightful to look at and irresistible to snack on.
Make Ahead and Storage
Storing Leftovers
Once fully decorated and dried, store your cookies in an airtight container at room temperature. This helps maintain their fresh-baked texture and keeps the royal icing glossy and firm. They’ll stay delicious for up to one week, perfect for enjoying all season long or sharing with friends and family.
Freezing
If you want to prepare ahead or save extras, freeze your un-iced cookies by wrapping them tightly in plastic wrap and placing them in a freezer-safe bag. When you’re ready to decorate, thaw them completely at room temperature to avoid condensation affecting your icing. Decorated cookies can also be frozen carefully, but make sure they are well-packed to avoid damaging the delicate royal icing.
Reheating
These sugar cookies are best enjoyed at room temperature, so reheating is usually unnecessary. If you prefer them slightly warm, briefly microwave a cookie for 5 to 10 seconds, but be careful not to soften the icing too much. The royal icing is the real star here and tastes best firm and set.
FAQs
Can I use regular meringue instead of meringue powder for the royal icing?
While fresh meringue can be used, meringue powder is more convenient and provides consistent results when making royal icing. It helps stabilize the icing and makes it easier to store, especially if you want to prep the icing ahead of time.
What if I don’t have gel food coloring? Can I use liquid food coloring instead?
Gel food coloring is preferred because it doesn’t thin out your royal icing, which is important for maintaining the right consistency. Liquid food coloring can be used, but add it sparingly to avoid making the icing too runny.
How long does the royal icing need to dry before I can store the cookies?
For the best results, allow the decorated cookies to dry at least several hours or preferably overnight so the icing hardens fully. This prevents smudging and keeps your beautiful Christmas lights design intact.
Can I make the dough ahead of time?
Absolutely! The dough can be made and chilled for up to 3 days before baking. This actually helps deepen the flavor and makes rolling out the dough easier when you’re ready to bake and decorate.
Are these cookies suitable for vegetarians?
Yes, this Christmas Lights Royal Icing Sugar Cookies Recipe is vegetarian-friendly as it contains no meat or gelatin products. It’s perfect for sharing with all your holiday guests.
Final Thoughts
There’s something truly magical about baking and decorating sugar cookies that bring out the festive spirit in everyone, and this Christmas Lights Royal Icing Sugar Cookies Recipe hits all the right notes. It’s a joyful project that results in a stunning, tasty treat guaranteed to brighten your holiday celebrations. I can’t wait for you to make these cookies, share them with loved ones, and enjoy that wonderful sparkle of Christmas joy with every bite!
Print
Christmas Lights Royal Icing Sugar Cookies Recipe
- Prep Time: 25 minutes
- Cook Time: 10 minutes
- Total Time: 35 minutes plus chilling and drying time
- Yield: 24 cookies
- Category: Dessert
- Method: Baking
- Cuisine: American
- Diet: Vegetarian
Description
Delight in the festive spirit with these Christmas Lights Royal Icing Sugar Cookies. Soft, buttery sugar cookies are decorated with vibrant royal icing to mimic colorful Christmas lights, perfect for holiday celebrations or gifting.
Ingredients
Cookie Dough
- 2 3/4 cups all purpose flour
- 1 teaspoon baking powder
- 1/2 teaspoon salt
- 1 cup unsalted butter, softened
- 1 cup granulated sugar
- 1 large egg
- 2 teaspoons vanilla extract
- 1/2 teaspoon almond extract (optional)
Royal Icing
- 2 cups powdered sugar
- 1 1/2 tablespoons meringue powder
- 3 to 4 tablespoons warm water
- Assorted gel food coloring
- Black decorating icing (for light strands)
- Small round piping tip
- Parchment paper (for baking)
Instructions
- Mix Dry Ingredients: In a bowl, whisk together the flour, baking powder, and salt until evenly combined, ensuring a consistent dough texture.
- Cream Butter and Sugar: In a large mixing bowl, beat the softened butter and granulated sugar together until light and fluffy, which makes for tender cookies.
- Add Egg and Extracts: Incorporate the egg, vanilla extract, and optional almond extract into the butter mixture, mixing thoroughly until combined.
- Combine Wet and Dry: Gradually add the dry ingredients to the wet mixture, stirring until a soft cookie dough forms.
- Chill Dough: Divide the dough into two halves, wrap each in plastic wrap, and refrigerate for at least one hour to make rolling easier.
- Preheat Oven and Prepare Baking Sheets: Set oven to 350°F (175°C) and line baking sheets with parchment paper to prevent sticking.
- Roll and Cut Dough: Roll each dough portion on lightly floured surface to about 1/4 inch thickness and cut into rectangles or festive holiday shapes.
- Bake Cookies: Place cookie cutouts on prepared baking sheets and bake for 8 to 10 minutes until edges are lightly golden, indicating doneness.
- Cool Cookies: Remove cookies from oven and let them cool completely on a wire rack before decorating.
- Prepare Royal Icing: In a bowl, combine powdered sugar, meringue powder, and warm water, beating until the mixture is smooth, glossy, and holds soft peaks.
- Color Icing: Divide the royal icing into separate bowls and tint each with different gel food colors for decorating.
- Decorate Cookies: Spread or pipe a base layer of colored icing onto the cooled cookies and allow it to set before further decoration.
- Add Light Strands: Use black decorating icing with a small round piping tip to pipe thin lines resembling Christmas light strands across each cookie.
- Pipe Light Bulbs: Pipe small dots of assorted colored icing along the black lines to resemble Christmas light bulbs.
- Dry and Store: Allow the decorated cookies to dry completely, preferably several hours or overnight, then store in an airtight container at room temperature.
Notes
- Adjust royal icing consistency by adding a few drops of water to thin or extra powdered sugar to thicken the icing as needed.
- Allow decorated cookies to dry thoroughly for several hours or overnight to ensure the icing hardens fully and won’t smudge.
- Store finished cookies in an airtight container at room temperature to maintain freshness and prevent softening.
