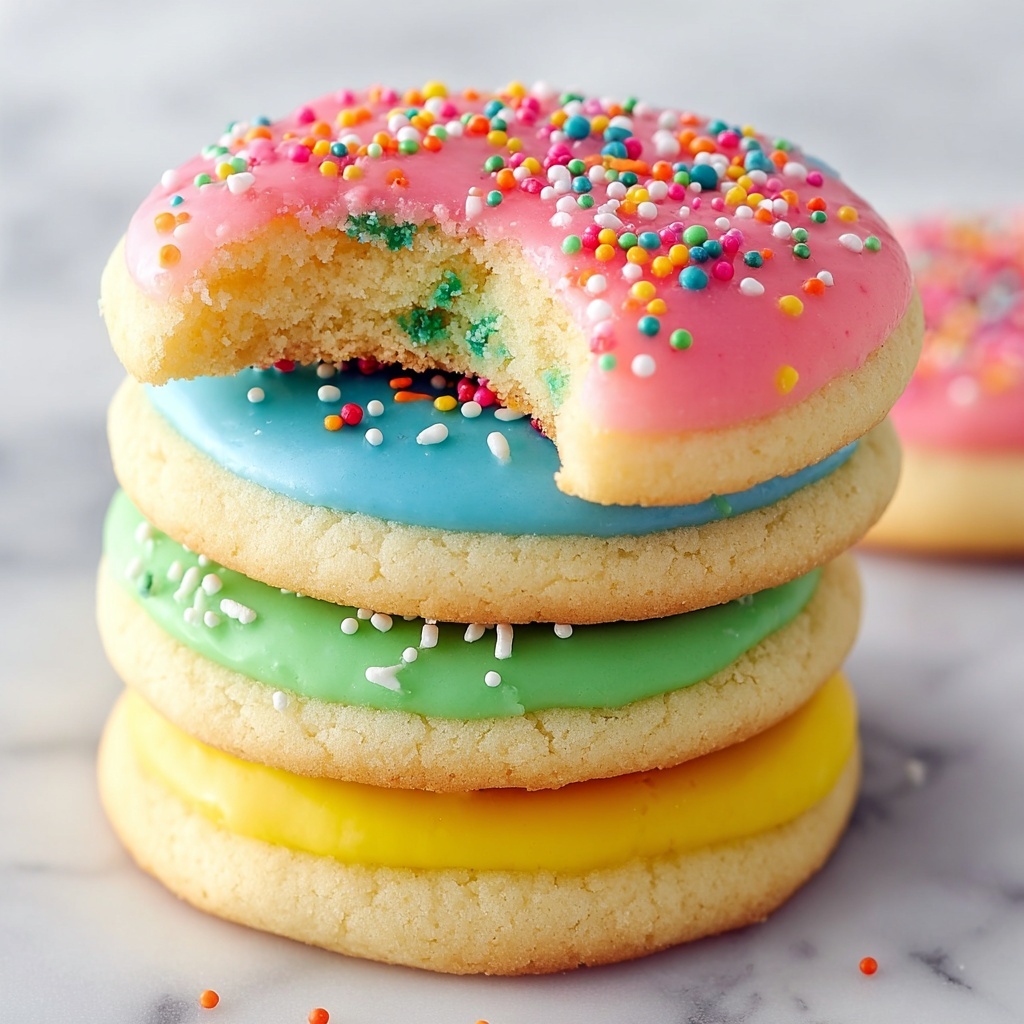
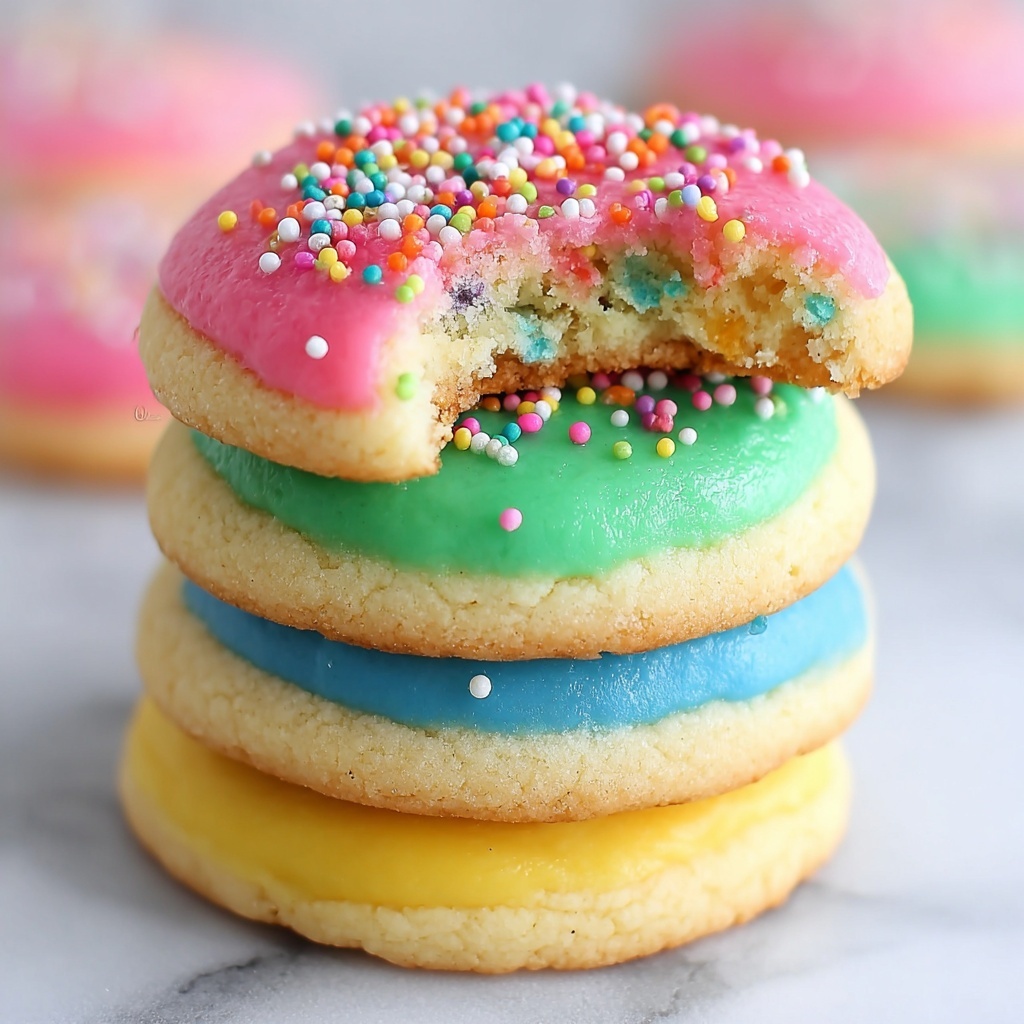
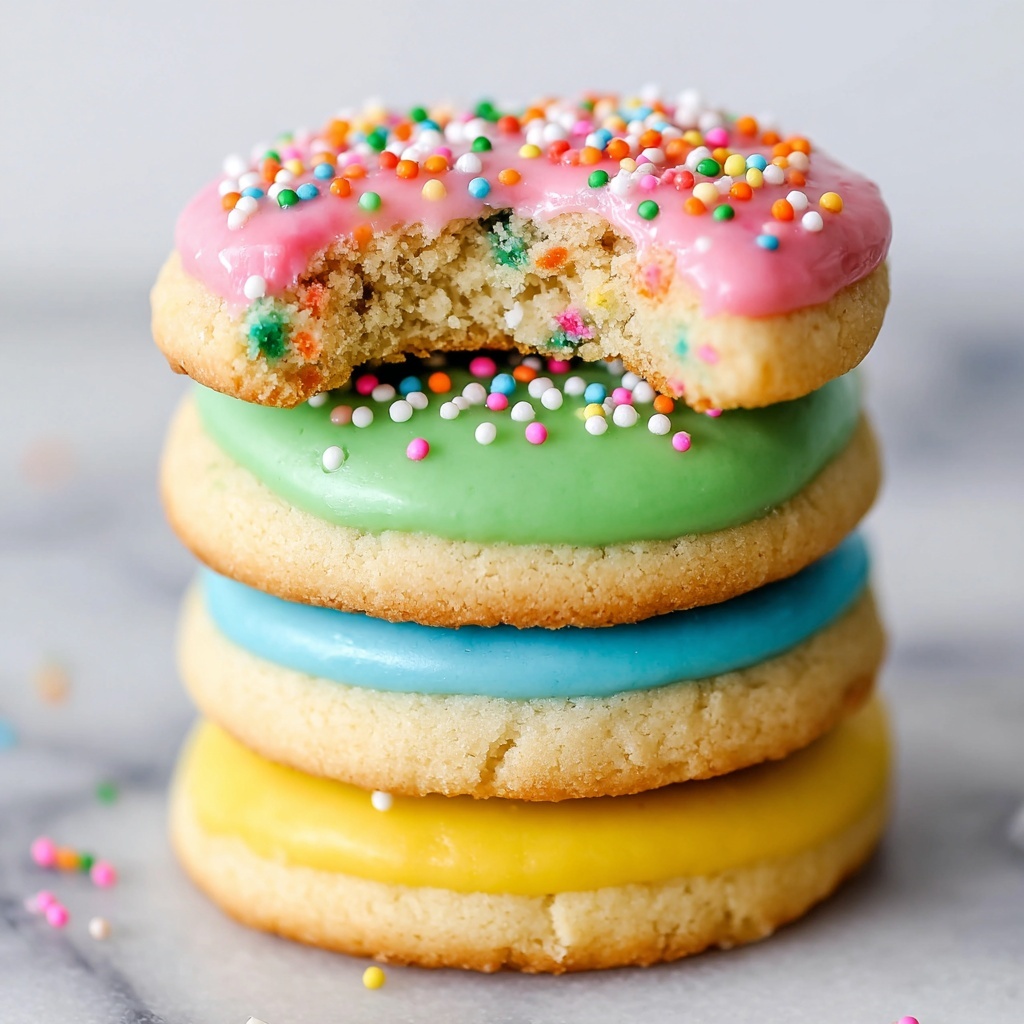
If you’re looking to bring a burst of springtime joy to your kitchen, this Easter Sugar Cookies Recipe is the perfect treat to bake and share. These sugar cookies are delightfully soft with just the right amount of sweetness, and vibrant, colorful icing that screams celebration. The recipe is designed to be fun and simple, making it ideal for baking with family or friends while creating wonderful memories and delicious cookies that everyone will love. Plus, the festive pastel colors and sprinkles make these cookies an absolute hit at any Easter gathering or just a cheerful snack anytime you want a little sunshine on your plate.
Ingredients You’ll Need
Getting the right ingredients is the first step to baking these irresistible Easter sugar cookies. Each element plays a starring role, from the creamy butter that ensures a tender texture to the vibrant food coloring that turns your cookies into little works of art packed with flavor and joy.
- Sugar: Provides the perfect level of sweetness and helps create a crisp edge on the cookies.
- Butter: Adds richness and moisture, giving the cookies a melt-in-your-mouth tenderness.
- Eggs: Bind the dough together while giving structure and richness to the cookies.
- Milk: Moistens the dough for a soft bite, also used to adjust icing consistency.
- Vanilla Extract: Infuses a warm, aromatic flavor that elevates both the cookies and frosting.
- Flour: Provides the structure needed for perfectly soft yet sturdy sugar cookies.
- Baking Powder: Helps the cookies rise slightly, keeping them light and tender.
- Salt: Enhances the sweetness and balances the flavors beautifully.
- Powdered Sugar: Key to making a smooth, creamy icing that coats perfectly.
- Food Coloring: Creates cheerful pastel shades that make these cookies distinctive Easter treats.
- Sprinkles: Adds texture, crunch, and extra festive charm to your decorated cookies.
How to Make Easter Sugar Cookies Recipe
Step 1: Preheat and Prepare
Start by preheating your oven to 350ºF to ensure it’s perfectly hot for baking. Line a baking sheet with parchment paper to stop your cookies from sticking, making your cleanup much easier and keeping your cookies perfectly shaped.
Step 2: Cream Butter and Sugar
Using a hand mixer, cream together the butter and sugar until the mixture is light and fluffy. This step is crucial because it incorporates air, helping your cookies develop a tender texture and slight rise.
Step 3: Add the Wet Ingredients
Next, beat in the eggs, milk, and vanilla extract until everything is perfectly smooth. These liquids add richness and flavor while making the dough easy to work with.
Step 4: Incorporate Dry Ingredients
Mix in flour, baking powder, and salt carefully until a dough forms. The dry ingredients provide structure so your cookies don’t spread too much and hold their classic shape.
Step 5: Shape Your Cookies
Roll the dough into 1-inch balls and place them evenly spaced on your prepared baking sheet. Then dip a glass in flour and gently press each ball down until it’s about 1/2-inch thick for that perfect sugar cookie look.
Step 6: Bake to Perfection
Bake your cookies for about 9 minutes or until the edges just start to turn golden. Keep an eye on them so they don’t over-bake, which preserves their soft texture.
Step 7: Cool Completely
Let the cookies cool fully before icing—this keeps the frosting from melting and sliding off, so your colors stay bright and your designs stay neat.
Step 8: Make and Color the Icing
Whisk together powdered sugar, milk, and vanilla until smooth. Divide the icing into four bowls, adding a couple drops of green, pink, yellow, and blue food coloring to each bowl for those festive pastel Easter hues.
Step 9: Ice and Decorate
Dip each cooled cookie into the icing, covering the surface evenly. Before the icing sets, sprinkle your favorite sprinkles over the top for a fun pop of texture and color.
Step 10: Set and Enjoy
Allow the icing to harden completely before handling or storing your cookies, preserving their beautiful finish and making them easy to stack or gift.
How to Serve Easter Sugar Cookies Recipe
Garnishes
Beyond sprinkles, you can enhance your Easter Sugar Cookies Recipe with delicate edible glitter, finely chopped nuts, or a drizzle of contrasting colored icing to add that extra wow factor and texture variety.
Side Dishes
These cookies pair wonderfully with a cup of tea, a chilled glass of milk, or a fruity lemonade. Serving them with fresh fruit or pastel-colored candies can create a delightful Easter spread that’s light and refreshing.
Creative Ways to Present
Arrange your Easter sugar cookies on a decorative platter with pastel-colored napkins or nest them inside an Easter basket lined with shredded paper grass. You can even individually wrap cookies in clear bags tied with ribbon for gift-giving or party favors.
Make Ahead and Storage
Storing Leftovers
Store your baked and iced Easter Sugar Cookies in an airtight container at room temperature. This keeps them fresh for up to a week and preserves the frosting’s texture and flavor beautifully.
Freezing
If you want to enjoy the cookies later, freeze them after they’ve been iced and hardened. Place parchment paper between layers to prevent sticking and store in a freezer-safe container for up to 3 months. Just thaw at room temperature before serving.
Reheating
Since these cookies are best enjoyed soft and fresh, reheating is not usually necessary. If you prefer slightly warm cookies, forgo the icing and warm them in a 300ºF oven for 5–8 minutes, but avoid microwave heating as it can make them tough.
FAQs
Can I make the dough ahead of time?
Absolutely! You can prepare the dough and refrigerate it for up to 24 hours before rolling out and baking. This can improve the texture and make rolling easier.
What can I use if I don’t have powdered sugar for the icing?
Powdered sugar is key for smooth icing. If unavailable, you can try grinding granulated sugar in a blender until powdery, but the texture might be a bit grainier.
How do I get the pastel colors perfect every time?
Start with just a couple drops of gel or liquid food coloring and mix well, adding more gradually if needed. Too much color can affect icing consistency.
Are these cookies gluten-free?
This recipe as is contains regular flour, so it is not gluten-free. However, you can experiment with gluten-free all-purpose blends to achieve a similar result.
Can I substitute butter with margarine or oil?
Butter is recommended for flavor and texture, but you may substitute margarine with slightly different results. Oil is not recommended as it affects dough structure and cookie firmness.
Final Thoughts
There is something truly magical about the Easter Sugar Cookies Recipe—it’s not just about the taste but the bright colors, the fun of decorating, and the joy of sharing them with loved ones. Whether you’re baking with kids or prepping for a festive brunch, these cookies never fail to put a smile on faces and add a little sweetness to your occasion. So grab your apron, gather your ingredients, and get ready to bake a batch of happiness that’s as cheerful as spring itself!
Print
Easter Sugar Cookies Recipe
- Prep Time: 15 minutes
- Cook Time: 9 minutes
- Total Time: 39 minutes
- Yield: 30 cookies
- Category: Dessert
- Method: Baking
- Cuisine: American
- Diet: Vegetarian
Description
Delight in these classic Easter Sugar Cookies, perfectly soft and chewy with a light vanilla flavor and colorful icing decorations. Easy to prepare in just under 40 minutes, these festive cookies are ideal for holiday celebrations or any occasion deserving a sweet treat.
Ingredients
Cookie Dough
- 1 1/2 cups sugar
- 2/3 cup butter
- 2 eggs
- 2 Tbsp milk
- 1 tsp vanilla extract
- 3 1/4 cups flour
- 2 1/2 tsp baking powder
- 1/2 tsp salt
Icing
- 2 cups powdered sugar
- 3–4 tbsp milk
- 1 tsp vanilla extract
- Green, pink, yellow, and blue food coloring
- Sprinkles of your choice
Instructions
- Preheat the oven: Preheat the oven to 350ºF to ensure it reaches the right temperature for baking the cookies evenly.
- Prepare baking sheet: Line a baking sheet with parchment paper to prevent the cookies from sticking and to make cleanup easier.
- Cream butter and sugar: In a large mixing bowl, use a hand mixer to cream together the butter and sugar until the mixture is light and fluffy, incorporating air for a soft cookie base.
- Add wet ingredients: Mix in the eggs, milk, and vanilla extract with the creamed butter-sugar mixture until the batter is smooth and homogenous.
- Incorporate dry ingredients: Gradually add the flour, baking powder, and salt to the wet ingredients. Mix until a consistent dough forms, providing structure to the cookies.
- Form cookie balls: Roll the dough into 1-inch balls and place them evenly spaced on the prepared baking sheet to ensure uniform baking.
- Flatten cookies: Dip a glass in flour and press each dough ball down to about 1/2-inch thickness, shaping the classic sugar cookie form.
- Bake cookies: Bake in the preheated oven for about 9 minutes or until the tops begin to lightly brown, watching carefully to prevent over-baking.
- Cool cookies: Remove from the oven and let the cookies cool completely on a wire rack before decorating to prevent icing from melting.
- Prepare icing: In a bowl, whisk together powdered sugar, milk, and vanilla extract until smooth. Adjust thickness by adding more milk (to thin) or powdered sugar (to thicken).
- Color icing: Divide the icing evenly into 4 small bowls, adding about 2 drops of food coloring to each (green, pink, yellow, and blue) to make colorful icing.
- Ice cookies: Dip the cooled cookies into the colored icing, making sure to cover the surface evenly for a beautiful glaze.
- Add sprinkles: Immediately after icing, sprinkle your choice of sprinkles on top before the icing sets to add texture and festive decoration.
- Set and serve: Allow the icing to harden completely at room temperature before serving or storing the cookies to preserve their shape and appearance.
Notes
- Ensure the cookies are fully cooled before icing to avoid melting and sliding.
- You can adjust icing consistency to your preference for either a thin glaze or thicker decoration.
- Use parchment paper or silicone baking mats to prevent sticking and simplify cleanup.
- Store the cookies in an airtight container at room temperature to keep them fresh for up to a week.
- Customize the icing colors and sprinkles to suit different occasions beyond Easter.


