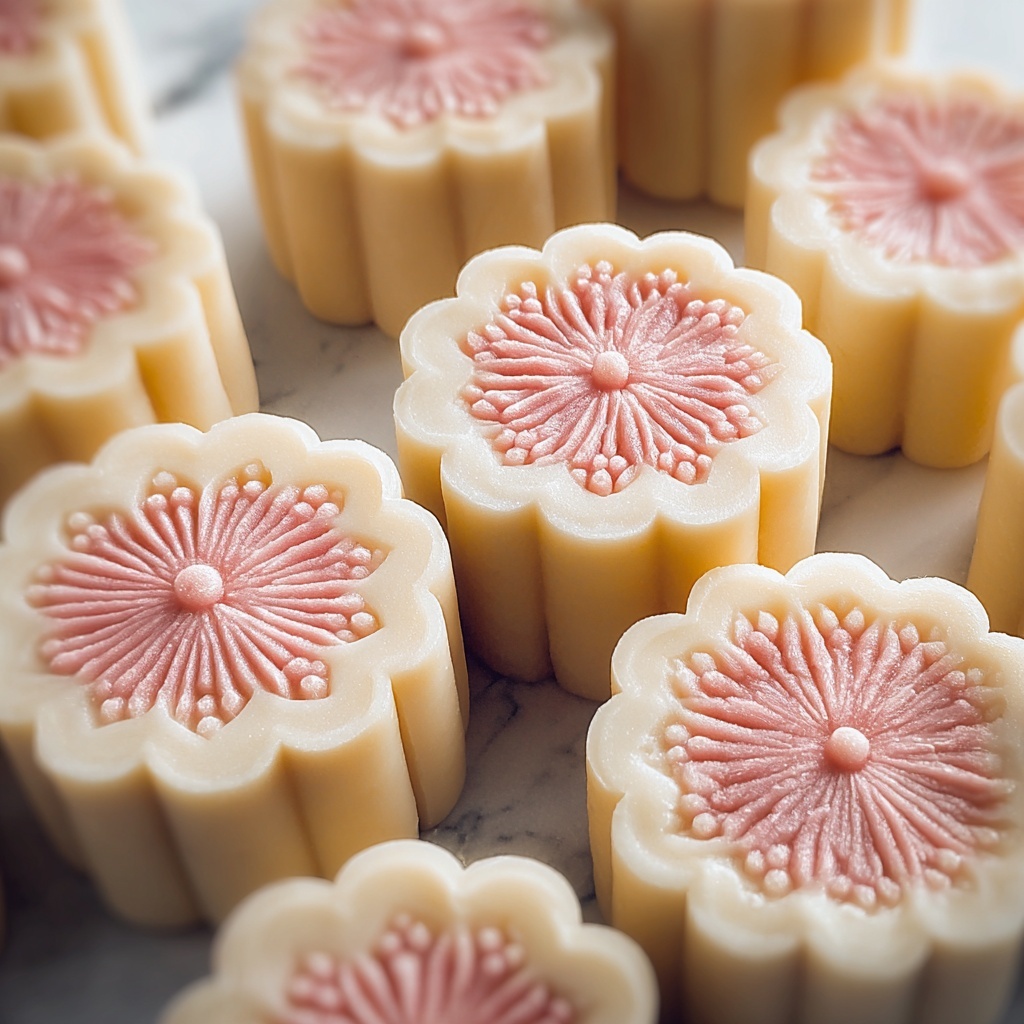
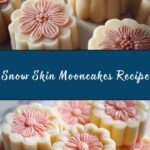
If you are looking to bring a touch of festive elegance and delightful sweetness to your dessert table, this Snow Skin Mooncakes Recipe is an absolute must-try. These soft, chewy, and beautifully delicate treats are a refreshing twist on traditional baked mooncakes, offering a no-bake, chilled version that melts in your mouth. Each bite is a harmonious blend of subtly sweet glutinous dough enveloping luscious lotus or red bean paste, making them perfect for celebrations or anytime you crave a little sweetness with a lovely texture. Let me take you through this fun, rewarding recipe that’s as charming to make as it is to eat!
Ingredients You’ll Need
This recipe uses a handful of simple yet essential ingredients that come together to create the perfect snow skin dough and rich filling. Each component plays a crucial role in giving the mooncakes their signature soft texture, sweet taste, and beautiful appearance.
- Glutinous rice flour (1/2 cup): The foundation for that signature chewy, snow skin texture that makes these mooncakes special.
- Rice flour (1/4 cup): Adds structure and helps achieve a smooth, pliable dough.
- Wheat starch or cornstarch (1/4 cup): Keeps the dough tender and slightly elastic without toughness.
- Powdered sugar (1/3 cup): Sweetens the dough subtly without graininess.
- Milk (3/4 cup): Provides moisture and richness, blending the dry ingredients into a silky batter.
- Sweetened condensed milk (2 tablespoons): Adds creamy sweetness and helps keep the dough supple.
- Vegetable oil (2 tablespoons): Gives the dough a smooth, non-sticky finish for easy handling.
- Lotus seed paste or red bean paste (1 cup): Classic fillings that offer a rich, luxurious contrast to the light dough.
- Cooked glutinous rice flour (kao fen): Essential for dusting molds and surfaces to prevent sticking without drying the dough.
- Optional chopped nuts or dried fruit: Add texture and bursts of flavor inside the filling if you like.
How to Make Snow Skin Mooncakes Recipe
Step 1: Prepare the Dough Batter
Start by whisking the glutinous rice flour, rice flour, wheat starch, powdered sugar, milk, sweetened condensed milk, and vegetable oil together in a heatproof bowl until the mixture is silky smooth and free of lumps. This smooth batter is the secret to the dough’s delicate, soft texture once steamed, so take your time to mix well.
Step 2: Steam to Cook the Dough
Place the bowl over a steamer with medium heat and steam for about 25 to 30 minutes. Remember to stir the mixture halfway through cooking to ensure even heat distribution and prevent lumps from forming. You’ll see it thicken into a cohesive dough that looks glossy and a little translucent—this is your green light to move on.
Step 3: Knead the Dough
After steaming, let the dough cool just enough so it’s comfortable to handle. Then knead it gently until it feels soft, smooth, and a bit stretchy. This kneading step is key to developing the dough’s elastic texture and making it easier to wrap the filling later. Cover the dough with plastic wrap and chill it in the fridge for 30 minutes to firm up slightly.
Step 4: Shape the Filling and Dough Portions
While your dough chills, divide the lotus seed or red bean paste into small balls around 25 grams each. Likewise, portion out the dough into 30-gram sections. Having uniform sizes helps keep your mooncakes neat and consistent.
Step 5: Wrap and Mold the Mooncakes
Flatten each dough portion into a disc and place a filling ball in the center. Gently wrap the dough around the filling, sealing the edges completely. Roll the filled dough into a smooth ball. Lightly dust your mooncake molds and your hands with cooked glutinous rice flour (kao fen) to keep things from sticking. Press the dough ball firmly into the mold, then gently unmold to reveal perfect mooncake shapes. Repeat the process until all dough and filling are used.
Step 6: Chill Before Serving
Place your beautiful snow skin mooncakes into an airtight container and refrigerate for up to 5 days. Let them come to room temperature before serving to enjoy that signature soft, chewy texture and luscious center fully.
How to Serve Snow Skin Mooncakes Recipe
Garnishes
A sprinkle of edible gold dust or a tiny edible flower on top of each mooncake can instantly elevate the presentation, making them suitable for special occasions. If you made different flavors or colors, arrange them in a vibrant pattern on a serving plate to delight the eyes as much as the palate.
Side Dishes
A traditional accompaniment for snow skin mooncakes is a cup of lightly brewed jasmine or oolong tea. The floral notes and slight bitterness cleanse the palate and balance the sweetness perfectly. You could also serve them alongside fresh fruit slices like ripe pears or citrus segments for a refreshing contrast.
Creative Ways to Present
For a fun twist, try dusting the dough with matcha or cocoa powder before molding to create naturally colored snow skin mooncakes. You can also press edible flower petals into the dough before molding for an artisanal touch. Present them in individual bamboo steamer baskets or pretty boxes to evoke the Mid-Autumn Festival spirit.
Make Ahead and Storage
Storing Leftovers
Stored in an airtight container, snow skin mooncakes keep beautifully in the fridge for up to 5 days. The texture remains soft and tender as long as they are not left uncovered, so sealing is important to prevent drying.
Freezing
If you want to enjoy them later, snow skin mooncakes freeze well for up to one month. Wrap each mooncake individually in plastic wrap to avoid freezer burn, then place them in a sealed freezer-safe container. When ready to eat, thaw overnight in the fridge.
Reheating
Unlike baked mooncakes, these chilled treats are best enjoyed without reheating to preserve their unique texture and freshness. Let frozen mooncakes thaw gradually in the fridge then rest at room temperature before serving for the perfect bite every time.
FAQs
Can I substitute the milk for a non-dairy alternative in the Snow Skin Mooncakes Recipe?
Absolutely! You can use oat milk, almond milk, or any other plant-based milk to keep it dairy-free. Just make sure it is unsweetened to control the sweetness of your snow skin.
How do I prevent the mooncakes from sticking to the mold?
The key is to lightly but thoroughly dust your mooncake molds and dough balls with cooked glutinous rice flour (kao fen). Avoid using raw flour since it absorbs moisture differently and can affect texture.
Is it possible to make these mooncakes gluten-free?
Yes! When you use wheat starch, you can substitute it with cornstarch for a gluten-free version. Just ensure all other ingredients, like the fillings, are also gluten-free if you have dietary restrictions.
Can I use other fillings instead of lotus seed or red bean paste?
Definitely. Snow skin mooncakes are versatile! You can try black sesame paste, fruit jams, or even custards for a different flavor experience.
Why does the dough need to be steamed?
Steaming cooks the glutinous rice mixture gently, transforming it into a stretchy, elastic dough that is soft yet firm enough to wrap fillings. Without steaming, the dough would remain floury and gritty.
Final Thoughts
Making this Snow Skin Mooncakes Recipe is such a joyful experience because you end up with stunning, delicious treats that feel truly special and rewarding to share. Whether you’re honoring tradition or simply exploring delightful new desserts, these mooncakes offer a perfect balance of texture, flavor, and charm. So gather your ingredients, follow these steps, and get ready to wow your friends and family with your homemade snow skin delights!
Print
Snow Skin Mooncakes Recipe
- Prep Time: 45 minutes
- Cook Time: 30 minutes
- Total Time: 1 hour 15 minutes
- Yield: 10 mooncakes (50–60g each)
- Category: Dessert
- Method: Steaming
- Cuisine: Chinese
- Diet: Vegetarian, Gluten Free
Description
Snow Skin Mooncakes are a delightful Chinese dessert traditionally enjoyed during the Mid-Autumn Festival. These no-bake mooncakes feature a soft, chewy, and slightly sweet glutinous rice-based skin filled with rich lotus seed or red bean paste. The dough is steamed to achieve its characteristic texture and chilled before molding into intricate shapes. Perfect for those who prefer a lighter alternative to baked mooncakes, this recipe offers a refreshing treat that’s both visually appealing and delicious.
Ingredients
For the Dough:
- 1/2 cup glutinous rice flour
- 1/4 cup rice flour
- 1/4 cup wheat starch or cornstarch
- 1/3 cup powdered sugar
- 3/4 cup milk
- 2 tablespoons sweetened condensed milk
- 2 tablespoons vegetable oil
For the Filling:
- 1 cup lotus seed paste or red bean paste
- Optional chopped nuts or dried fruit
For Dusting:
- Cooked glutinous rice flour (kao fen), for dusting molds and surface
Instructions
- Mix the Dough Ingredients: In a heatproof mixing bowl, whisk together the glutinous rice flour, rice flour, wheat starch, powdered sugar, milk, sweetened condensed milk, and vegetable oil until the mixture is smooth and free of lumps.
- Steam the Dough: Place the mixture in a steamer and steam over medium heat for 25 to 30 minutes. Stir once halfway through to ensure even cooking. The dough should thicken and become cooked through.
- Cool and Knead the Dough: Allow the steamed dough to cool slightly until it is warm to the touch but not hot. Then knead it until it becomes smooth and stretchy, indicating elasticity in the dough. Cover the dough and chill it in the refrigerator for 30 minutes.
- Prepare the Filling: While the dough chills, divide your chosen filling (lotus seed paste or red bean paste) into small balls, approximately 25 grams each. You may add chopped nuts or dried fruit if desired.
- Assemble Mooncakes: Divide the chilled dough into equal portions weighing about 30 grams each. Flatten each portion into a disc, place a filling ball in the center, and carefully wrap the dough around it, sealing the edges completely. Roll gently to form a smooth ball.
- Shape the Mooncakes: Lightly dust a mooncake mold and your working surface with cooked glutinous rice flour (kao fen) to prevent sticking. Press each ball into the mold and gently press down to imprint the traditional design. Carefully unmold each mooncake.
- Store and Serve: Place finished mooncakes in an airtight container and refrigerate. They will keep fresh for up to 5 days. Before serving, allow the mooncakes to come to room temperature for the best texture and flavor.
Notes
- Kao fen, or cooked glutinous rice flour, is essential for dusting the molds and surfaces to prevent the dough from sticking; do not substitute with raw flour.
- To add natural colors to the dough, incorporate powders such as matcha, cocoa, or fruit powders during the mixing stage.
- If wheat starch is not preferred, cornstarch can be used as an alternative.
- These mooncakes are traditionally served chilled but warm slightly to enjoy the best texture.
