
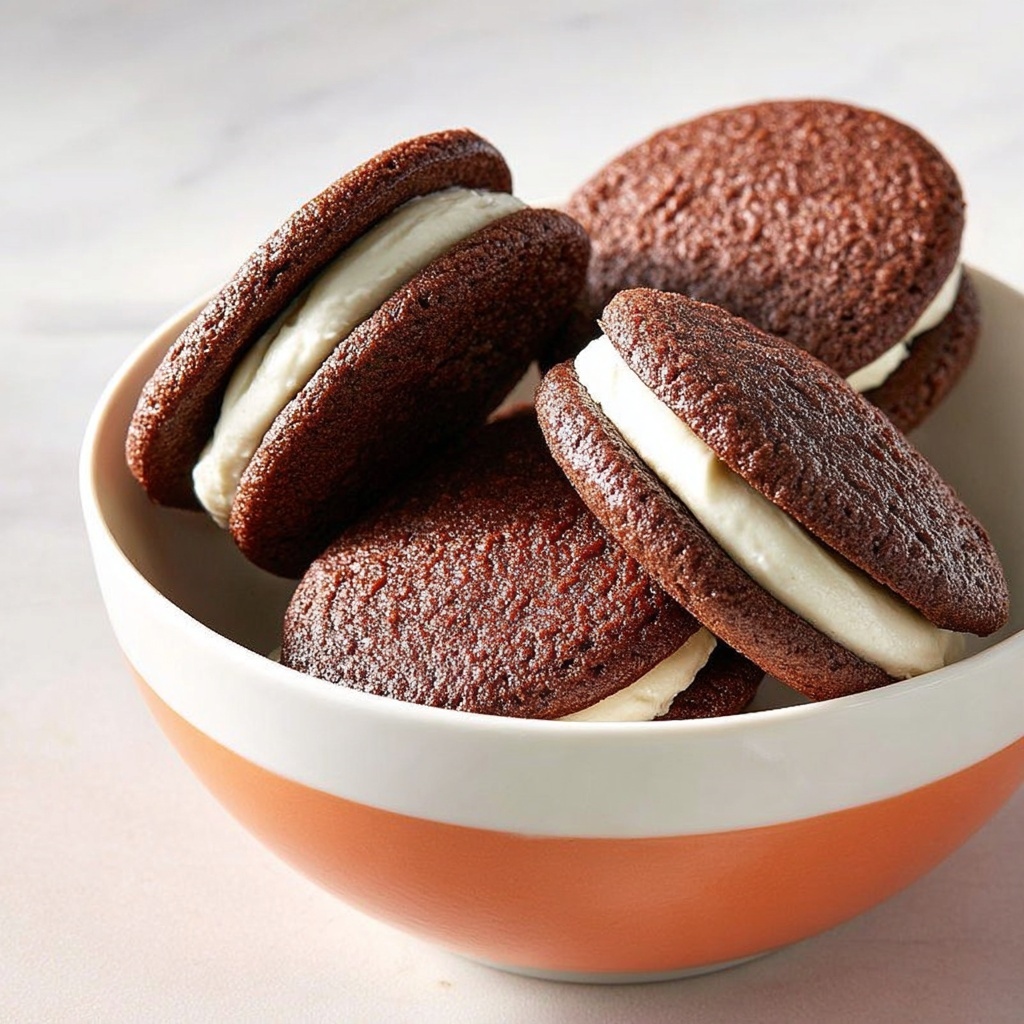
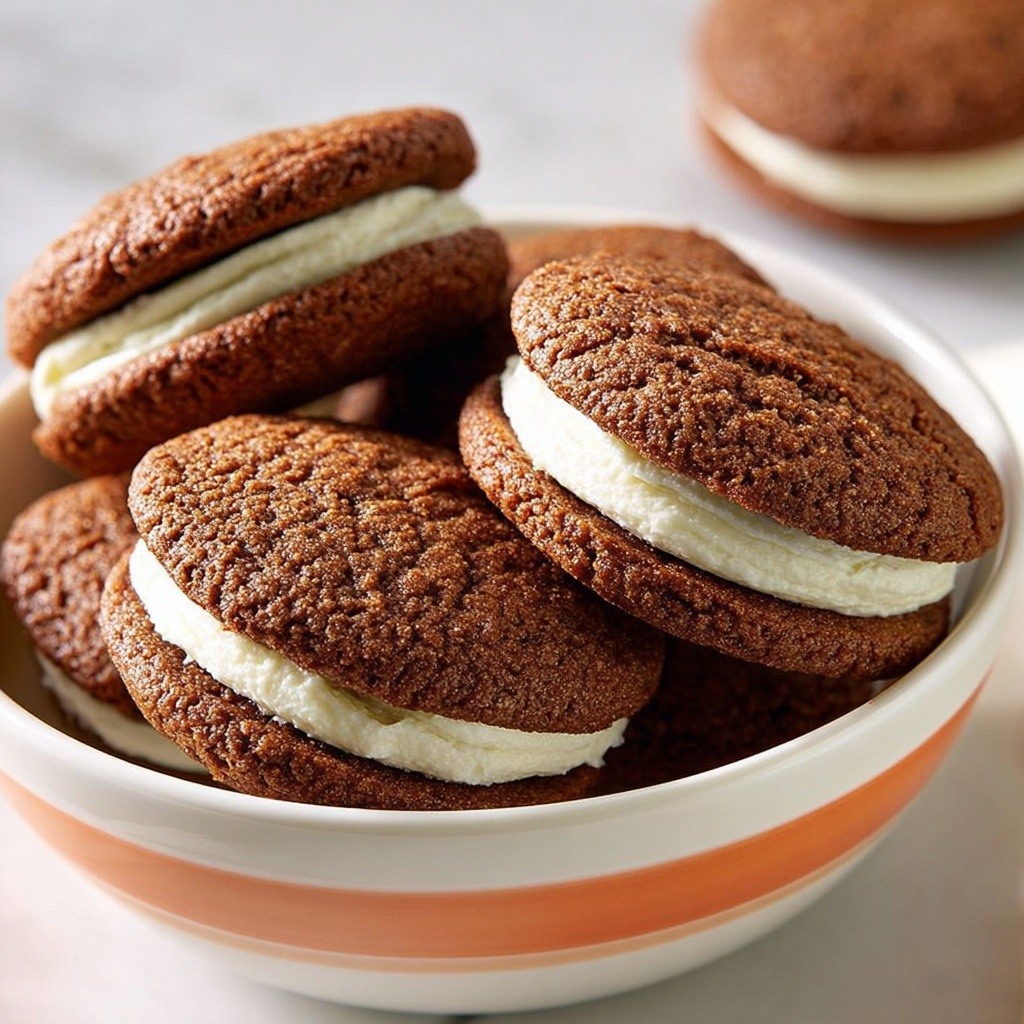
If you’ve ever dreamed of biting into a perfectly soft, chocolatey cookie with a dreamy, creamy center, then this Cream-Filled Chocolate Cookies Recipe is exactly what you need in your life. These delightful sandwich cookies bring together the rich, deep flavor of cocoa in the cookie with a buttery, sweet filling that melts in your mouth. They are incredibly easy to make but feel like special treats you’d find in a fancy bakery. Whether for a cozy afternoon snack or an impressive dessert at your next gathering, these cookies promise irresistible texture and flavor that will keep you coming back for more.
Ingredients You’ll Need
This recipe calls for simple pantry staples, each playing a crucial role in creating the texture, flavor, and look of your cream-filled cookies. From the rich cocoa powder that delivers that signature chocolate taste to the powdered sugar that makes the filling light and fluffy, every ingredient matters.
- All-purpose flour: Forms the base for the cookies, ensuring a tender yet sturdy structure.
- Unsweetened cocoa powder: Gives the cookies their intense chocolate flavor and dark color.
- Baking soda: Helps the cookies rise slightly, keeping them soft and chewy.
- Salt: Balances the sweetness and enhances the chocolate flavor.
- Unsalted butter (softened): Adds richness and moisture for tender cookies and creamy filling.
- Granulated sugar: Sweetens the cookies with a subtle crunch during baking.
- Brown sugar: Adds a slight caramel note and keeps cookies moist.
- Large egg: Binds the ingredients and helps with the cookie’s soft texture.
- Vanilla extract: Intensifies flavor and makes the cookies smell heavenly.
- Vegetable shortening: Blends with butter in the filling for a smooth, stable cream.
- Powdered sugar: Provides sweetness and gives the filling a light, fluffy texture.
How to Make Cream-Filled Chocolate Cookies Recipe
Step 1: Prepare the Cookie Dough
First things first, preheat your oven to 350°F (175°C) and line two baking sheets with parchment paper to prevent sticking. In a medium bowl, whisk together the all-purpose flour, cocoa powder, baking soda, and salt. This dry mix will give your cookies that bold chocolate punch and perfect crumb. Meanwhile, in a large mixing bowl, cream together the softened butter and both sugars until the mixture looks light and fluffy, which usually takes a few minutes. Next, beat in the egg and vanilla extract, infusing moisture and flavor. Gradually incorporate your dry ingredients into the wet, stirring just until smooth dough forms. Avoid overmixing to keep your cookies tender.
Step 2: Shape and Bake the Cookies
Using a teaspoon or a small scoop, portion out the dough and roll it into small balls. Place them evenly spaced on your prepared baking sheets. Flatten each ball slightly with your fingers or the bottom of a glass – this gentle press helps create the classic cookie look and an even bake. Pop them into the oven for 8 to 10 minutes. The cookies will be slightly soft when you take them out but will firm up as they cool, so resist the urge to bake until firm. Transfer them to a wire rack to cool completely before adding the filling.
Step 3: Mix the Cream Filling
While your cookies cool, whip up the delicious cream filling. Beat together the softened butter and vegetable shortening until smooth and creamy. Then gradually add the powdered sugar and vanilla extract, continuing to beat until the mixture is light and fluffy. This type of filling is wonderfully rich yet airy, making it the perfect complement to the dense chocolate cookies. For a festive touch, you can tint this filling with a few drops of food coloring if you like!
Step 4: Assemble the Cookies
Once your cookies have fully cooled, it’s assembly time. Take one cookie, spread or pipe about 1 tablespoon of the cream filling onto its flat side, then gently sandwich it with another cookie, pressing lightly to ensure the filling reaches the edges. Repeat this process with all remaining cookies, creating beautiful and delicious chocolate cream sandwiches that you and your friends will adore.
How to Serve Cream-Filled Chocolate Cookies Recipe
Garnishes
For an extra special presentation, consider dusting a little powdered sugar or cocoa powder on top of the sandwiches. You might also roll the edges of the cream filling in mini chocolate chips, sprinkles, or crushed nuts for a fun texture and appearance that grabs attention at any party.
Side Dishes
These cream-filled chocolate cookies pair beautifully with a glass of cold milk or a steaming cup of coffee or tea. For an indulgent twist, serve alongside a scoop of vanilla ice cream or a drizzle of caramel sauce for that extra wow factor during dessert time.
Creative Ways to Present
Try arranging your cookies on a pretty platter lined with parchment or doilies, or even creating a tiered cookie tower for celebrations. Wrapping individual cookies in clear cellophane and tying with a ribbon turns these cookies into charming homemade gifts that friends and family will treasure.
Make Ahead and Storage
Storing Leftovers
Store your cream-filled chocolate cookies in an airtight container at room temperature. They will stay soft and fresh for up to 5 days, making them perfect to prepare a few days in advance for parties or sweet cravings.
Freezing
If you want to keep these treats longer, freeze the assembled cookies by placing them in a single layer on a baking sheet first, then once frozen, transfer to an airtight container or freezer bag. They will keep well for up to 2 months. Thaw at room temperature before serving.
Reheating
These cookies are best enjoyed at room temperature, so no reheating is necessary. However, if you prefer, you can briefly warm them for just a few seconds in the microwave to soften the filling, but be careful not to melt the cream completely.
FAQs
Can I use a different type of flour for this recipe?
All-purpose flour works best for the texture of these cookies. Using whole wheat or gluten-free flour may change the softness and rise, but you can experiment if needed, just expect a slightly different texture.
Is there a way to make the filling dairy-free?
You can substitute butter with dairy-free margarine and use a plant-based shortening to keep the filling creamy and stable while making it suitable for dairy-free diets.
How do I prevent the filling from getting too sweet?
If you prefer a less sweet filling, reduce the powdered sugar by a quarter cup and add a pinch of salt to balance the sweetness. You’ll still get a delicious, creamy texture without it being overpowering.
Can I add flavors to the cookies or filling?
Absolutely! Try adding a teaspoon of espresso powder to the cookie dough for a mocha twist, or swap vanilla extract in the filling for peppermint or almond extract to customize your sandwich cookies.
How thick should the cookie dough balls be?
Teaspoon-sized dough balls work well, slightly flattened before baking. This size ensures that cookies bake evenly and aren’t too thick to sandwich comfortably with the filling.
Final Thoughts
There is something truly special about homemade Cream-Filled Chocolate Cookies Recipe that makes each bite feel like a celebration. Whether you bake them for yourself, your friends, or family, these cookies bring joy, warmth, and rich chocolate bliss with every sandwich. Give this recipe a try—you might just find your new favorite treat that everyone asks for again and again.
Print
Cream-Filled Chocolate Cookies Recipe
- Prep Time: 20 minutes
- Cook Time: 10 minutes
- Total Time: 30 minutes
- Yield: 18 sandwich cookies
- Category: Dessert
- Method: Baking
- Cuisine: American
- Diet: Vegetarian
Description
Delight in these Cream-Filled Chocolate Cookies, featuring rich cocoa-flavored cookies sandwiched with a luscious, fluffy vanilla cream filling. Perfectly soft yet slightly crisp, these homemade chocolate sandwich cookies offer a nostalgic treat reminiscent of classic favorites but with a unique homemade twist.
Ingredients
For the Cookies
- 1 cup all-purpose flour
- 1/2 cup unsweetened cocoa powder
- 1/2 teaspoon baking soda
- 1/4 teaspoon salt
- 1/2 cup unsalted butter, softened
- 1/2 cup granulated sugar
- 1/4 cup brown sugar
- 1 large egg
- 1 teaspoon vanilla extract
For the Filling
- 1/4 cup unsalted butter, softened
- 1/4 cup vegetable shortening
- 1 1/2 cups powdered sugar
- 1/2 teaspoon vanilla extract
Instructions
- Preheat Oven: Preheat your oven to 350°F (175°C) and prepare two baking sheets by lining them with parchment paper to prevent sticking.
- Mix Dry Ingredients: In a medium bowl, whisk together the all-purpose flour, unsweetened cocoa powder, baking soda, and salt until evenly combined.
- Cream Butter and Sugars: In a large mixing bowl, beat the softened unsalted butter with granulated sugar and brown sugar using a mixer until the mixture becomes light, fluffy, and pale in color.
- Add Egg and Vanilla: Incorporate the large egg and vanilla extract into the creamed butter and sugars, mixing until the batter is smooth and homogeneous.
- Combine Wet and Dry Ingredients: Gradually add the dry ingredient mixture to the wet batter, mixing gently until a smooth, cohesive cookie dough forms without overmixing.
- Shape Cookies: Scoop teaspoon-sized portions of dough and roll them into balls. Place them evenly spaced on the prepared baking sheets. Gently flatten each ball slightly with your fingers or the bottom of a glass to form cookie shapes.
- Bake: Bake in the preheated oven for 8 to 10 minutes, or until the cookies are set but still soft. Avoid overbaking to maintain a tender texture.
- Cool Cookies: Remove the cookies from the oven and transfer them to a wire rack to cool completely before filling.
- Make Filling: In a mixing bowl, beat the softened butter and vegetable shortening together until creamy and smooth. Gradually add powdered sugar and vanilla extract, beating until the mixture is light and fluffy.
- Assemble Sandwiches: Once the cookies have fully cooled, spread or pipe about 1 tablespoon of the cream filling onto the flat side of one cookie. Top it with another cookie to create a sandwich. Repeat until all cookies are filled.
Notes
- Store cookies in an airtight container at room temperature for up to 5 days to maintain freshness.
- For festive occasions, tint the cream filling with your choice of food coloring to add a seasonal or fun touch.


