If you’ve ever dreamed of baking an irresistible, crusty loaf without all the fuss, you’re in for a treat. This Best No Knead Artisan Bread Recipe is pure magic—combining simplicity, incredible flavor, and that perfect rustic crust without breaking a sweat. Just a handful of humble ingredients and a little patience will reward you with bakery-quality bread right from your home oven. Believe me, once you try this, it will fast become your go-to recipe for fresh, homemade bread that impresses every time.
Ingredients You’ll Need
The beauty of this recipe lies in its simplicity. Each ingredient plays a crucial role in building the bread’s texture, flavor, and crust without complicating your prep work. Ready to get baking? Here’s what you’ll need:
- 3 cups all-purpose flour: The backbone of the bread, providing structure and chewiness.
- 2 teaspoons coarse sea salt: Adds flavor depth and controls yeast activity for perfect rising.
- ½ teaspoon active dry yeast (or instant yeast): Just enough yeast to gently lift the dough without overpowering it.
- 1 ½ cups warm water (about 110°F): Activates the yeast and hydrates the flour, creating that elastic dough.
How to Make Best No Knead Artisan Bread Recipe
Step 1: Mix the Dry Ingredients
Start by whisking together the all-purpose flour, coarse sea salt, and yeast in a large bowl. This ensures everything is evenly combined before the water comes into play, setting a solid foundation for your dough’s rise and flavor.
Step 2: Add Warm Water and Stir
Pour the warm water over your dry mix and give it a good stir until a shaggy, sticky dough forms. Don’t worry if it looks rough—that’s exactly what you want! No kneading means the gluten will develop on its own during the long resting time.
Step 3: Let the Dough Rest
Cover the bowl with a damp cloth or plastic wrap and leave it to sit at room temperature for 12 to 18 hours, typically overnight. This slow fermentation is the secret behind that rich flavor and airy texture, so be patient as your dough bubbles and rises beautifully.
Step 4: Preheat Your Oven and Dutch Oven
Once your dough is fermented, crank your oven up to 450°F (230°C). Place a Dutch oven or heavy oven-safe pot with a lid inside to heat for 30 minutes. This step helps create that signature crust by simulating a professional steam oven environment.
Step 5: Shape the Dough
On a floured surface, gently turn out your rustic dough and shape it into a round loaf. Be careful not to overwork it—keep things gentle to protect all those lovely air bubbles that formed overnight.
Step 6: Bake in the Hot Pot
Carefully remove your scorching hot pot from the oven, place the dough inside, and cover it with the lid. This traps steam, allowing the bread to rise fully and develop a shiny crust during baking.
Step 7: Finish Baking Uncovered
Bake for 30 minutes covered, then remove the lid and bake for another 10 to 15 minutes until your loaf boasts a deeply golden, crackling crust. That final uncovered bake seals the deal on crunchy texture and beautiful color.
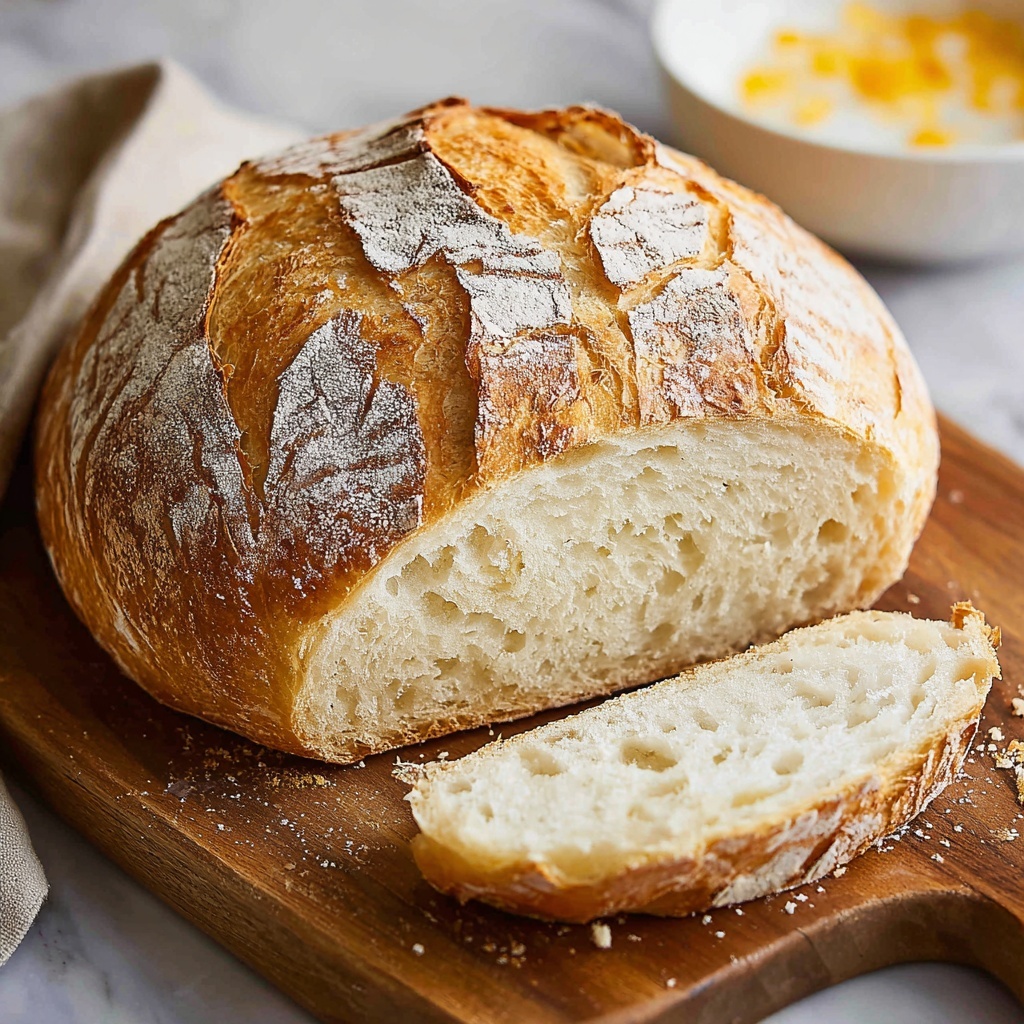
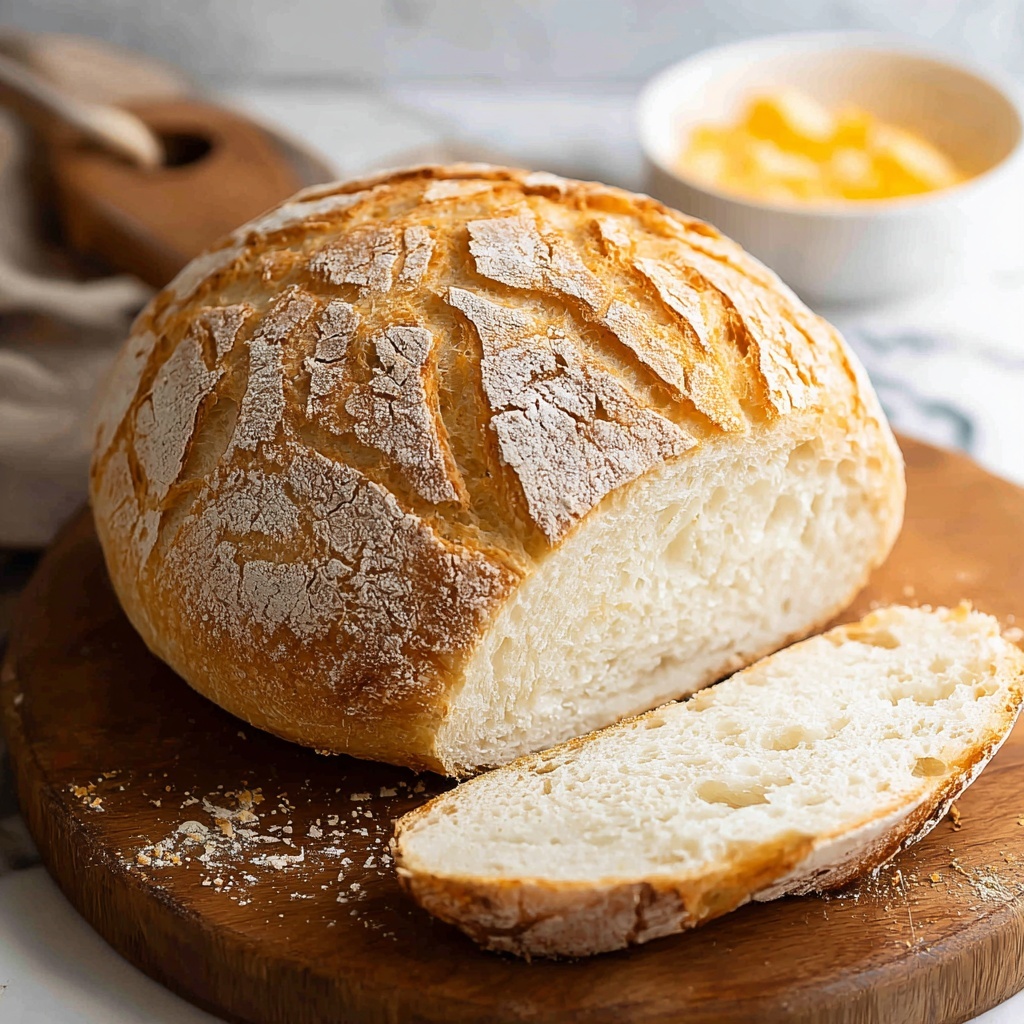
Step 8: Cool Before Slicing
Transfer your loaf to a wire rack and give it time to cool completely. This lets the interior crumb set nicely and prevents gummy bread. Once cooled, slice and enjoy your masterpiece!
How to Serve Best No Knead Artisan Bread Recipe
Garnishes
While this bread shines on its own, a simple brush of melted butter or a sprinkle of flaky sea salt on top right after baking elevates its flavor. For a sweeter spin, lightly spread with honey or jam. These small touches highlight the bread’s warm, rustic character.
Side Dishes
This artisan bread pairs wonderfully with hearty soups, creamy stews, and fresh garden salads. It’s fantastic for dipping into olive oil and balsamic vinegar as a starter or alongside cheese boards featuring sharp cheddar, brie, or even blue cheese.
Creative Ways to Present
Serve sliced rounds as an open-faced sandwich base layered with smashed avocado, smoked salmon, or roasted veggies. Or turn it into croutons by cubing, seasoning, and toasting the bread for salads and soups. The possibilities are endless with this versatile loaf.
Make Ahead and Storage
Storing Leftovers
To keep your bread fresh, wrap it in a clean kitchen towel and place it in a paper bag at room temperature. This prevents moisture buildup and keeps the crust crisp for up to two days. Avoid plastic wrap which can make the crust soft.
Freezing
If you want to enjoy your bread longer, slice it and freeze in an airtight container or zip-top bag. Frozen slices thaw quickly and can be toasted directly from the freezer, so you don’t miss out on that fresh-baked goodness anytime.
Reheating
For best results, warm leftover bread in a preheated 350°F (175°C) oven for 5 to 10 minutes. This re-crisps the crust and revives the soft crumb inside, making it taste as close to fresh-baked as possible!
FAQs
Can I use whole wheat flour instead of all-purpose flour?
Absolutely! Swapping in whole wheat flour adds a nuttier flavor and extra nutrients, but you might need to adjust the water slightly since whole wheat absorbs more moisture. Try starting with a bit less water and add more if needed.
Why does the dough need to rest for so long?
The long rest time allows the yeast to slowly ferment the dough, developing complex flavors and letting gluten form naturally. This is what gives the bread its airy crumb and distinctive taste without any kneading.
Do I have to use a Dutch oven?
While a Dutch oven yields the best crust thanks to its steam-trapping lid, you can use any oven-safe pot with a lid or create steam by placing a pan of hot water in the oven. Just be careful when handling hot vessels!
What if my dough doesn’t rise much after 18 hours?
This can happen if your kitchen is too cold or if the yeast is old. Try to keep your dough in a warm, draft-free spot. Also, check your yeast’s freshness before starting for best results.
Can I make this bread gluten-free?
This recipe relies on gluten development, so it doesn’t translate well to gluten-free flours without modifications. However, there are dedicated no knead gluten-free bread recipes designed to mimic this style.
Final Thoughts
This Best No Knead Artisan Bread Recipe demystifies homemade bread baking and makes it accessible for everyone, no matter your experience level. It’s the kind of recipe you’ll want to keep coming back to—each loaf bringing comfort, warmth, and endless delicious possibilities right to your kitchen table. So grab your ingredients, get that Dutch oven heating, and prepare to impress yourself with this fantastic, fuss-free artisan bread!
Print
Best No Knead Artisan Bread Recipe
- Prep Time: 15 minutes
- Cook Time: 45 minutes
- Total Time: 12 hours 45 minutes
- Yield: 1 loaf (about 8-10 slices)
- Category: Bread
- Method: Baking
- Cuisine: American
- Diet: Vegetarian
Description
This Best No Knead Artisan Bread Recipe offers a simple, hands-off approach to baking delicious, crusty homemade bread with minimal effort. Using basic pantry ingredients and an overnight rise, this recipe yields a rustic loaf with a chewy interior and golden-brown crust, perfect for sandwiches or enjoying with butter.
Ingredients
Ingredients
- 3 cups all-purpose flour
- 2 teaspoons coarse sea salt
- 1/2 teaspoon active dry yeast (or instant yeast)
- 1 ½ cups warm water (about 110°F)
Instructions
- Combine Dry Ingredients: In a large bowl, mix together the all-purpose flour, coarse sea salt, and active dry yeast until evenly distributed.
- Add Warm Water and Mix: Pour the warm water into the dry ingredients and stir thoroughly until a shaggy dough forms with no dry flour remaining.
- Let Dough Rise: Cover the bowl with a damp cloth or plastic wrap and leave it at room temperature for 12 to 18 hours, allowing the dough to rise and bubble slightly, developing flavor and gluten without kneading.
- Preheat Oven and Pot: About 30 minutes before baking, preheat your oven to 450°F (230°C) and place a Dutch oven or an oven-safe heavy pot with a lid inside to heat thoroughly.
- Shape the Dough: After the rise, turn the dough out onto a heavily floured surface. Gently shape it into a round loaf, handling it carefully to preserve air bubbles.
- Place Dough in Hot Pot: Remove the preheated pot from the oven with oven mitts, place the shaped dough into the pot, and cover it with the lid.
- Bake Covered: Bake the bread covered for 30 minutes; this traps steam to create a crispy crust.
- Bake Uncovered: Remove the lid and continue baking for an additional 10 to 15 minutes, until the crust turns a deep golden brown.
- Cool Before Slicing: Take the bread out of the pot and let it cool completely on a wire rack to set the crumb before slicing.
Notes
- Use warm water around 110°F to activate the yeast properly without killing it.
- The long fermentation time improves flavor and texture—do not rush this step.
- If you don’t have a Dutch oven, use any heavy, oven-safe pot with a lid to trap steam.
- Letting the bread cool before slicing prevents it from becoming gummy.
- For a crunchier crust, you can bake uncovered for a few minutes longer.


