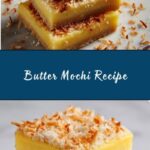
If you have a soft spot for desserts that are both chewy and buttery with a hint of sweetness, then this Butter Mochi Recipe is about to become your new best friend in the kitchen. This Hawaiian-inspired treat is unlike any cake you’ve tasted — with its unique, bouncy texture and rich flavor that comes from simple yet carefully balanced ingredients, it’s pure comfort in every bite. Whether you’re sharing it at a gathering or indulging solo, this Butter Mochi Recipe delivers a delightfully satisfying experience that’s easy to make and impossible to forget.
Ingredients You’ll Need
To nail this Butter Mochi Recipe, you only need a handful of straightforward ingredients. Each one plays a vital role, whether it’s building that signature chewy texture, infusing richness, or adding just the right touch of sweetness and warmth.
- Mochiko (sweet rice flour): The star ingredient providing that irresistible chewy texture unique to mochi desserts.
- Granulated sugar: Essential for sweetness and helping to create a tender crumb.
- Baking powder: Gives the mochi a slight lift without sacrificing chewiness.
- Salt: Balances the sweetness and enhances the other flavors.
- Eggs: Bind everything together and add richness.
- Whole milk: Moistens the batter and brings a creamy depth.
- Evaporated milk: Adds a concentrated sweetness and velvety texture.
- Vanilla extract: Infuses a warm, aromatic note that elevates the entire dish.
- Unsalted butter (melted and slightly cooled): Crucial for that buttery flavor that makes this treat so comforting and delicious.
How to Make Butter Mochi Recipe
Step 1: Prep Your Baking Pan and Oven
Start by preheating your oven to 350°F and lightly greasing a 9×13-inch baking pan. This size is perfect for creating those classic square servings, and greasing ensures your buttery mochi won’t stick as it bakes into a golden delight.
Step 2: Combine Dry Ingredients
In a large mixing bowl, whisk together your mochiko, granulated sugar, baking powder, and salt. This ensures the dry ingredients are evenly distributed, setting a smooth foundation for your batter’s consistency and flavor.
Step 3: Mix Wet Ingredients
In a separate bowl, beat the eggs lightly, then add whole milk, evaporated milk, vanilla extract, and the melted unsalted butter. Mixing these wet ingredients thoroughly brings together the richness and moisture that will make your mochi irresistibly tender.
Step 4: Combine Wet and Dry
Pour the wet mixture into the bowl with the dry ingredients and whisk until smooth and fully combined. This batter should be free of lumps and ready to transform into that classic chewy texture once baked.
Step 5: Bake to Golden Perfection
Pour the batter into your prepared pan, smoothing the top with a spatula. Bake for about 1 hour until the surface is golden brown and a toothpick inserted near the center comes out clean. Let it cool completely in the pan — patience here rewards you with perfect slices.
How to Serve Butter Mochi Recipe
Garnishes
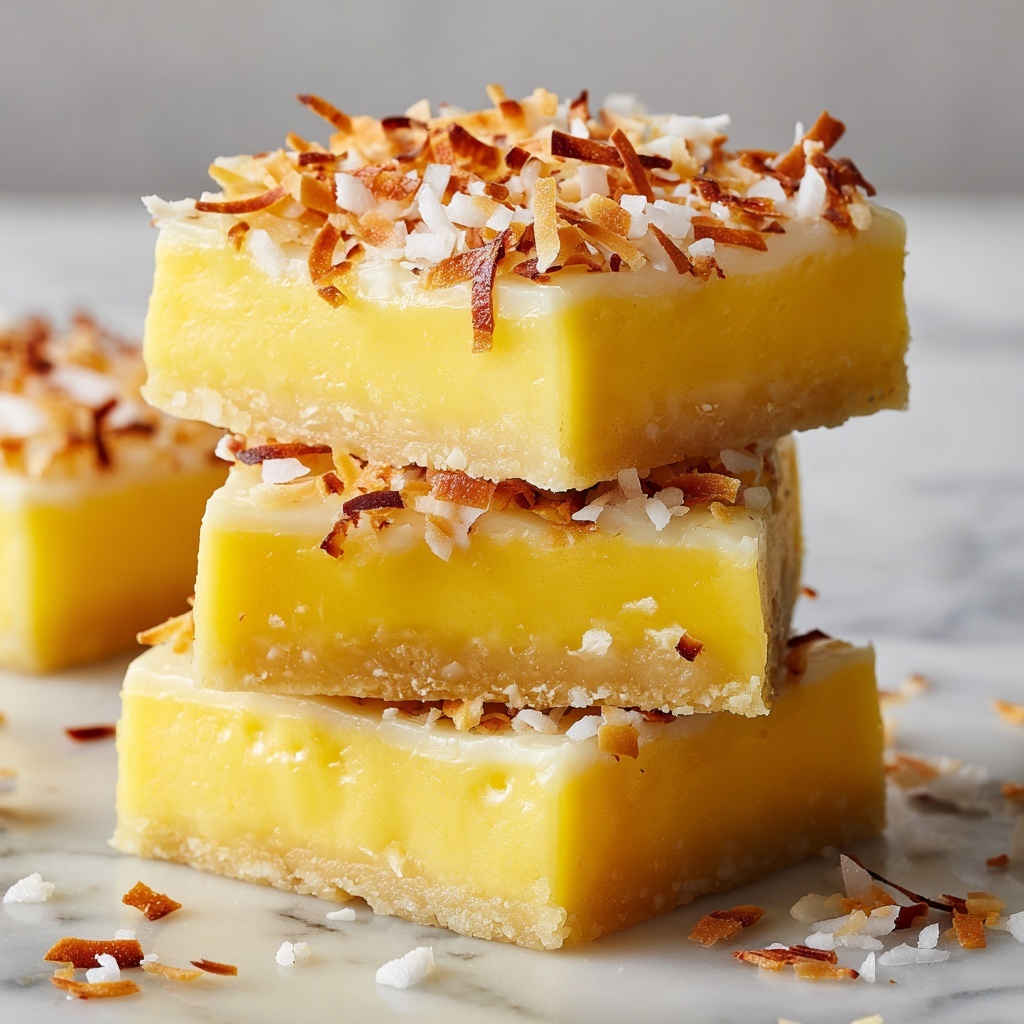
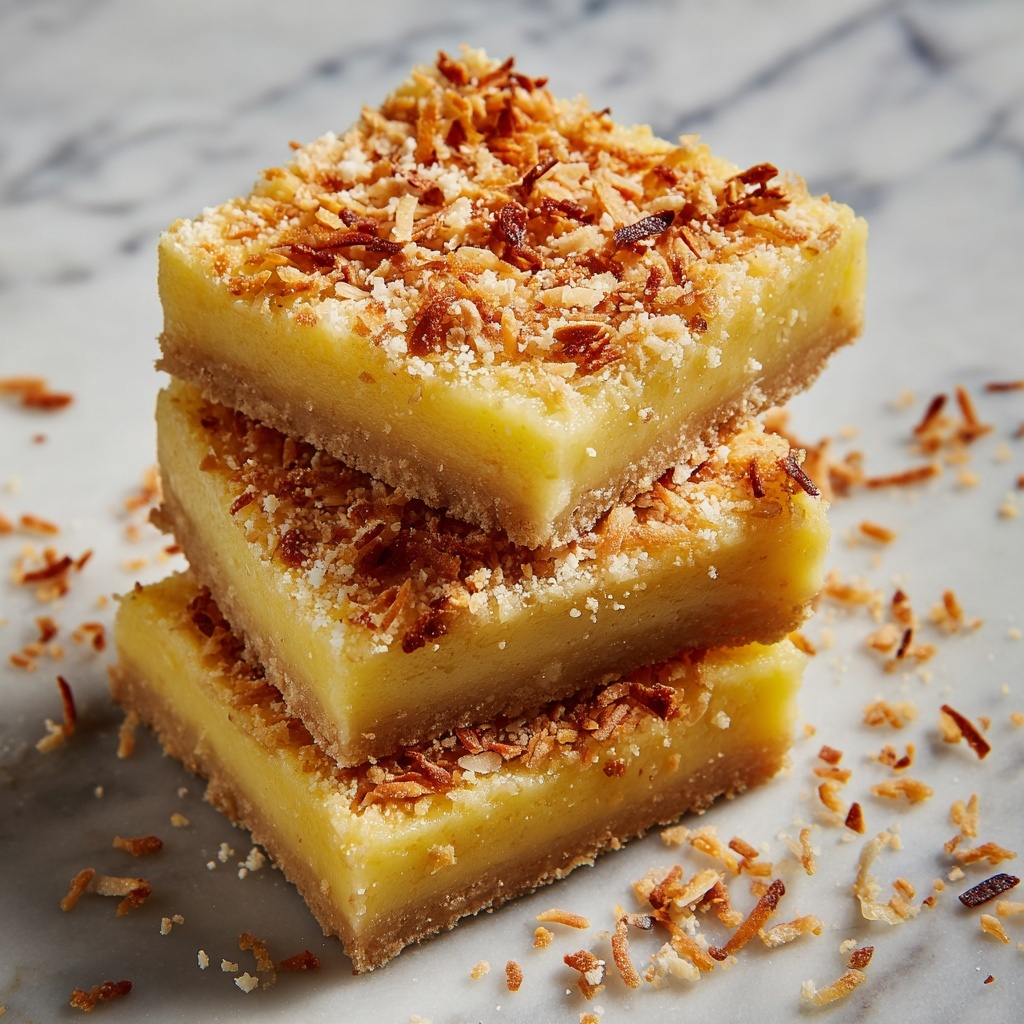
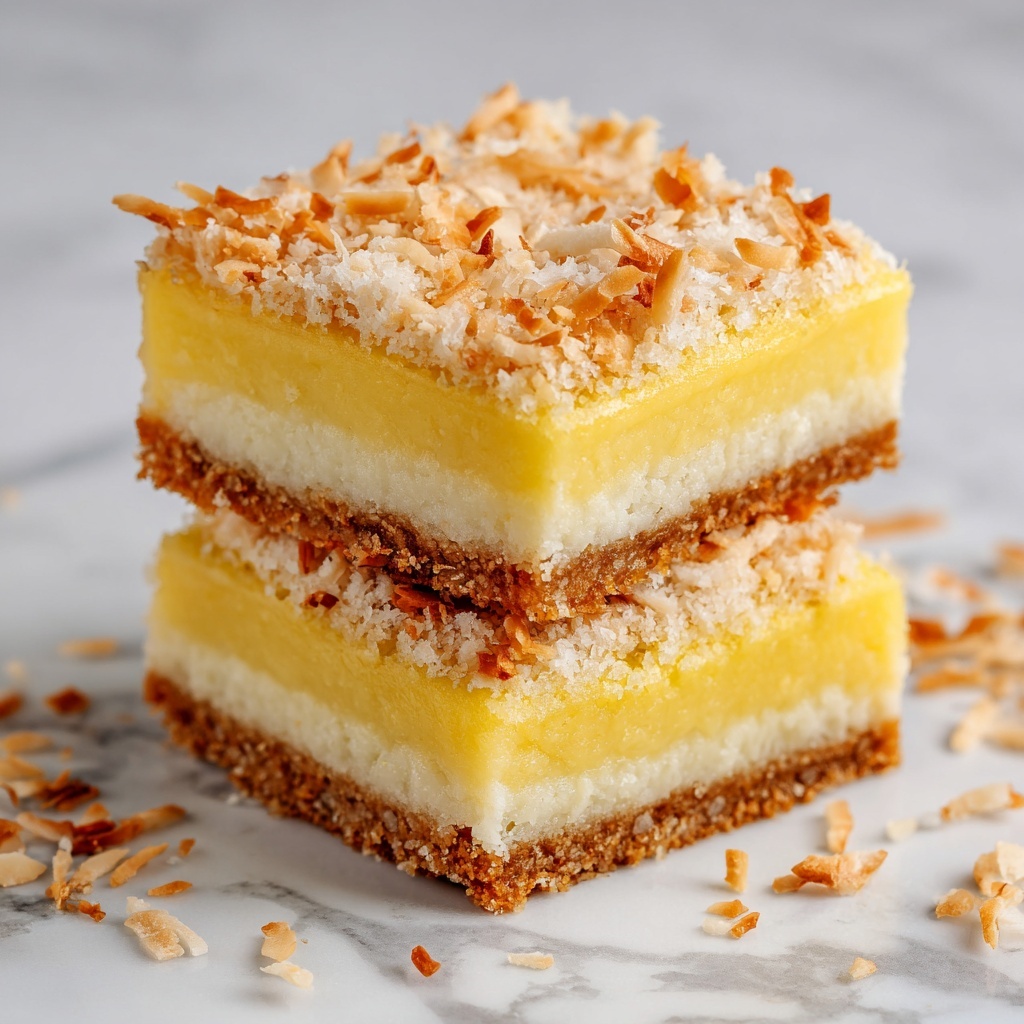
Butter mochi shines on its own, but you can easily dress it up with a light dusting of powdered sugar or a sprinkle of toasted coconut flakes. These add a subtle crunch and a lovely visual touch that complements the dessert’s flavor without overpowering its buttery charm.
Side Dishes
Serving butter mochi alongside a scoop of vanilla ice cream creates a fantastic contrast of cold and chewy textures. For a tropical vibe, fresh fruit like mango or pineapple works wonderfully to brighten each bite.
Creative Ways to Present
Try cutting the mochi into small, bite-sized squares and arranging them on a decorative platter for parties. You can also experiment by adding a spread of whipped cream or drizzling sweetened condensed milk on top to remind you why this Butter Mochi Recipe is a crowd-pleaser every time.
Make Ahead and Storage
Storing Leftovers
If you find yourself lucky enough to have leftovers, store them in an airtight container at room temperature. They stay perfectly chewy and fresh for up to 3 days, making it easy to enjoy Butter Mochi Recipe treats at your leisure.
Freezing
You can freeze butter mochi slices by wrapping them tightly in plastic wrap and placing them in a freezer-safe bag. When ready to enjoy, thaw at room temperature. The texture holds up well, so it’s a wonderful option for making this dessert ahead of time.
Reheating
To bring back that freshly baked warmth, reheat mochi squares in the microwave for about 15 seconds or until just warmed through. Avoid overheating, as it can toughen the chewy texture that makes this treat so special.
FAQs
What makes butter mochi different from regular mochi?
Butter mochi is baked like a cake using mochiko flour and includes butter, milk, and eggs, giving it a chewy yet cakey texture. Regular mochi is a steamed or pounded rice cake, often denser and stickier without the rich, buttery flavor.
Can I substitute ingredients in this Butter Mochi Recipe?
Yes! For example, you can swap one cup of whole milk for canned coconut milk to add a tropical flavor twist. However, be careful with flour substitutions because mochiko flour is key to achieving the signature chewiness.
Is Butter Mochi Recipe gluten-free?
Absolutely. Since this recipe uses mochiko (sweet rice flour), which contains no gluten, it’s a great gluten-free dessert option. Always ensure other ingredients you use are also gluten-free for safe preparation.
How chewy is butter mochi supposed to be?
Butter mochi should have a pleasantly bouncy, chewy texture that is firm yet tender on the inside. It’s quite different from spongy cakes or dense puddings, giving it a unique mouthfeel that’s both satisfying and fun to eat.
Can I make this Butter Mochi Recipe vegan?
Making a vegan version would require substituting eggs, milk, evaporated milk, and butter with plant-based alternatives. While doable, the texture and flavor may differ from the traditional recipe that relies on these classic rich ingredients.
Final Thoughts
I can’t recommend this Butter Mochi Recipe enough for anyone who loves a dessert that’s both nostalgic and deliciously unique. It’s a simple recipe with a wonderful payoff that brings a little taste of Hawaiian comfort right into your home kitchen. Trust me, once you try it, you’ll be hooked on its buttery, chewy charm just like I am. Give it a go and share the joy with those you love!
Print
Butter Mochi Recipe
- Prep Time: 15 minutes
- Cook Time: 1 hour
- Total Time: 1 hour 15 minutes
- Yield: 16 squares
- Category: Dessert
- Method: Baking
- Cuisine: Hawaiian
- Diet: Gluten Free
Description
Butter Mochi is a beloved Hawaiian dessert known for its chewy, bouncy texture and sweet, buttery flavor. Made primarily from mochiko (sweet rice flour), this dessert combines eggs, milk, and melted butter to create a rich and satisfying treat that bakes into a golden, tender cake. Perfect for slicing into squares and enjoying at room temperature, butter mochi is a delightful way to experience a traditional Hawaiian favorite with a simple baking method.
Ingredients
Dry Ingredients
- 1 (16 oz) box mochiko (sweet rice flour)
- 2 cups granulated sugar
- 2 teaspoons baking powder
- ½ teaspoon salt
Wet Ingredients
- 4 large eggs
- 2 cups whole milk
- 1 (12 oz) can evaporated milk
- 1 teaspoon vanilla extract
- ½ cup unsalted butter (melted and slightly cooled)
Instructions
- Preheat the oven: Preheat your oven to 350°F and lightly grease a 9×13-inch baking pan to ensure the mochi does not stick during baking.
- Mix dry ingredients: In a large mixing bowl, whisk together mochiko, sugar, baking powder, and salt until well combined for an even distribution of leavening and flavor.
- Combine wet ingredients: In another bowl, beat the eggs thoroughly, then add whole milk, evaporated milk, vanilla extract, and melted butter. Mix these ingredients well to create a smooth wet base.
- Mix wet and dry ingredients: Pour the wet mixture into the dry ingredients bowl and whisk until the batter is smooth and fully combined without any lumps.
- Pour into pan and bake: Transfer the batter into the prepared baking pan and smooth the top evenly. Place in the oven and bake for 1 hour, or until the top is golden brown and a toothpick inserted in the center comes out clean.
- Cool and serve: Remove from the oven and let the butter mochi cool completely in the pan before slicing into 16 squares to serve. Enjoy at room temperature for the best texture.
Notes
- Butter mochi has a chewy, bouncy texture that is best enjoyed at room temperature.
- Store leftovers in an airtight container at room temperature for up to 3 days to maintain freshness.
- For a coconut twist, substitute 1 cup of whole milk with 1 cup of canned coconut milk to add tropical flavor.

