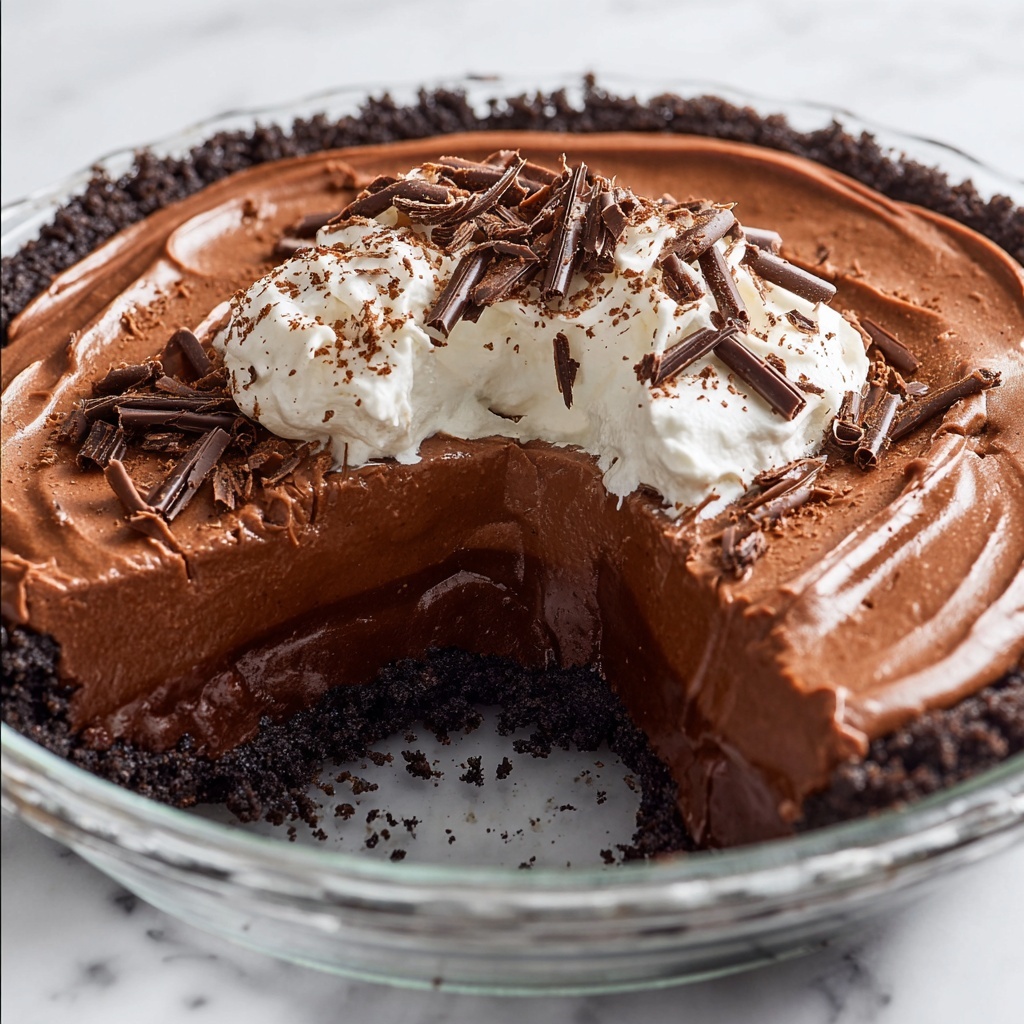
If you’re craving a decadent dessert that comes together easily and tastes like a dream, you’re going to adore this No Bake Chocolate Pudding Pie Recipe. Imagine a silky, luscious chocolate pudding nestled inside a perfectly crisp chocolate cookie crust, all without turning on your oven. It’s a rich, comforting treat that’s incredibly simple to whip up and bound to impress anyone lucky enough to get a slice. Whether you want an elegant finish to dinner or a quick sweet fix, this pie fits the bill with its smooth texture and deeply satisfying chocolate flavor.
Ingredients You’ll Need
This recipe proves that sometimes the simplest ingredients create the most irresistible desserts. Each component plays a special role, from the crunch of the cookie crust to the creamy chocolate filling, making every bite a perfect balance of texture and taste.
- Chocolate sandwich cookies (2 cups, crushed): The base for your crust, delivering crispness and rich cocoa flavor that sets the stage beautifully.
- Melted butter (6 tablespoons): Acts as the glue to hold the cookie crumbs together for a firm, sliceable crust.
- Almond milk (2 ½ cups): Or regular milk, provides the creamy liquid foundation for the pudding without overpowering its chocolate essence.
- Granulated sugar (½ cup): Sweetens the pudding just right without masking the cocoa’s depth.
- Unsweetened cocoa powder (⅓ cup): Packs that rich, true chocolate punch to the filling’s flavor.
- Cornstarch (¼ cup): The secret thickener that transforms the mixture into a luscious, pudding-perfect consistency.
- Salt (¼ teaspoon): Enhances all the chocolate notes and balances the sweetness.
- Vanilla extract (½ teaspoon): Adds warmth and depth to the chocolate pudding.
- Chocolate chips (1 cup, optional): For an extra chocolate boost and silky smoothness when melted into the pudding.
- Whipped cream: Either regular or non-dairy, to top the pie with fluffy elegance.
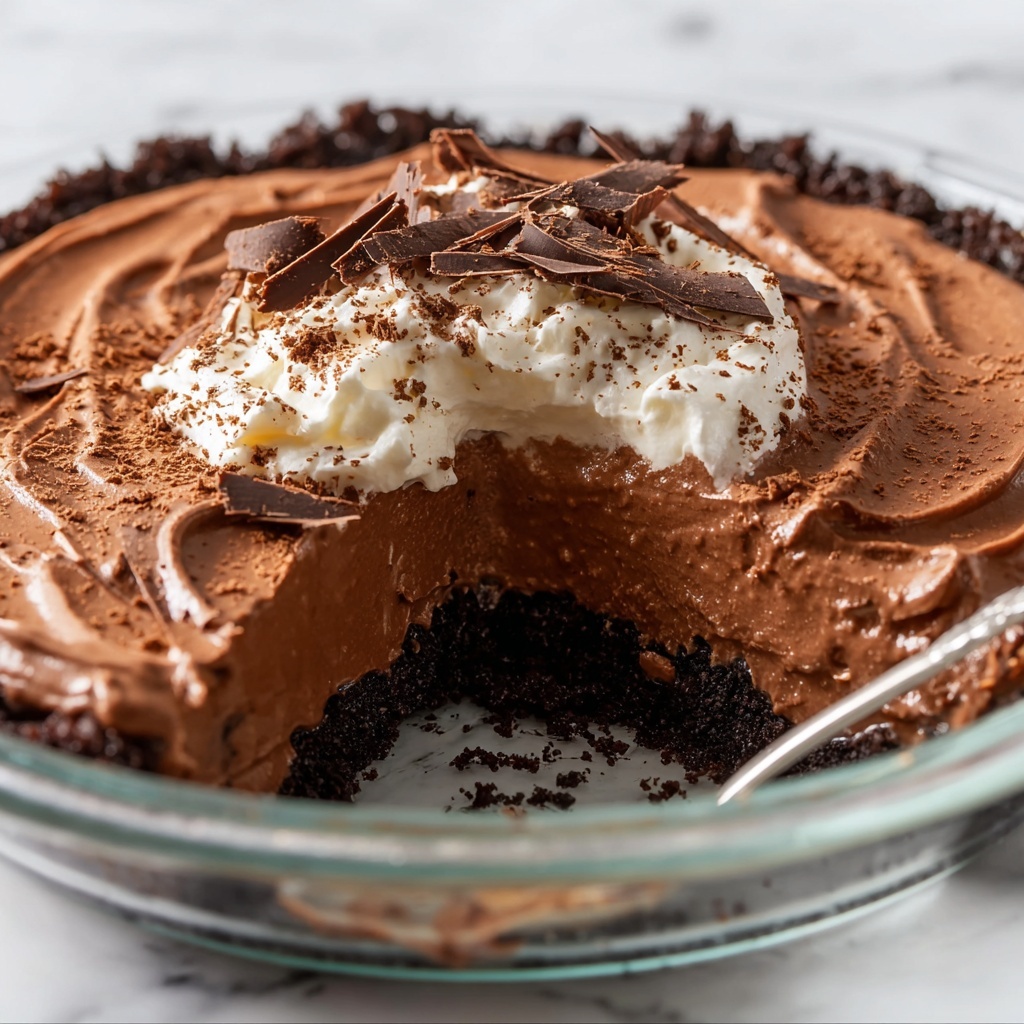
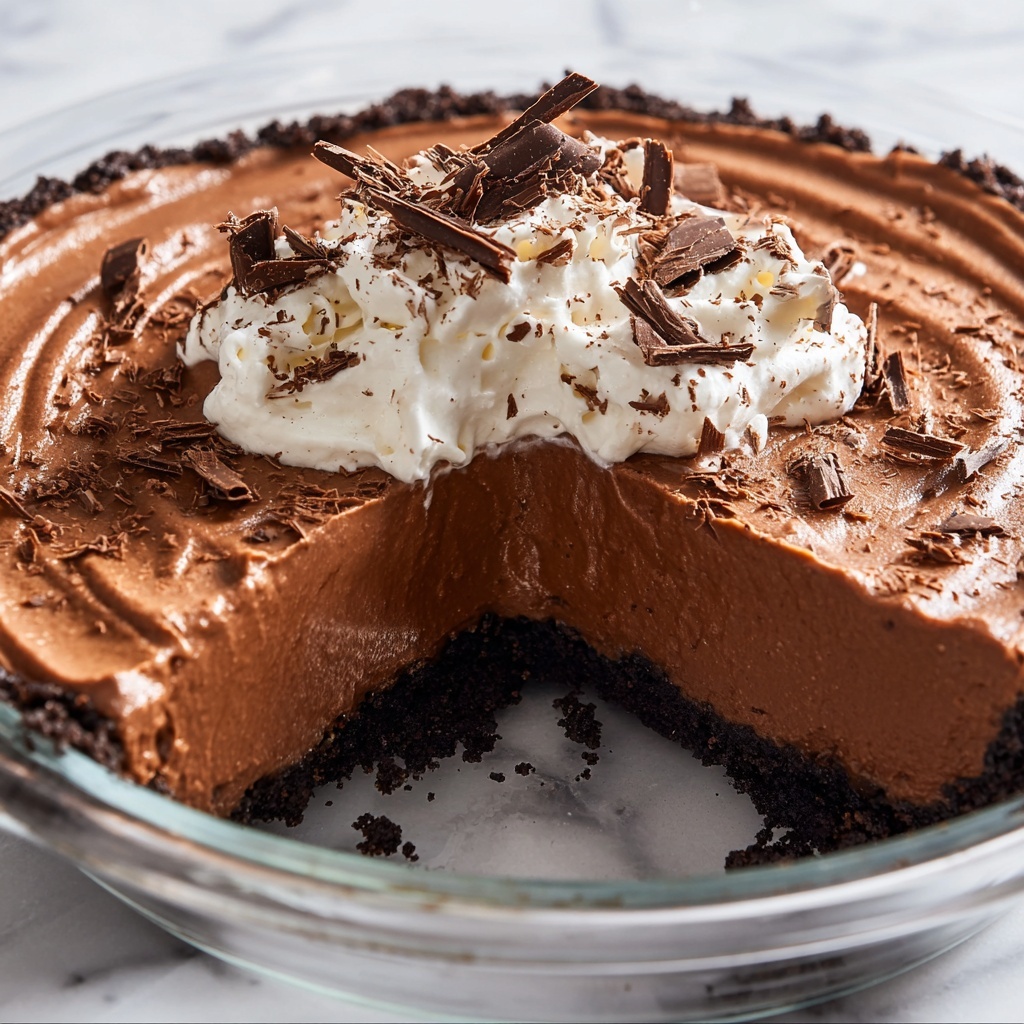
- Shaved chocolate or chocolate curls: For a gorgeous, professional-looking garnish that adds texture and visual appeal.
How to Make No Bake Chocolate Pudding Pie Recipe
Step 1: Prepare the Chocolate Cookie Crust
Start by mixing the crushed chocolate sandwich cookies with the melted butter. This creates a crumbly, flavorful base that holds everything together perfectly. Press the mixture firmly into a 9-inch pie pan, making sure it evenly covers the bottom and sides. This step is crucial for that satisfying snap when you slice into the pie. Pop it into the fridge while you work on the filling to let it set up nicely.
Step 2: Whisk Together Dry Ingredients for the Pudding
In a medium saucepan, combine the sugar, cocoa powder, cornstarch, and salt. Whisking these together first ensures the cocoa and cornstarch are evenly distributed, preventing lumps later. This little prep step sets you up for a smooth, creamy pudding that’s rich and glossy.
Step 3: Incorporate the Almond Milk and Cook
Gradually pour in the almond milk while stirring constantly to dissolve all those dry ingredients into a uniform mixture. Place the saucepan over medium heat and keep stirring—it takes about 8 to 10 minutes for the pudding to thicken and become bubbly. Patience here pays off with that perfect velvety texture.
Step 4: Add Vanilla and Optional Chocolate Chips
Once off the heat, stir in the vanilla extract to introduce that lovely aromatic note. If you’re opting for extra chocolate richness, fold in the chocolate chips now; they’ll melt beautifully into the warm pudding.
Step 5: Assemble and Chill the Pie
Pour the warm pudding into your chilled cookie crust, smoothing out the surface with a spatula. To keep a flawless pudding top, press plastic wrap directly onto the pudding before chilling. Refrigerate for at least 4 hours until the pie is fully set and ready to slice into thick, indulgent pieces.
How to Serve No Bake Chocolate Pudding Pie Recipe
Garnishes
Topping your pie with clouds of whipped cream instantly elevates it, adding a light and airy contrast to the dense pudding. A sprinkle of shaved chocolate or delicate chocolate curls not only makes each slice look inviting but contributes an extra bit of chocolate crunch that’s simply irresistible.
Side Dishes
This pie pairs wonderfully with fresh berries like raspberries or strawberries, whose natural tartness cuts through the richness. A scoop of vanilla or coffee ice cream on the side also creates a dreamy, dessert duo that guests will rave about.
Creative Ways to Present
Try serving individual portions in clear glass dessert bowls layered with cookie crumbs and pudding for a sophisticated twist. You can also drizzle warm caramel or raspberry sauce over slices to mix up the flavor profile and impress friends with your creativity.
Make Ahead and Storage
Storing Leftovers
Your leftover pie is just as delightful the next day—cover it tightly with plastic wrap and keep it refrigerated. It’ll hold up well for 3 to 4 days, letting the flavors meld even more over time.
Freezing
If you want to keep it longer or get ahead of your dessert game, this pie freezes beautifully. Wrap it securely and freeze for up to 2 months. When ready, thaw overnight in the fridge to preserve that creamy texture.
Reheating
This pie is best enjoyed cold or at room temperature, so reheating isn’t recommended as it can affect the pudding’s silky consistency. Just let a frozen slice thaw completely before serving.
FAQs
Can I use regular milk instead of almond milk?
Absolutely! Regular dairy milk works just as well and will give a creamy texture to your pudding. Almond milk is just a great dairy-free alternative that keeps things lighter.
Is this pie suitable for vegans?
Yes, with a few simple swaps. Use dairy-free cookies, a plant-based butter substitute, non-dairy milk, and whipped cream alternatives. Just be mindful of the chocolate chips, as some contain dairy—opt for vegan-friendly chocolate chips.
Why do I need to press the plastic wrap directly onto the pudding?
This little trick prevents a dry skin from forming on the pudding’s surface as it chills. It keeps the texture smooth and creamy when you’re ready to enjoy your pie.
Can I make this pie ahead of time for a party?
Definitely! This pie is an excellent make-ahead dessert because it needs to chill for several hours. You can prepare it a day in advance, which takes the stress out of serving guests.
Can I use a different type of cookie for the crust?
Chocolate sandwich cookies are ideal for rich flavor and texture, but feel free to experiment with other cookies like chocolate graham crackers or even peanut butter cookies for a unique twist.
Final Thoughts
You’re going to fall head over heels for this easy No Bake Chocolate Pudding Pie Recipe. It’s an effortless way to indulge your chocolate cravings and impress friends and family without any oven time. Once you make it, it’s sure to become one of your go-to desserts for any occasion—sweet, silky, and supremely satisfying. Give it a try, and prepare for a lot of compliments!
Print
No Bake Chocolate Pudding Pie Recipe
- Prep Time: 10 minutes
- Cook Time: 10 minutes
- Total Time: 4 hours 20 minutes
- Yield: 8 servings
- Category: Dessert
- Method: Stovetop
- Cuisine: American
- Diet: Vegetarian
Description
This No Bake Chocolate Pudding Pie combines a rich chocolate cookie crust with a creamy, homemade chocolate pudding filling. Easy to prepare in under 30 minutes, it’s chilled to perfection and topped with whipped cream and chocolate curls, making it a decadent yet simple dessert for any occasion.
Ingredients
Crust
- 2 cups chocolate sandwich cookies (crushed into crumbs)
- 6 tablespoons melted butter
Filling
- 2 ½ cups almond milk (or regular milk)
- ½ cup granulated sugar
- ⅓ cup unsweetened cocoa powder
- ¼ cup cornstarch
- ¼ teaspoon salt
- ½ teaspoon vanilla extract
- 1 cup dairy-free or regular chocolate chips (optional)
Toppings
- Whipped cream (regular or non-dairy)
- Shaved chocolate or chocolate curls
Instructions
- Prepare the crust: Combine the crushed chocolate cookies and melted butter in a mixing bowl until evenly mixed.
- Press into pie pan: Press the mixture firmly into the bottom and sides of a 9-inch pie pan using a flat-bottomed glass or spoon to create an even crust.
- Chill crust: Place the crust in the refrigerator for 20 minutes to set while preparing the filling.
- Mix dry ingredients for filling: In a medium saucepan, whisk together granulated sugar, unsweetened cocoa powder, cornstarch, and salt until well combined.
- Add milk: Gradually pour in almond milk (or regular milk), stirring constantly to dissolve all dry ingredients smoothly.
- Cook pudding: Heat the mixture over medium heat, stirring continuously until it thickens and comes to a gentle boil, approximately 8 to 10 minutes.
- Finish filling: Remove the saucepan from heat; stir in vanilla extract. If using, add chocolate chips and stir until completely melted and incorporated.
- Assemble pie: Pour the warm pudding mixture into the chilled crust and smooth the top evenly with a spatula.
- Prevent skin formation: Cover the pie surface with plastic wrap, pressing it directly onto the pudding to prevent a skin from forming.
- Chill pie: Refrigerate for at least 4 hours or until the pudding is fully set and firm.
- Serve: Before serving, top with whipped cream and garnish with shaved chocolate or chocolate curls. Slice and enjoy your delicious pie!
Notes
- You can substitute almond milk with any other plant-based or regular milk based on dietary preferences.
- Ensure constant stirring while cooking pudding to avoid lumps and prevent burning.
- Pressing plastic wrap directly onto the pudding keeps the surface smooth and prevents formation of a skin.
- For a richer crust, feel free to add a tablespoon of sugar or a pinch of cinnamon to the cookie crumbs before pressing.
- If not using chocolate chips, the pudding will still be deliciously chocolatey and smooth.
- Store leftovers covered in the refrigerator for up to 3 days.

