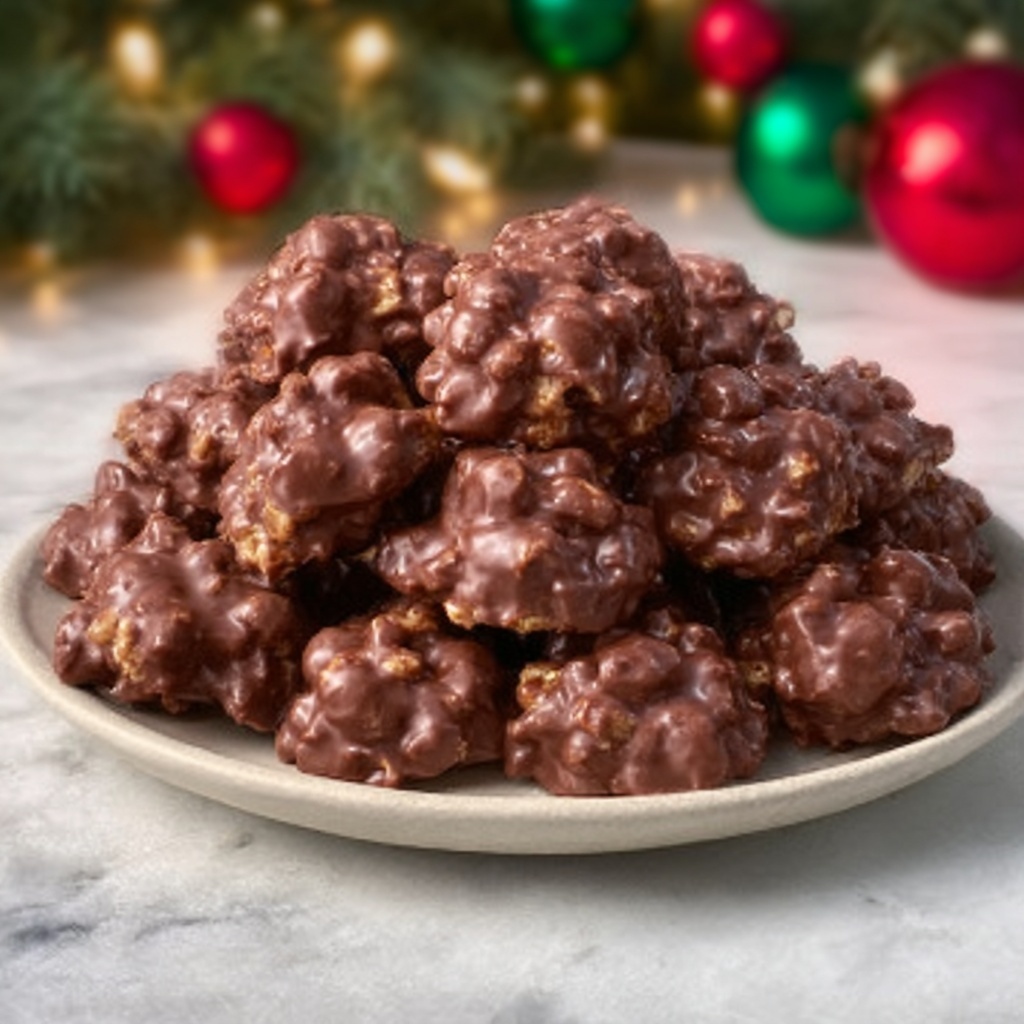
If you have a sweet tooth and crave something irresistibly crunchy and chocolaty, then this Chocolate Rice Krispie Balls Recipe is about to become your new favorite treat. Imagine the perfect bite-sized morsels combining the toasty snap of Rice Krispies with the creamy richness of peanut butter, all enveloped in a luscious layer of smooth, semi-sweet chocolate. These no-bake delights are wonderfully easy to whip up, making them an excellent go-to for when you want a quick but satisfyingly decadent dessert or snack. Whether you’re packing them for a picnic, serving them at a party, or just treating yourself, these Chocolate Rice Krispie Balls are pure joy in every bite.
Ingredients You’ll Need
Gathering simple yet essential ingredients is the first step to making this Chocolate Rice Krispie Balls Recipe shine. Each component plays a starring role: from the crispy Rice Krispies that offer light crunch to the creamy peanut butter that provides richness and structure, plus the chocolate that delivers that perfect, glossy finish. Let’s break down what you’ll need.
- Rice Krispies cereal: 3 cups of this classic cereal give the balls their signature crunch and airy texture.
- Creamy peanut butter: 1 cup to add smoothness and a wonderful nutty flavor that balances the sweetness.
- Powdered sugar: ½ cup to sweeten the mixture subtly and help with binding.
- Unsalted butter: ¼ cup, softened for creaminess and to enrich the flavor without overpowering.
- Vanilla extract: 1 teaspoon to lift and deepen the overall flavor profile.
- Semi-sweet chocolate chips: 1½ cups for melting and coating the balls with that irresistible chocolate shell.
- Coconut oil or shortening (optional): 1 tablespoon to ensure your chocolate coating is silky smooth and shiny.
How to Make Chocolate Rice Krispie Balls Recipe
Step 1: Mix the Base Ingredients
In a large mixing bowl, combine the creamy peanut butter, softened butter, powdered sugar, and vanilla extract. Stir them together gently until the mixture is smooth and creamy. This base not only sweetens but adds a luscious texture that holds everything together without dryness.
Step 2: Fold in the Rice Krispies
Next, carefully fold the Rice Krispies cereal into the peanut butter mixture. The goal is to coat each crispy piece evenly without crushing them, so use a gentle hand. You’ll want to make sure the crispness remains front and center to deliver that delightful snap in every bite.
Step 3: Shape into Balls and Chill
Using a heaping tablespoon or a small scooper, portion out the mixture and roll it into balls with your hands. Place each ball on a baking sheet lined with parchment paper, giving enough space so they don’t stick as they firm up. Pop the tray into the freezer for 15 to 20 minutes until the balls are firm and easy to handle for dipping.
Step 4: Melt the Chocolate Coating
While your balls chill, place the chocolate chips in a microwave-safe bowl. Add the optional coconut oil or shortening to help the chocolate melt smoother if you like a glossy finish. Heat in 30-second bursts, stirring thoroughly between each, until the chocolate becomes perfectly melted and velvety.
Step 5: Dip and Set
Grab each chilled Rice Krispie ball with a fork, skewer, or dipping tool, and dunk it into the melted chocolate. Gently tap off any excess chocolate and return the ball to the parchment-lined sheet. The chocolate coating will harden as it cools at room temperature, or you can speed up the process by refrigerating them for a few minutes.
How to Serve Chocolate Rice Krispie Balls Recipe
Garnishes
Adding garnishes is a fun way to personalize your Chocolate Rice Krispie Balls. Consider rolling the wet chocolate-coated balls in sprinkles, crushed nuts, or even mini chocolate chips for texture contrast and visual appeal. Drizzling a bit of white chocolate on top before the coating sets adds a lovely decorative touch that’s sure to impress.
Side Dishes
These treats are so rich and flavorful that they pair beautifully with light accompaniments. Fresh berries or a simple fruit salad offer a refreshing contrast that balances the sweetness. Alternatively, a scoop of vanilla or cinnamon ice cream alongside makes an indulgent dessert plate everyone will love.
Creative Ways to Present
For a party or gift, arrange your Chocolate Rice Krispie Balls Recipe on a decorative platter with colorful cupcake liners. You can even stack them in small glass jars layered with parchment paper, tied with a festive ribbon for a charming handmade gift. Turning these little balls into bite-sized pops on sticks dipped in chocolate adds extra fun and excitement.
Make Ahead and Storage
Storing Leftovers
Once your chocolate coating has set, store any leftover chocolate Rice Krispie balls in an airtight container in the refrigerator. They’ll keep fresh and delicious for up to one week, making them perfect for prepping in advance for gatherings or last-minute snack cravings.
Freezing
You can freeze these treats by placing them in a single layer on a baking sheet until firm, then transferring them to an airtight container or freezer bag. Frozen Chocolate Rice Krispie Balls can last up to 2 months and make a convenient sweet fix to thaw briefly before serving when you want them.
Reheating
Since these balls are best enjoyed cool, there’s no need to reheat them. However, if you prefer the chocolate slightly softened, let them sit at room temperature for 10-15 minutes or microwave very briefly at low power to avoid melting the crunchy center.
FAQs
Can I use crunchy peanut butter instead of creamy?
Absolutely! Using crunchy peanut butter will add an extra layer of texture to your Chocolate Rice Krispie Balls Recipe, giving small nutty bits inside. Just keep in mind it might be a little harder to mix evenly.
Is it possible to make this recipe nut-free?
Yes! You can substitute the peanut butter for a seed butter like sunflower seed butter or soy nut butter. This keeps the creamy binding element while making the recipe safe for those with nut allergies.
Can I use milk or white chocolate instead of semi-sweet?
Definitely, although semi-sweet chocolate provides the best balance of sweetness and richness to complement the peanut butter. Milk or white chocolate will make the balls sweeter and have a different flavor profile, which can be delicious if you prefer sweeter coatings.
Do I need to add the coconut oil or shortening?
This step is optional but recommended. Adding coconut oil or shortening to the melting chocolate helps create a smoother, shinier coating that hardens nicely without cracking.
Are these Chocolate Rice Krispie Balls gluten-free?
They can be! Just be sure to use a certified gluten-free Rice Krispies cereal, as some brands do contain malt flavoring which has gluten. Double-checking your ingredients guarantees a safe treat for gluten-sensitive folks.
Final Thoughts
There is something so comforting and nostalgic about the perfect Chocolate Rice Krispie Balls Recipe. They are incredibly easy to make, wonderfully versatile, and a true crowd-pleaser every single time. Whether you’re a seasoned baker or a kitchen novice, these little chocolate-coated bites will quickly become a beloved standby in your dessert rotation. So go ahead, grab those ingredients, and make some magic happen in your kitchen today!
Print
Chocolate Rice Krispie Balls Recipe
- Prep Time: 20 minutes
- Cook Time: 0 minutes
- Total Time: 40 minutes (including chilling and setting time)
- Yield: 20 balls
- Category: Dessert
- Method: No-Cook
- Cuisine: American
- Diet: Gluten Free
Description
Delicious and easy-to-make Chocolate Rice Krispie Balls combine crunchy Rice Krispies with creamy peanut butter, powdered sugar, and a smooth chocolate coating for a perfect no-bake dessert or snack. These bite-sized treats are ideal for parties, lunchboxes, or a quick sweet fix, blending peanut butter’s richness with the delightful crunch and sweetness of chocolate.
Ingredients
Base Mixture
- 3 cups Rice Krispies cereal
- 1 cup creamy peanut butter
- ½ cup powdered sugar
- ¼ cup unsalted butter, softened
- 1 tsp vanilla extract
Chocolate Coating
- 1½ cups semi-sweet chocolate chips
- 1 tbsp coconut oil or shortening (optional, for smoother chocolate coating)
Instructions
- Prepare the Base Mixture: In a large mixing bowl, combine the creamy peanut butter, softened unsalted butter, powdered sugar, and vanilla extract. Stir thoroughly until the mixture is smooth and well integrated. Then, gently fold in the Rice Krispies cereal, ensuring each piece is evenly coated with the peanut butter mixture without crushing the cereal.
- Shape the Balls: Use a heaping tablespoon to scoop portions of the mixture and roll them between your palms into firm balls. Arrange these on a parchment-lined baking sheet to prevent sticking. Place the tray in the freezer for around 15 to 20 minutes to allow the balls to firm up, making dipping easier later.
- Melt the Chocolate: While the rice krispie balls chill, melt the semi-sweet chocolate chips in a microwave-safe bowl. Heat in 30-second intervals, stirring well between each to avoid burning, until the chocolate is smooth and glossy. If desired, add the coconut oil or shortening for a silkier coating.
- Dip the Balls: Using a fork or skewer, dip each chilled rice krispie ball into the melted chocolate, ensuring an even coating. Gently tap off any excess chocolate for a clean finish. Place the coated balls back onto the parchment-lined tray.
- Set the Chocolate: Allow the chocolate coating to set at room temperature or accelerate the process by refrigerating the tray. Once set, transfer the balls into an airtight container and store in the refrigerator for up to one week for freshness.
Notes
- For added texture and visual appeal, roll balls in colorful sprinkles or crushed nuts before the chocolate coating sets.
- Drizzling with melted white chocolate prior to coating sets creates a decorative swirl effect.
- Use certified gluten-free cereal to make the recipe gluten-free.
- To prevent chocolate from cracking, avoid rapid temperature changes during setting.
