
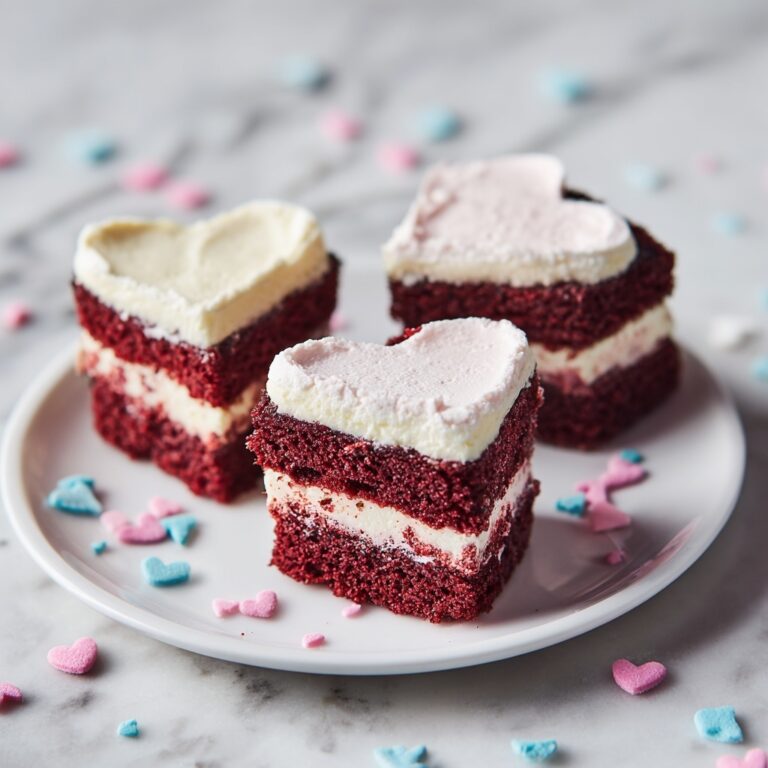
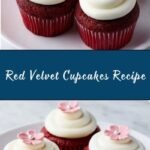
If you have a soft spot for rich, decadent treats that are as beautiful as they are delicious, this Red Velvet Cupcakes Recipe is just the ticket. Imagine perfectly moist, tender cupcakes boasting that iconic deep red hue, complemented by a subtle chocolate flavor and topped with creamy, tangy frosting that melts in your mouth. Whether it’s a special occasion or just a sweet craving, these cupcakes never fail to bring a smile and a touch of magic to any table.
Ingredients You’ll Need

Ingredients You’ll Need
Gathering the right ingredients is key to nailing this classic dessert. Each component plays a vital role—from the cake flour that ensures an airy texture to the red gel food coloring that gives these cupcakes their signature vibrant shade.
- 2 1/2 cups cake flour, sifted: This creates a tender crumb, making your cupcakes extra soft and delicate.
- 1 tsp salt: Enhances all the flavors and balances the sweetness beautifully.
- 2 tbsp cocoa powder: Adds just a whisper of chocolate flavor, the heart of any true red velvet.
- 1 1/2 cups sugar: Sweetens and helps create a moist texture.
- 1 1/2 cups vegetable oil: Keeps the cupcakes moist for days, unlike butter which can dry out faster.
- 2 large eggs: Bind everything together while contributing richness.
- 1 tsp vanilla extract: Adds warmth and depth to the flavor profile.
- 1 tsp red gel food coloring: The star that gives these cupcakes their striking color; adjust for desired intensity.
- 1 cup buttermilk: Provides tenderness and a slight tang that complements the sweetness.
- 2 tsp vinegar: Reacts with baking soda to create a light, fluffy texture and sharpens the flavor.
- 1 1/2 tsp baking soda: The leavening agent that helps the cupcakes rise perfectly.
How to Make Red Velvet Cupcakes Recipe
Step 1: Preheat Oven & Prepare Pan
Begin by heating your oven to 350°F (175°C) so it’s ready when your batter is done. Line a muffin tin with paper liners for 24 cupcakes to ensure easy removal and a beautiful presentation.
Step 2: Combine Dry Ingredients
Whisk together the sifted cake flour, cocoa powder, and salt in a medium bowl. This ensures the cocoa and salt are evenly dispersed, guaranteeing consistent flavor in each bite.
Step 3: Mix Sugar and Oil
In a large bowl, use an electric mixer to blend the sugar and vegetable oil until smooth. This mixture provides the base that keeps your cupcakes moist and irresistibly tender.
Step 4: Add Eggs
Beat in the eggs one at a time, mixing gently but thoroughly after each addition. This slow incorporation helps create a stable, fluffy batter ready to rise beautifully.
Step 5: Incorporate Flavor & Color
Add the vanilla extract and red gel food coloring to your wet mix. Mix slowly until the color is uniform and vibrant. If you want those spectacularly deep red cupcakes, feel free to add a bit more coloring at this stage.
Step 6: Alternate Dry & Wet Ingredients
Now for a crucial step for fluffy perfection: add the flour mixture and buttermilk alternately in three batches, starting and ending with the flour. This gentle folding technique prevents the batter from getting tough, ensuring soft cupcakes.
Step 7: Add Leavening Mixture
Combine vinegar and baking soda in a small bowl—watch the fizz! Quickly fold this into the batter. This reaction gives your cupcakes their famous light, airy crumb.
Step 8: Fill Cupcake Liners
Using an ice cream scoop or spoon, evenly distribute the batter among the 24 cupcake liners, filling about two-thirds full. This prevents overflow while giving the cupcakes room to rise beautifully.
Step 9: Bake
Bake for 18 minutes at 350°F, rotating the muffin tin halfway through for even cooking. A toothpick inserted in the center should come out clean when they’re done.
Step 10: Cool
Allow your cupcakes to cool in the tin for a few minutes before transferring them to a wire rack. Cooling completely is essential to prevent melting your frosting when you decorate.
Step 11: Frost and Decorate
Once fully cooled, generously frost each cupcake with your favorite cream cheese frosting. For an extra special touch, add fondant shapes, sprinkle red velvet crumbs, or keep it classic with a simple swirl.
How to Serve Red Velvet Cupcakes Recipe
Garnishes
Adding garnishes like delicate fondant hearts, edible glitter, or even a dusting of cocoa powder can elevate your Red Velvet Cupcakes Recipe from charming to absolutely show-stopping.
Side Dishes
Serve your cupcakes alongside fresh berries, a dollop of whipped cream, or a creamy cup of hot chocolate to complement their rich, velvety flavor perfectly.
Creative Ways to Present
Try stacking the cupcakes as a mini cake centerpiece or arrange them on a tiered dessert stand for a festive look. Wrapping each cupcake with a decorative ribbon around the liner can also add a lovely touch.
Make Ahead and Storage
Storing Leftovers
To keep your Red Velvet Cupcakes Recipe fresh, store them in an airtight container at room temperature for up to two days or refrigerate for up to five days. This preserves moisture without sacrificing their tender texture.
Freezing
You can freeze unfrosted cupcakes wrapped tightly in plastic wrap and placed in a freezer bag for up to three months. Thaw completely at room temperature before frosting to maintain that perfect crumb.
Reheating
If you prefer your cupcakes slightly warm, gently reheat them in the microwave for 10-15 seconds. Avoid overheating, especially if they’re frosted, to keep the texture and flavor just right.
FAQs
What makes red velvet cake red?
The classic red color in a Red Velvet Cupcakes Recipe comes from red food coloring, usually gel for richness. Originally, it was from a reaction between natural cocoa powder and acidic ingredients, but today’s vibrant red is mostly thanks to food dye.
Can I substitute buttermilk in this recipe?
Yes! If you don’t have buttermilk, mix 1 cup of milk with 1 tablespoon of white vinegar or lemon juice, let it sit for 5 minutes, then use as a perfect stand-in to keep your cupcakes tender and flavorful.
How long do these cupcakes last?
Properly stored, the cupcakes will stay fresh for about 2-3 days at room temperature or up to 5 days refrigerated. Beyond that, the texture may start to change.
Can I make this recipe gluten-free?
Absolutely! Use a gluten-free cake flour blend in place of regular cake flour. Be sure it includes xanthan gum for structure to keep your cupcakes light and fluffy.
What frosting pairs best with Red Velvet Cupcakes Recipe?
The traditional and most beloved pairing is cream cheese frosting—it adds a creamy tang that perfectly balances the cupcake’s sweetness and slight cocoa flavor.
Final Thoughts
Making these Red Velvet Cupcakes Recipe at home is such a rewarding experience, one that brings festive color and luscious flavor to any occasion. The process is straightforward, and the results are delightful—tender, flavorful cupcakes that look like they belong in a bakery display. So grab your mixing bowls and dive in, because these cupcakes are sure to become a treasured favorite in your baking repertoire!
Print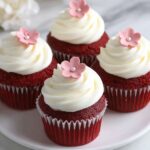
Red Velvet Cupcakes Recipe
- Prep Time: 15 minutes
- Cook Time: 18 minutes
- Total Time: 38 minutes
- Yield: 24 cupcakes
- Category: Dessert
- Method: Baking
- Cuisine: American
Description
This Red Velvet Cupcakes recipe delivers moist, tender cupcakes with a vibrant red color and classic cocoa flavor, topped with creamy cream cheese frosting. Perfect for celebrations or a delightful treat, these cupcakes are easy to make from scratch using simple ingredients and baking techniques.
Ingredients
Dry Ingredients
- 2 1/2 cups cake flour, sifted
- 1 tsp salt
- 2 tbsp cocoa powder
Wet Ingredients
- 1 1/2 cups sugar
- 1 1/2 cups vegetable oil
- 2 large eggs
- 1 tsp vanilla extract
- 1 tsp red gel food coloring (add more for deeper red color)
- 1 cup buttermilk
- 2 tsp vinegar
Leavening
- 1 1/2 tsp baking soda
Instructions
- Preheat Oven & Prepare Pan: Preheat your oven to 350°F (175°C) and line a standard muffin tin with 24 paper liners.
- Combine Dry Ingredients: In a medium bowl, whisk together sifted cake flour, cocoa powder, and salt until evenly combined. Set aside.
- Mix Sugar and Oil: In a large bowl, use an electric mixer to combine the sugar and vegetable oil until smoothly blended.
- Add Eggs: Add the eggs one at a time, mixing gently after each addition until just combined.
- Incorporate Flavor & Color: Add the vanilla extract and red gel food coloring to the wet mixture, mixing slowly until the color is evenly distributed. Add more coloring if a deeper red shade is desired.
- Alternate Dry & Wet Ingredients: Alternately add the flour mixture and buttermilk to the wet ingredients in three batches, starting and ending with the flour mixture. Mix well between each addition but avoid overmixing to keep cupcakes tender.
- Add Leavening Mixture: In a small bowl, stir together vinegar and baking soda (it will fizz) and immediately add this to the cupcake batter. Mix until just combined.
- Fill Cupcake Liners: Use an ice cream scoop or spoon to evenly divide the batter among the 24 muffin cups, filling each about two-thirds full.
- Bake: Bake for 18 minutes, rotating the muffin tin halfway through baking, until a toothpick inserted in the center comes out clean.
- Cool: Let cupcakes cool in the pan for a few minutes, then transfer to wire racks to cool completely before frosting.
- Frost and Decorate: Once fully cooled, frost generously with cream cheese frosting and decorate with fondant flowers, hearts, red velvet cake crumbs, or enjoy plain.
Notes
- Use cake flour for the lightest and most tender cupcakes.
- Adjust red food coloring to achieve your preferred shade of red.
- Filling cupcake liners about 2/3 full ensures proper rise without overflow.
- Rotate the pan halfway during baking for even cooking.
- Cool completely before frosting to prevent melting or sliding off the cupcakes.