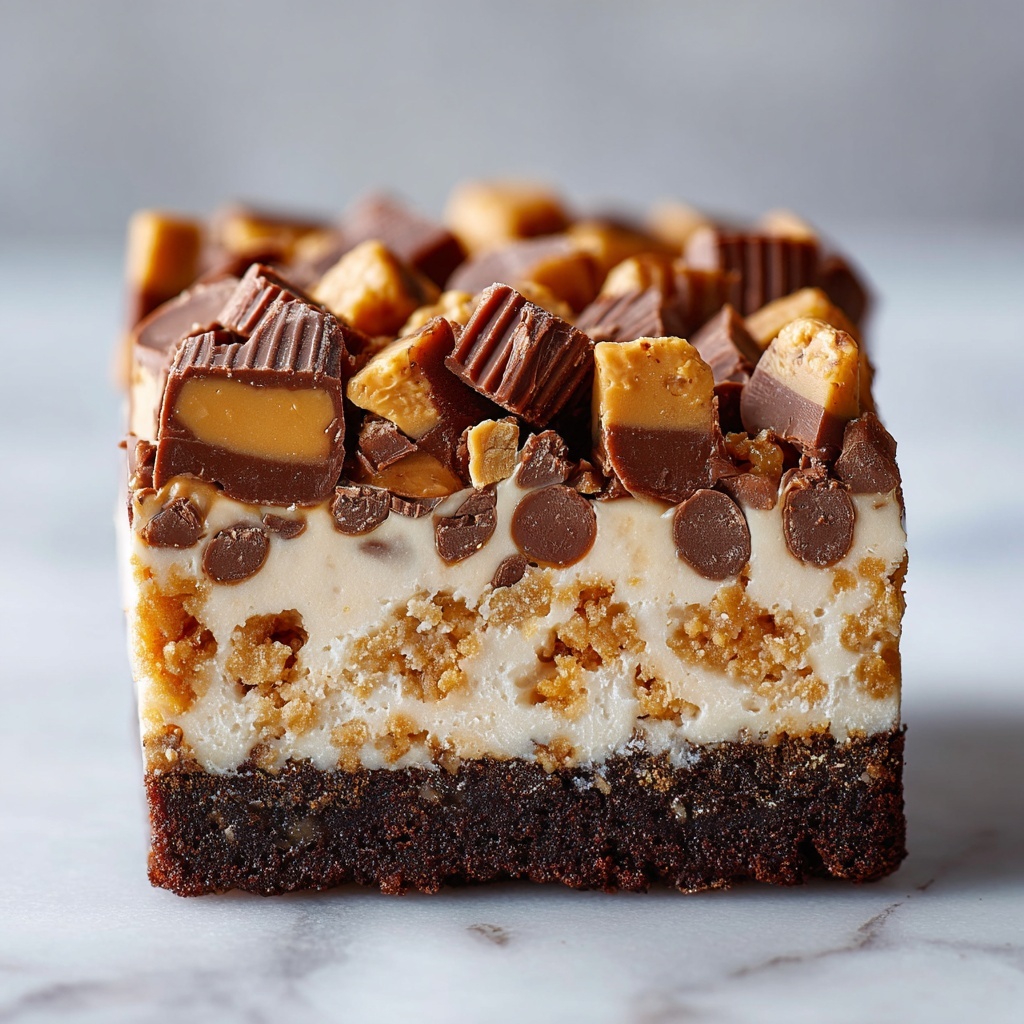
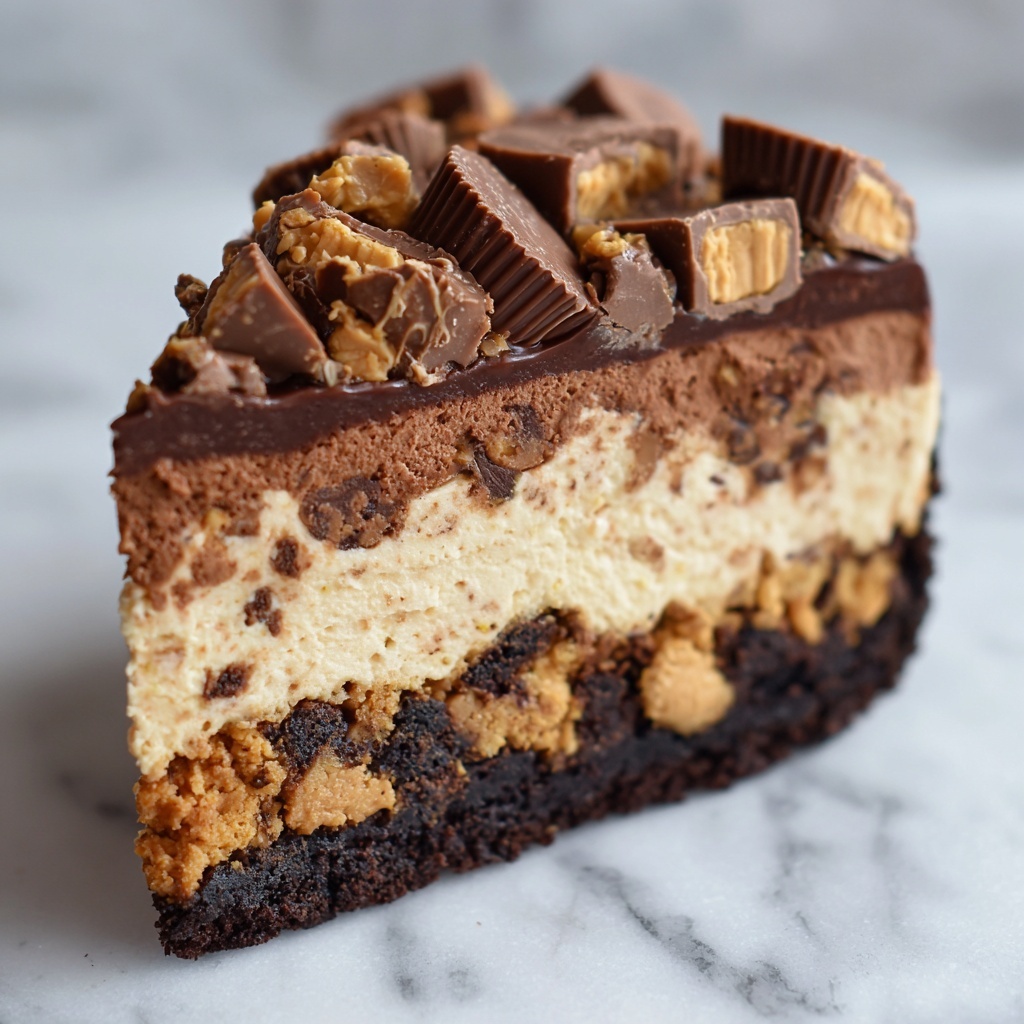
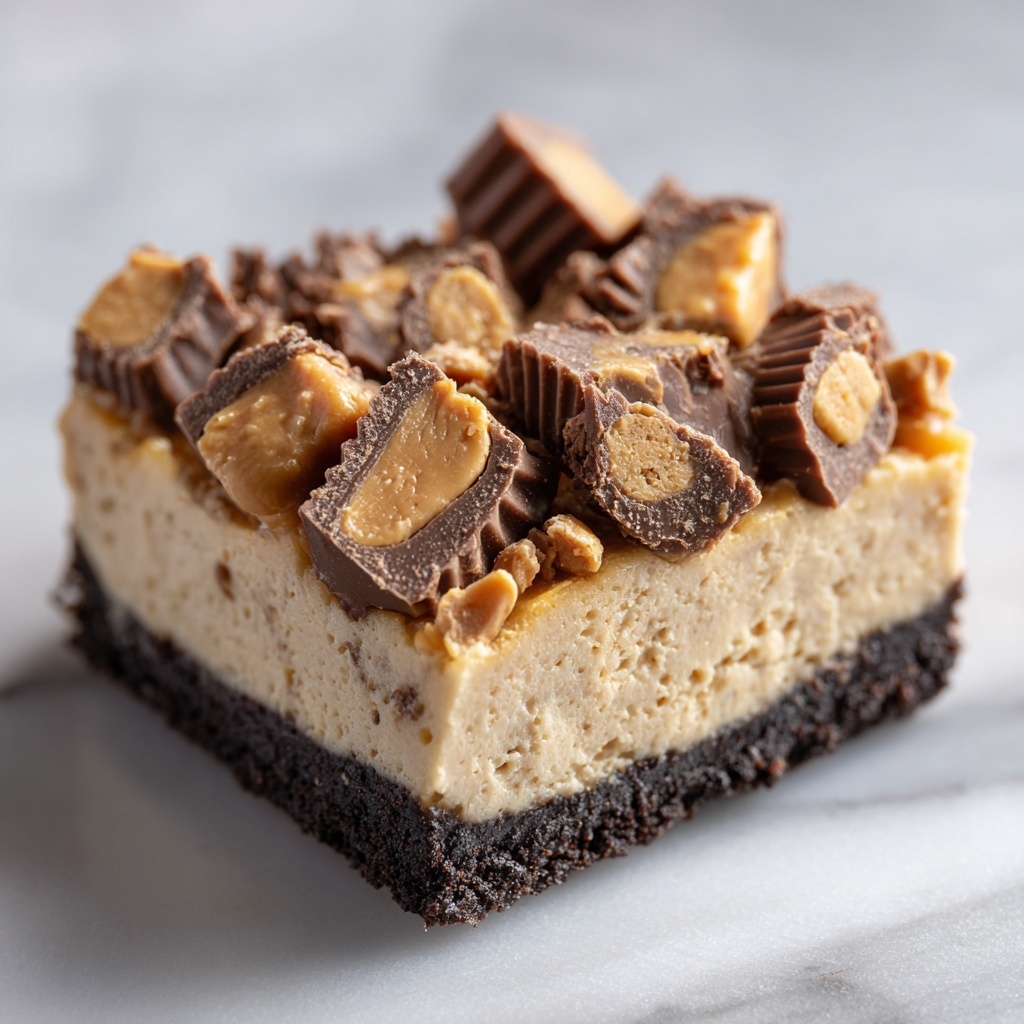
If you are craving a dessert that combines creamy texture, rich peanut butter flavor, and the irresistible crunch of candy bars, look no further than this Butterfinger Pie (No-Bake) Recipe. It’s the kind of dessert that feels like a warm hug in pie form, yet it requires zero baking, making it perfect for those warm days or when you just want to whip up something indulgent without turning on the oven. Cream cheese and peanut butter swirl together effortlessly with crushed Butterfinger bars, all enveloped in a buttery graham cracker crust that sets the stage for every delicious bite.
Ingredients You’ll Need
This Butterfinger Pie (No-Bake) Recipe calls for simple, straightforward ingredients that you probably have on hand but come together to create something truly extraordinary. Each one plays a key role in balancing creaminess, sweetness, and that signature crunch you expect from a dessert inspired by Butterfinger candy bars.
- Graham cracker crumbs (1 1/2 cups): The base of the pie crust, offering a lightly sweet and crunchy foundation.
- Granulated sugar (1/4 cup): Adds just the right amount of sweetness to the crust to complement the filling.
- Unsalted butter, melted (1/2 cup): Binds the crust ingredients while providing rich flavor and a perfect texture.
- Cream cheese, softened (8 oz): Creates a smooth, tangy body that balances the sweetness beautifully.
- Powdered sugar (1 cup): Sweetens the cream cheese filling for a silky finish.
- Whipped topping (1 cup): Lightens the filling, making it airy and fluffy—like a cloud of peanut butter goodness.
- Peanut butter (1 cup): The star ingredient, lending that rich, nutty flavor that pairs perfectly with Butterfinger pieces.
- Heavy cream (1 cup): Adds decadence and helps create a soft, creamy texture.
- Butterfinger bars, crushed (3 bars): Mixed into the filling and sprinkled on top for signature crunch and chocolatey peanut butter flavor.
How to Make Butterfinger Pie (No-Bake) Recipe
Step 1: Prepare the Crust
Start by combining graham cracker crumbs, granulated sugar, and melted butter in a medium bowl, mixing until every crumb is moistened and ready to hold its shape. Press this mixture firmly into the bottom of a 9-inch pie dish, creating an even layer that will be the crunchy base for the creamy filling. Pop it in the refrigerator to chill so it sets up nicely before adding the filling.
Step 2: Make the Filling
In a large mixing bowl, beat the softened cream cheese and powdered sugar together until the mixture is perfectly smooth and no lumps remain. Next, add the peanut butter and heavy cream, whisking until the filling becomes fluffy and well combined. The peanut butter’s richness is balanced perfectly by the creamy tang of the cream cheese and the heavy cream’s silkiness.
Step 3: Fold in Whipped Topping and Butterfinger Crumbs
Gently fold in the whipped topping with a spatula, lightening the texture and creating a soft, airy filling that melts in your mouth. Then, carefully stir in most of the crushed Butterfinger bars, reserving a handful to sprinkle on top for that irresistible final crunch.
Step 4: Assemble and Chill
Spread the luscious filling evenly over the chilled crust, smoothing the surface. Sprinkle the reserved Butterfinger crumbs on top to give every slice a delightful crunch. Refrigerate the pie for at least 3 to 4 hours, or overnight if you can wait that long—this allows the flavors to meld and the pie to set perfectly.
Step 5: Serve and Enjoy
When you’re ready, slice into the chilled pie and serve. Each bite offers a wonderful contrast of silky filling and crunchy candy, making this Butterfinger Pie (No-Bake) Recipe an absolute crowd-pleaser every time.
How to Serve Butterfinger Pie (No-Bake) Recipe
Garnishes
To elevate the presentation and add extra flavor, consider topping your Butterfinger Pie with a few whole or halved Butterfinger pieces, a drizzle of chocolate sauce, or a sprinkle of chopped roasted peanuts. Fresh whipped cream dollops add a touch of elegance and creamy texture that’s always welcome.
Side Dishes
This pie pairs beautifully with a simple cup of coffee or a glass of cold milk to balance out the sweet richness. For a lighter option, serve alongside fresh fruit like strawberries or raspberries, which add a pop of color and a tangy contrast to the nutty dessert.
Creative Ways to Present
For a more unique presentation, try serving Butterfinger Pie in individual clear cups or small mason jars, layering the filling with extra crushed candy between layers for visual effect. You could also top with mini peanut butter cups or even crushed pretzels for a salty-sweet twist that guests will love.
Make Ahead and Storage
Storing Leftovers
Once your Butterfinger Pie is made, keep it covered tightly with plastic wrap or in an airtight container and refrigerate. It will stay fresh and delicious for up to 3 days. This makes it a fantastic make-ahead dessert for parties or family dinners.
Freezing
You can freeze the pie for longer storage by wrapping it securely with plastic wrap and then aluminum foil to prevent freezer burn. Freeze for up to 1 month. When ready to enjoy, thaw it in the refrigerator overnight to maintain the smooth, creamy texture without any ice crystals.
Reheating
Since this is a no-bake chilled dessert, reheating is not recommended. The best way to serve it is cold straight from the fridge or after thawing if frozen. This preserves the pie’s creamy texture and the crunch of the Butterfinger pieces.
FAQs
Can I use crunchy peanut butter instead of smooth?
Absolutely! Using crunchy peanut butter will add an extra layer of texture to the filling, making your Butterfinger Pie even more delightfully nutty and fun to eat.
Is there a way to make this pie gluten-free?
Yes. Simply substitute the graham cracker crumbs with your favorite gluten-free cracker crumbs or gluten-free graham crackers to keep the crust delicious and safe for gluten-sensitive friends.
How long does it take for the pie to set properly?
For the best results, refrigerate the pie for at least 3 to 4 hours. Overnight chilling is even better, allowing all the flavors to meld and the filling to fully firm up.
Can I substitute the whipped topping with homemade whipped cream?
You can! Whipping fresh heavy cream with a bit of sugar until soft peaks form will give you a fresh, creamy alternative that’s just as delicious and a little less processed.
What is the best way to crush Butterfinger bars?
Place the bars in a sealed plastic bag and gently crush them with a rolling pin or the bottom of a sturdy glass mug. This method allows you to control the size of the pieces and avoids making a mess.
Final Thoughts
There is something truly magical about this Butterfinger Pie (No-Bake) Recipe that makes dessert time special without the fuss of baking. It’s creamy, crunchy, and so easy to pull together, making it a fantastic choice for any occasion. I can’t wait for you to try it and discover your own moments of sweet delight with every bite!
Print
Butterfinger Pie (No-Bake) Recipe
- Prep Time: 20 minutes
- Cook Time: 0 minutes
- Total Time: 3 hours 20 minutes (including chilling time)
- Yield: 8 servings
- Category: Dessert
- Method: No-Cook
- Cuisine: American
Description
Butterfinger Pie is a creamy, no-bake dessert featuring a crunchy graham cracker crust filled with a fluffy peanut butter and cream cheese mixture studded with crushed Butterfinger candy bars. This easy-to-make pie is chilled until set and topped with extra Butterfinger pieces for added texture, making it a perfect indulgent treat for any occasion.
Ingredients
For the Crust
- 1 1/2 cups graham cracker crumbs
- 1/4 cup granulated sugar
- 1/2 cup unsalted butter, melted
For the Filling
- 1 package (8 oz) cream cheese, softened
- 1 cup powdered sugar
- 1 cup whipped topping (like Cool Whip)
- 1 cup peanut butter
- 1 cup heavy cream
- 3 Butterfinger bars, crushed (reserve some for topping)
Instructions
- Prepare the Crust: In a medium bowl, mix together graham cracker crumbs, granulated sugar, and melted butter until evenly combined to form a crumbly mixture.
- Form the Crust: Press the graham cracker mixture firmly into the bottom of a 9-inch pie dish to create an even crust layer. Refrigerate the crust to allow it to set and harden.
- Make the Filling: In a large bowl, beat softened cream cheese and powdered sugar using an electric mixer until the mixture is smooth and creamy.
- Add Peanut Butter and Cream: Add the peanut butter and heavy cream to the cream cheese mixture and continue beating until the filling is fluffy and fully blended.
- Incorporate Whipped Topping and Candy: Gently fold in the whipped topping to maintain the light texture, then stir in the crushed Butterfinger bars, saving some candy pieces to sprinkle on top later.
- Assemble the Pie: Spread the prepared filling evenly over the chilled graham cracker crust in the pie dish.
- Top with Butterfinger Pieces: Sprinkle the reserved crushed Butterfinger candy bars on top of the pie for a crunchy garnish.
- Chill to Set: Place the assembled pie in the refrigerator and chill for at least 3 to 4 hours or overnight to allow it to fully set and firm up.
- Serve: Once set, slice the pie and serve chilled for a delightful, creamy, and crunchy dessert experience.
Notes
- Ensure the cream cheese is softened to room temperature for easy mixing and a smooth filling.
- Use real peanut butter for best flavor; creamy works best for a smooth texture.
- Chilling overnight enhances the pie’s texture and flavor melding.
- Store leftover pie covered in the refrigerator for up to 3 days.
- You can substitute Butterfinger bars with similar crunchy peanut butter candy bars if desired.


