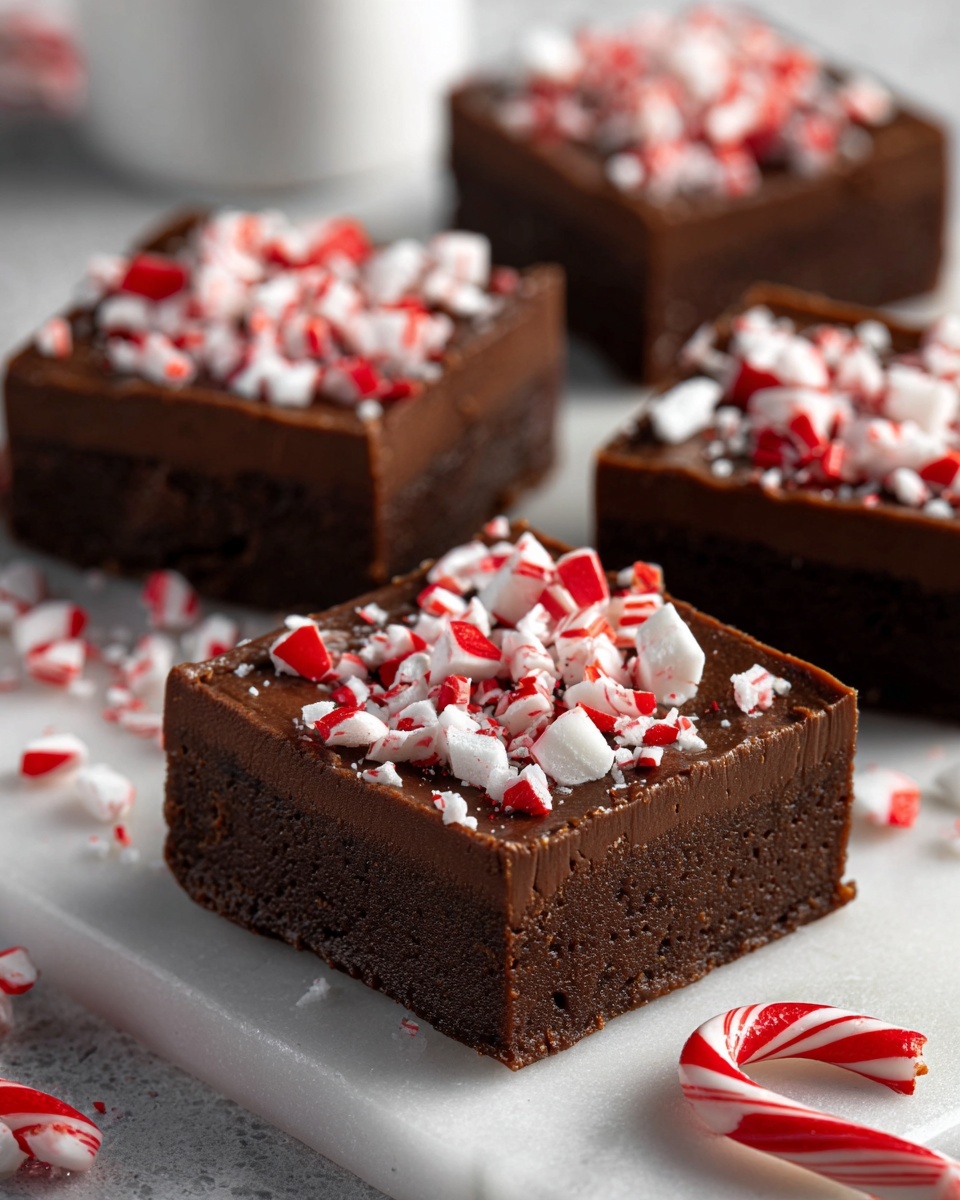
If you have a sweet tooth and love rich, melt-in-your-mouth treats, then this Chocolate Candy Fudge Recipe is about to become one of your all-time favorites. It’s a no-bake delight that brings together creamy chocolate, velvety condensed milk, and bursts of your favorite candies for a perfect blend of texture and flavor. Whether you’re whipping this up for a holiday celebration, a gift for a friend, or just a simple indulgence, each bite offers that nostalgic, comforting fudge experience with an exciting candy twist. Plus, it’s wonderfully easy to make and looks just as good as it tastes.
Ingredients You’ll Need
Getting started on this Chocolate Candy Fudge Recipe means gathering just a handful of simple and quality ingredients. Each one plays a crucial role in creating the smooth texture, rich flavor, and colorful crunch that makes this fudge so special.
- 3 cups semi-sweet chocolate chips: These provide the deep chocolate base that’s creamy and perfectly sweet.
- 1 can (14 oz) sweetened condensed milk: Adds luscious sweetness and helps achieve that smooth, fudge-like consistency.
- ¼ cup unsalted butter: Enhances richness and gives the fudge a silky texture.
- 1 teaspoon vanilla extract: A dash of warmth and depth that balances the chocolate perfectly.
- 1 cup chopped candy (M&M’s, peanut butter cups, Snickers, or favorites): Adds exciting bursts of flavor, color, and texture with every bite.
- ¼ teaspoon salt: Just enough salt to enhance the overall sweetness and highlight the chocolate notes.
How to Make Chocolate Candy Fudge Recipe
Step 1: Prepare Your Pan
Before any cooking begins, line an 8×8-inch baking dish with parchment paper. This will make lifting the fudge out a breeze once it’s set, and ensure your heavenly creation doesn’t stick to the pan.
Step 2: Melt the Base Ingredients
On low heat, combine the chocolate chips, sweetened condensed milk, butter, and salt in a medium saucepan. Stir continuously to prevent burning and to help everything melt into a smooth, glossy mixture. Patience here results in that perfect velvety fudge texture.
Step 3: Add Flavor and Candy
Once your chocolate mixture is smooth and lump-free, remove the pan from heat and stir in the vanilla extract—this little addition brings out all the flavors beautifully. Then, gently fold in most of the chopped candy, reserving a small handful to sprinkle on top for a playful and colorful finish.
Step 4: Set the Fudge
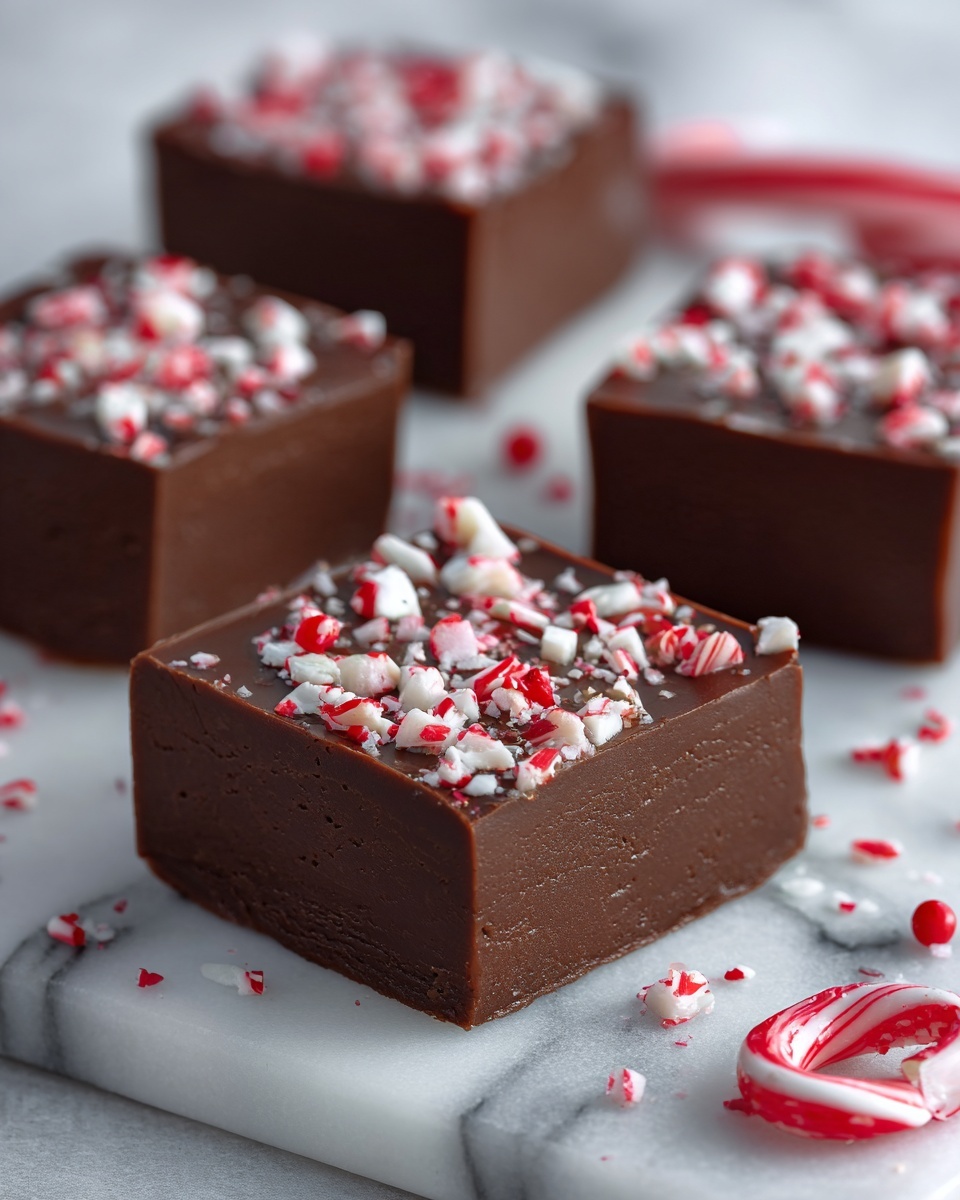
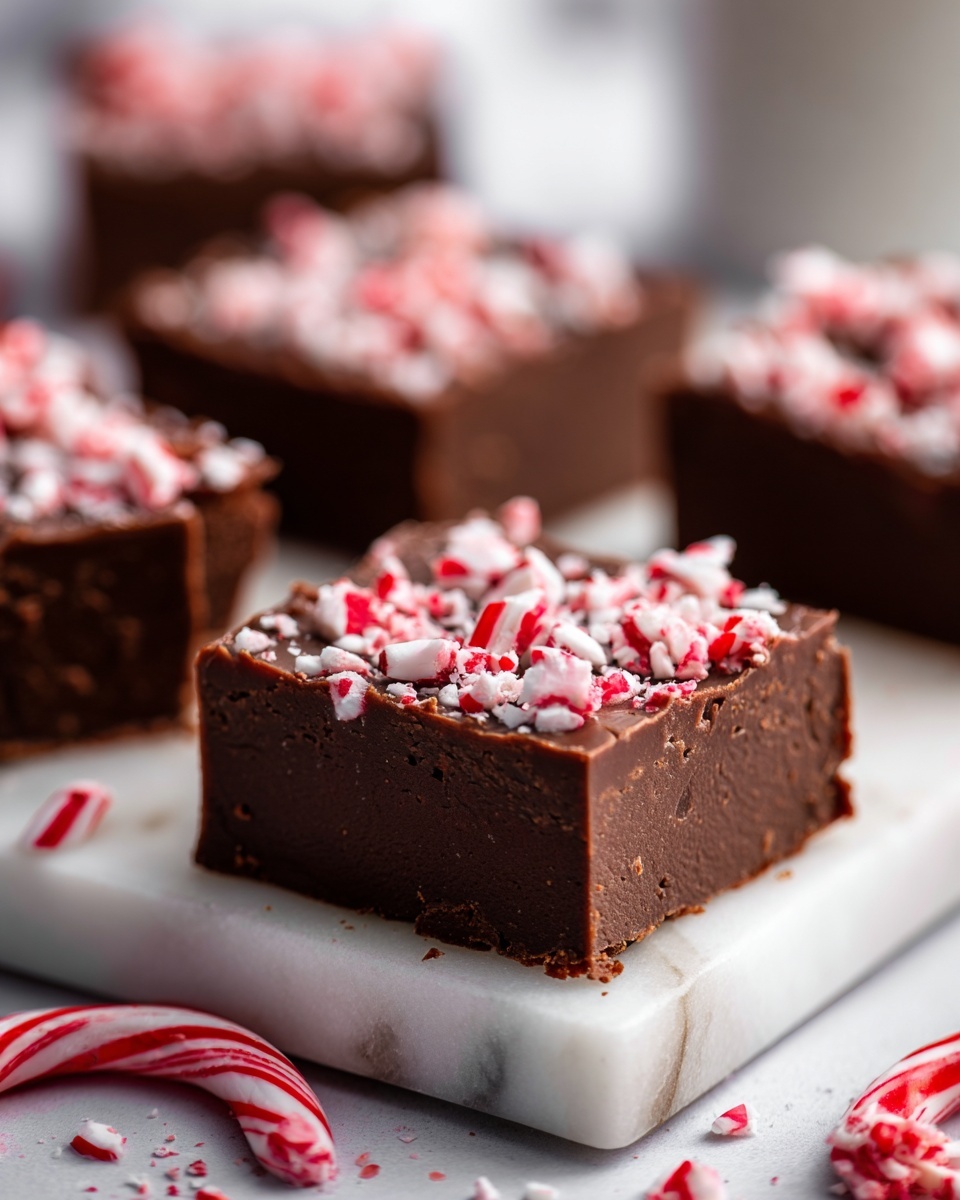
Pour the fudge mixture evenly into the prepared pan and smooth the surface with a spatula. Sprinkle the remaining candies over the top and press them in lightly so they stick but remain visible. Pop the pan into the refrigerator for at least two hours to allow the fudge to firm up.
Step 5: Cut and Enjoy
Once your fudge is completely set, lift it out of the pan using the parchment paper edges. Cut into approximately 25 small squares, and get ready to enjoy the creamy, dazzling pieces that are sure to become a favorite sweet treat.
How to Serve Chocolate Candy Fudge Recipe
Garnishes
To add a little flair when serving, consider dusting the fudge squares with a light sprinkle of cocoa powder, crushed nuts, or even some colorful candy sprinkles. These small touches elevate the presentation and add extra bursts of flavor and texture.
Side Dishes
This fudge pairs wonderfully with fresh berries or a scoop of vanilla ice cream to balance its rich sweetness. For a cozy gathering, serve it alongside a cup of hot coffee, tea, or even a glass of cold milk for classic comfort.
Creative Ways to Present
Presentation can be just as fun as the fudge itself. Arrange the squares on a festive platter with candy canes during the holidays, or wrap individual pieces in wax paper tied with colorful ribbons for delightful homemade gifts that friends and family will absolutely love.
Make Ahead and Storage
Storing Leftovers
Any leftover fudge should be stored in an airtight container in the refrigerator to maintain its fresh, creamy texture. It stays delicious for up to one week and remains ready whenever a sweet craving strikes.
Freezing
The fudge freezes beautifully if you want to keep it longer. Wrap it tightly in plastic wrap and place it in a freezer-safe container. When you’re ready, thaw it overnight in the refrigerator before serving for the best texture.
Reheating
This fudge is best enjoyed cold or at room temperature, so reheating isn’t necessary. Just allow frozen or chilled fudge to sit out for 10–15 minutes before cutting to soften slightly.
FAQs
Can I use milk chocolate or dark chocolate instead of semi-sweet?
Absolutely! You can swap semi-sweet chips for milk chocolate if you prefer a sweeter fudge or dark chocolate for a deeper, more intense cocoa flavor. Just keep in mind it may affect sweetness and texture slightly.
What if I don’t have parchment paper?
You can lightly grease the baking dish with butter or non-stick spray as an alternative, but parchment paper makes removing fudge much easier and cleaner.
Can I substitute the candy with nuts or dried fruit?
Definitely! Chopped nuts like walnuts or pecans or dried cranberries or cherries add lovely texture and flavor. Feel free to customize the recipe to your taste.
Is this recipe gluten-free?
Yes, as long as the candies you add are gluten-free, this fudge remains safe for a gluten-free diet. Always check labels to be sure.
How long does it take for the fudge to set?
It generally takes at least two hours in the refrigerator for the fudge to firm up properly. For a firmer texture, you can chill it longer, even overnight.
Final Thoughts
This Chocolate Candy Fudge Recipe is truly a joy to make and share. Its creamy richness combined with the playful crunch of candy makes it an irresistible treat that brightens any occasion. Whether you’re a fudge veteran or a first-time maker, this simple, no-bake recipe is a delicious way to indulge and impress. Give it a try—you may just find your new go-to dessert that feels like a warm, sweet hug in every bite!
Print
Chocolate Candy Fudge Recipe
- Prep Time: 10 minutes
- Cook Time: 10 minutes
- Total Time: 2 hours 20 minutes
- Yield: 25 small squares
- Category: Dessert
- Method: No-Cook
- Cuisine: American
- Diet: Vegetarian
Description
This chocolate candy fudge is a rich, creamy, and indulgent treat made with just a few simple ingredients. Perfect for holidays, gifts, or a quick sweet fix, it melts in your mouth and can be customized with your favorite candies or nuts. This no-bake fudge sets up beautifully in the fridge, making it an easy and delicious dessert option.
Ingredients
Fudge Base
- 3 cups semi-sweet chocolate chips
- 1 can (14 oz) sweetened condensed milk
- ¼ cup unsalted butter
- ¼ teaspoon salt
Flavorings and Mix-ins
- 1 teaspoon vanilla extract
- 1 cup chopped candy (such as M&M’s, peanut butter cups, Snickers, or your favorites)
Instructions
- Prepare the baking dish: Line an 8×8-inch baking dish with parchment paper to ensure easy removal of the fudge once it sets.
- Melt the fudge ingredients: In a medium saucepan over low heat, combine the semi-sweet chocolate chips, sweetened condensed milk, unsalted butter, and salt. Stir constantly to prevent burning until the chocolate has fully melted and the mixture is smooth and glossy.
- Add vanilla and candies: Remove the saucepan from heat and stir in the vanilla extract. Fold in most of the chopped candy, reserving a small handful to sprinkle on top later.
- Pour and set: Pour the smooth fudge mixture into the prepared baking dish and use a spatula to smooth the surface evenly. Sprinkle the remaining chopped candy over the top and gently press it into the fudge for decoration and extra texture.
- Chill the fudge: Place the dish in the refrigerator and chill for at least 2 hours or until the fudge is firm and set completely.
- Serve: Once set, lift the fudge out of the pan by the parchment paper, cut into approximately 25 small squares, and serve chilled for the best texture and flavor.
Notes
- Use high-quality chocolate chips for the best flavor and texture in your fudge.
- Store the fudge in an airtight container in the refrigerator for up to one week to maintain freshness.
- You can customize this fudge by substituting chopped candies with chopped nuts, mini marshmallows, or dried fruit based on your preference.
- If desired, add a pinch of sea salt on top before chilling for a sweet and salty contrast.


