
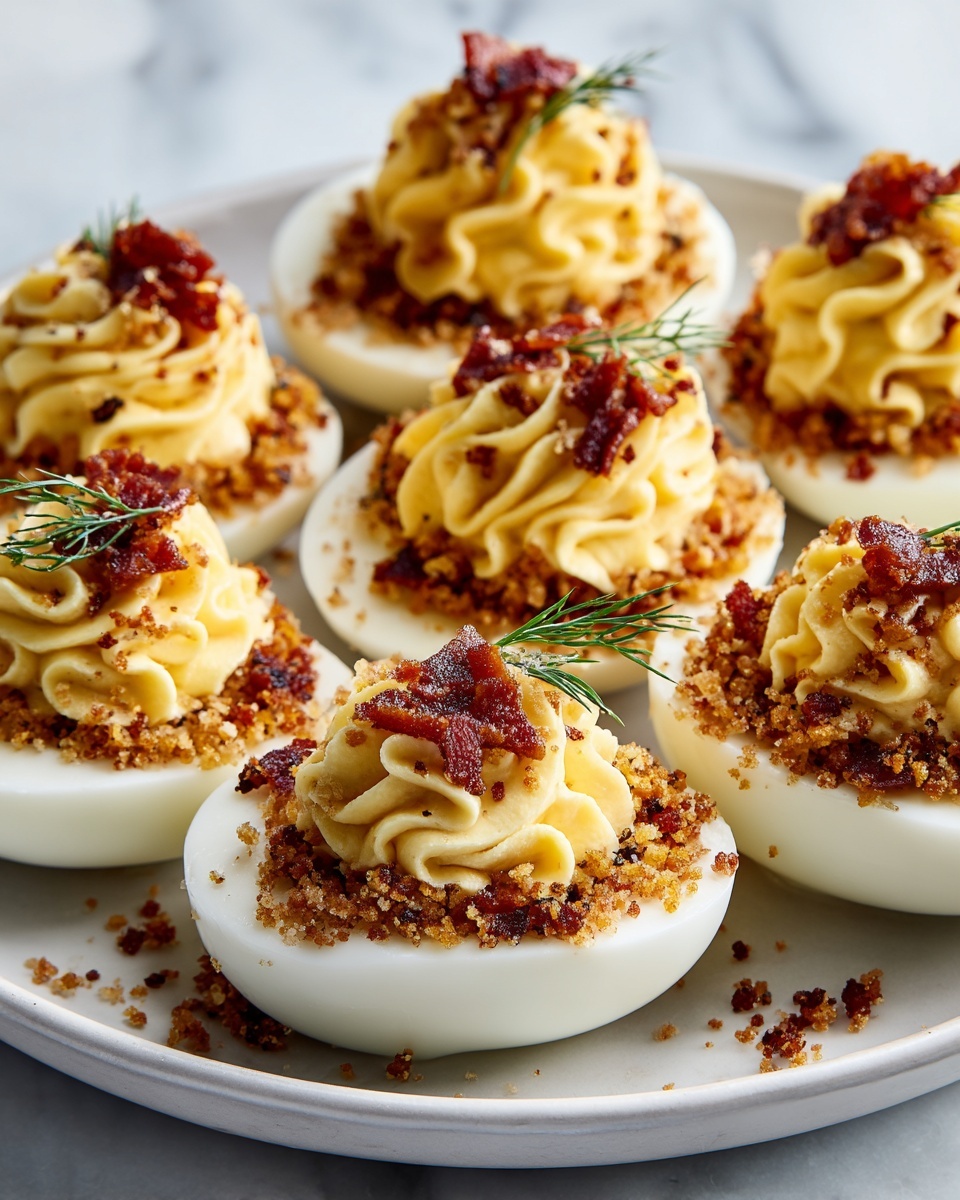
If you love the classic charm of deviled eggs but are craving a fresh, tangy twist that surprises and delights, then this Pickle-Brined Deviled Eggs Recipe is your new best friend in the kitchen. Soaking the egg whites in dill pickle juice before filling them with a creamy, zesty yolk mixture adds a deliciously briny depth that’s unlike any deviled egg you’ve tasted before. Whether you’re bringing these to a party, picnic, or just craving a snack packed with flavor and a bit of extra zing, this recipe transforms a humble appetizer into a memorable bite that everyone will be asking for more of.

Ingredients You’ll Need
Gathering the right ingredients for this Pickle-Brined Deviled Eggs Recipe is straightforward, and each one plays a vital role in creating that perfect balance of creamy, tangy, and slightly spiced flavor. From the simple eggs to the magic of dill pickle juice and crunchy pickle bits, every item adds its own texture, taste, or color punch.
- 6 large eggs: The perfect base for your deviled eggs, cooked to creamy perfection.
- ½ cup dill pickle juice: The secret brining agent that infuses the whites with a lively tang.
- ¼ cup mayonnaise: Adds richness and smooth texture to the yolk filling.
- 1 teaspoon Dijon mustard: Brings a subtle heat and depth to the creamy mixture.
- 1 tablespoon finely chopped dill pickles: Adds crunch and bursts of flavor inside the filling.
- ½ teaspoon garlic powder: Enhances the savory notes without overpowering the other flavors.
- ¼ teaspoon salt: Balances and brightens the overall taste.
- ⅛ teaspoon black pepper: Adds a gentle spice that complements the tangy brine.
- Paprika and chopped fresh dill for garnish (optional): Provides a beautiful color contrast and fresh herbal aroma.
How to Make Pickle-Brined Deviled Eggs Recipe
Step 1: Boil and Peel the Eggs
Start by placing your eggs in a saucepan and covering them with cold water. Bring the water to a boil over medium-high heat, then immediately remove the pan from heat and cover it. Let the eggs sit in the hot water for 10 to 12 minutes—this gentle cooking method ensures creamy yolks without any green rings. Next, transfer the eggs to an ice bath to cool completely, which makes peeling them a breeze.
Step 2: Brine the Egg Whites
Once peeled, carefully cut each egg in half lengthwise. Scoop out the yolks and set them in a bowl. Place the egg white halves in a shallow dish and pour the dill pickle juice over them. Refrigerate for 15 to 20 minutes. This brining step is where the magic happens, infusing the whites with a savory, tangy flavor that is the heart of this Pickle-Brined Deviled Eggs Recipe.
Step 3: Prepare the Yolk Filling
While the egg whites soak, mash the yolks with the mayonnaise, Dijon mustard, chopped pickles, garlic powder, salt, and black pepper. Stir until the mixture is smooth and creamy, with little bursts of pickle crunch to keep the texture interesting. Adjust seasoning to your preference and get ready for the filling fun.
Step 4: Fill and Garnish
Remove the egg whites from the pickle juice and gently pat them dry to avoid dilution of the filling. Spoon or pipe the yolk mixture into each egg white half, mounding it just right. If you’re feeling fancy (and who wouldn’t want to be), sprinkle freshly chopped dill and paprika on top for that inviting pop of color and aromatic flair.
How to Serve Pickle-Brined Deviled Eggs Recipe
Garnishes
Enhancing this Pickle-Brined Deviled Eggs Recipe with simple garnishes takes the presentation and flavor to the next level. A dusting of smoked paprika not only adds warmth and vibrant color but also a subtle smoky note that pairs perfectly with the pickle tang. Fresh chopped dill brings a burst of herbal brightness and complements the pickle juice beautifully. For an extra splash of texture and taste, add a small slice of pickle or a tiny sprig of fresh herbs on top.
Side Dishes
Pickle-Brined Deviled Eggs make a delightful appetizer alongside fresh vegetable sticks like crisp cucumbers, carrots, and celery that echo their refreshing character. Pair with a crisp green salad or a tangy coleslaw to keep the meal light and balanced. For a picnic or party platter, consider adding crusty bread, sharp cheeses, and charcuterie to complement the creamy and briny flavors.
Creative Ways to Present
Think beyond the traditional platter—try serving these deviled eggs on a bed of microgreens or edible flowers for a stunning brunch centerpiece. You can pipe the yolk filling using a star tip to create a decorative swirl that looks almost too good to eat. Another fun idea is to prepare mini deviled egg “boats” by slightly hollowing the whites deeper to hold even more filling, making each bite extra indulgent.
Make Ahead and Storage
Storing Leftovers
This Pickle-Brined Deviled Eggs Recipe holds up wonderfully in the fridge. Store any leftovers in an airtight container, covered tightly with plastic wrap or a lid, to keep them fresh and flavorful for up to two days. Keep the eggs chilled to maintain their texture and tangy zip.
Freezing
Because of the creamy mayonnaise-based filling and delicate texture, freezing deviled eggs is not recommended. The filling tends to separate, and the egg whites can become rubbery after thawing, so it’s best to enjoy them fresh or within a couple of days after making.
Reheating
Deviled eggs are best enjoyed cold or at room temperature straight from the fridge. If you prefer, you can take them out 15 minutes before serving to remove the chill and allow the flavors to bloom, but avoid reheating to preserve their perfect texture and freshness.
FAQs
Can I use other types of pickle juice for this recipe?
Absolutely! While dill pickle juice is classic for this Pickle-Brined Deviled Eggs Recipe, you can experiment with bread-and-butter pickle juice for a sweeter twist or spicy pickle juice to add a bit of heat. Each will bring a unique flavor profile to your eggs.
How long should I brine the egg whites in pickle juice?
About 15 to 20 minutes in the refrigerator is perfect for the egg whites to absorb that delightful tang without getting too salty or overpowering. Any longer might make the whites overly salty or soft.
Can I prepare this recipe ahead of time?
Yes! You can make the entire Pickle-Brined Deviled Eggs Recipe up to one day in advance and keep it covered in the fridge. This actually helps the flavors meld together beautifully, making each bite even tastier.
Is this recipe gluten-free and vegetarian?
Definitely yes! This Pickle-Brined Deviled Eggs Recipe includes no gluten-containing ingredients and is vegetarian-friendly, making it a great snack option for a variety of dietary preferences.
What can I do if I don’t have fresh dill for garnish?
If fresh dill isn’t on hand, dried dill works in a pinch, or you can skip it altogether and rely on the paprika for color and flavor. Chopped chives or parsley also make lovely alternatives that complement the flavors nicely.
Final Thoughts
If you’re searching for a classic party appetizer that stands out with surprising and delightful flavors, you simply must try this Pickle-Brined Deviled Eggs Recipe. It’s easy to make, packed with personality, and sure to become a staple that your family and friends will eagerly ask for again and again. Trust me, once you taste that perfect balance of creamy, tangy, and savory, you’ll wonder how you ever enjoyed deviled eggs any other way!
Print
Pickle-Brined Deviled Eggs Recipe
- Prep Time: 10 minutes
- Cook Time: 12 minutes
- Total Time: 30 minutes
- Yield: 12 deviled egg halves
- Category: Appetizer
- Method: Boiling
- Cuisine: American
- Diet: Gluten Free, Vegetarian
Description
These Pickle-Brined Deviled Eggs are a tangy twist on a classic appetizer. Hard-boiled eggs are soaked briefly in dill pickle juice before being filled with a creamy, flavorful yolk mixture enhanced with mayonnaise, Dijon mustard, and chopped dill pickles. Garnished with paprika and fresh dill, they make the perfect bite-sized party treat with a delightful briny kick.
Ingredients
Eggs and Brine
- 6 large eggs
- ½ cup dill pickle juice
Filling
- ¼ cup mayonnaise
- 1 teaspoon Dijon mustard
- 1 tablespoon finely chopped dill pickles
- ½ teaspoon garlic powder
- ¼ teaspoon salt
- ⅛ teaspoon black pepper
Garnish (optional)
- Paprika
- Chopped fresh dill
Instructions
- Boil the Eggs: Place the eggs in a saucepan and cover them with cold water. Bring the water to a boil over medium-high heat. Once boiling, remove the pan from heat, cover it, and let the eggs sit for 10 to 12 minutes to fully cook the yolks.
- Cool and Peel: Transfer the eggs to an ice bath to cool completely, which makes peeling easier. Gently peel the eggs once cooled.
- Slice and Brine: Cut the peeled eggs in half lengthwise. Carefully scoop out the yolks into a separate bowl. Arrange the egg white halves in a shallow dish and pour the dill pickle juice over them. Refrigerate for 15–20 minutes to infuse a briny flavor.
- Prepare the Filling: Mash the cooked yolks with mayonnaise, Dijon mustard, chopped dill pickles, garlic powder, salt, and black pepper until the mixture is smooth and creamy.
- Assemble the Deviled Eggs: Remove the egg whites from the pickle juice and pat them dry. Fill each half with the yolk mixture using a spoon or a piping bag for a neater presentation.
- Garnish and Serve: Sprinkle paprika and chopped fresh dill on top of the filled eggs for added color and flavor, if desired. Serve chilled.
Notes
- For extra flavor, use spicy pickles to add a kick or bread-and-butter pickles for a sweet-savory contrast.
- Deviled eggs can be made up to a day ahead; store covered in the refrigerator to maintain freshness.


